Easy Upcycled Valentine’s Day Sweater

My new Valentine’s Day sweater made from thrifted/upcycled sweaters!

It recently dawned on me that if I can have a festive Christmas sweater, why can’t I have an equally festive Valentine’s Day sweater? I love my Lands’ End red and white Fair Isle Christmas sweater and have been wearing it since I purchased it in college. (I’m fully aware that it’s corny. I love what I love and can’t help it!) Because I’ve been dabbling in making my own clothes and repurposing/upcycling clothes, I set out to create my own design with thrifted sweaters.

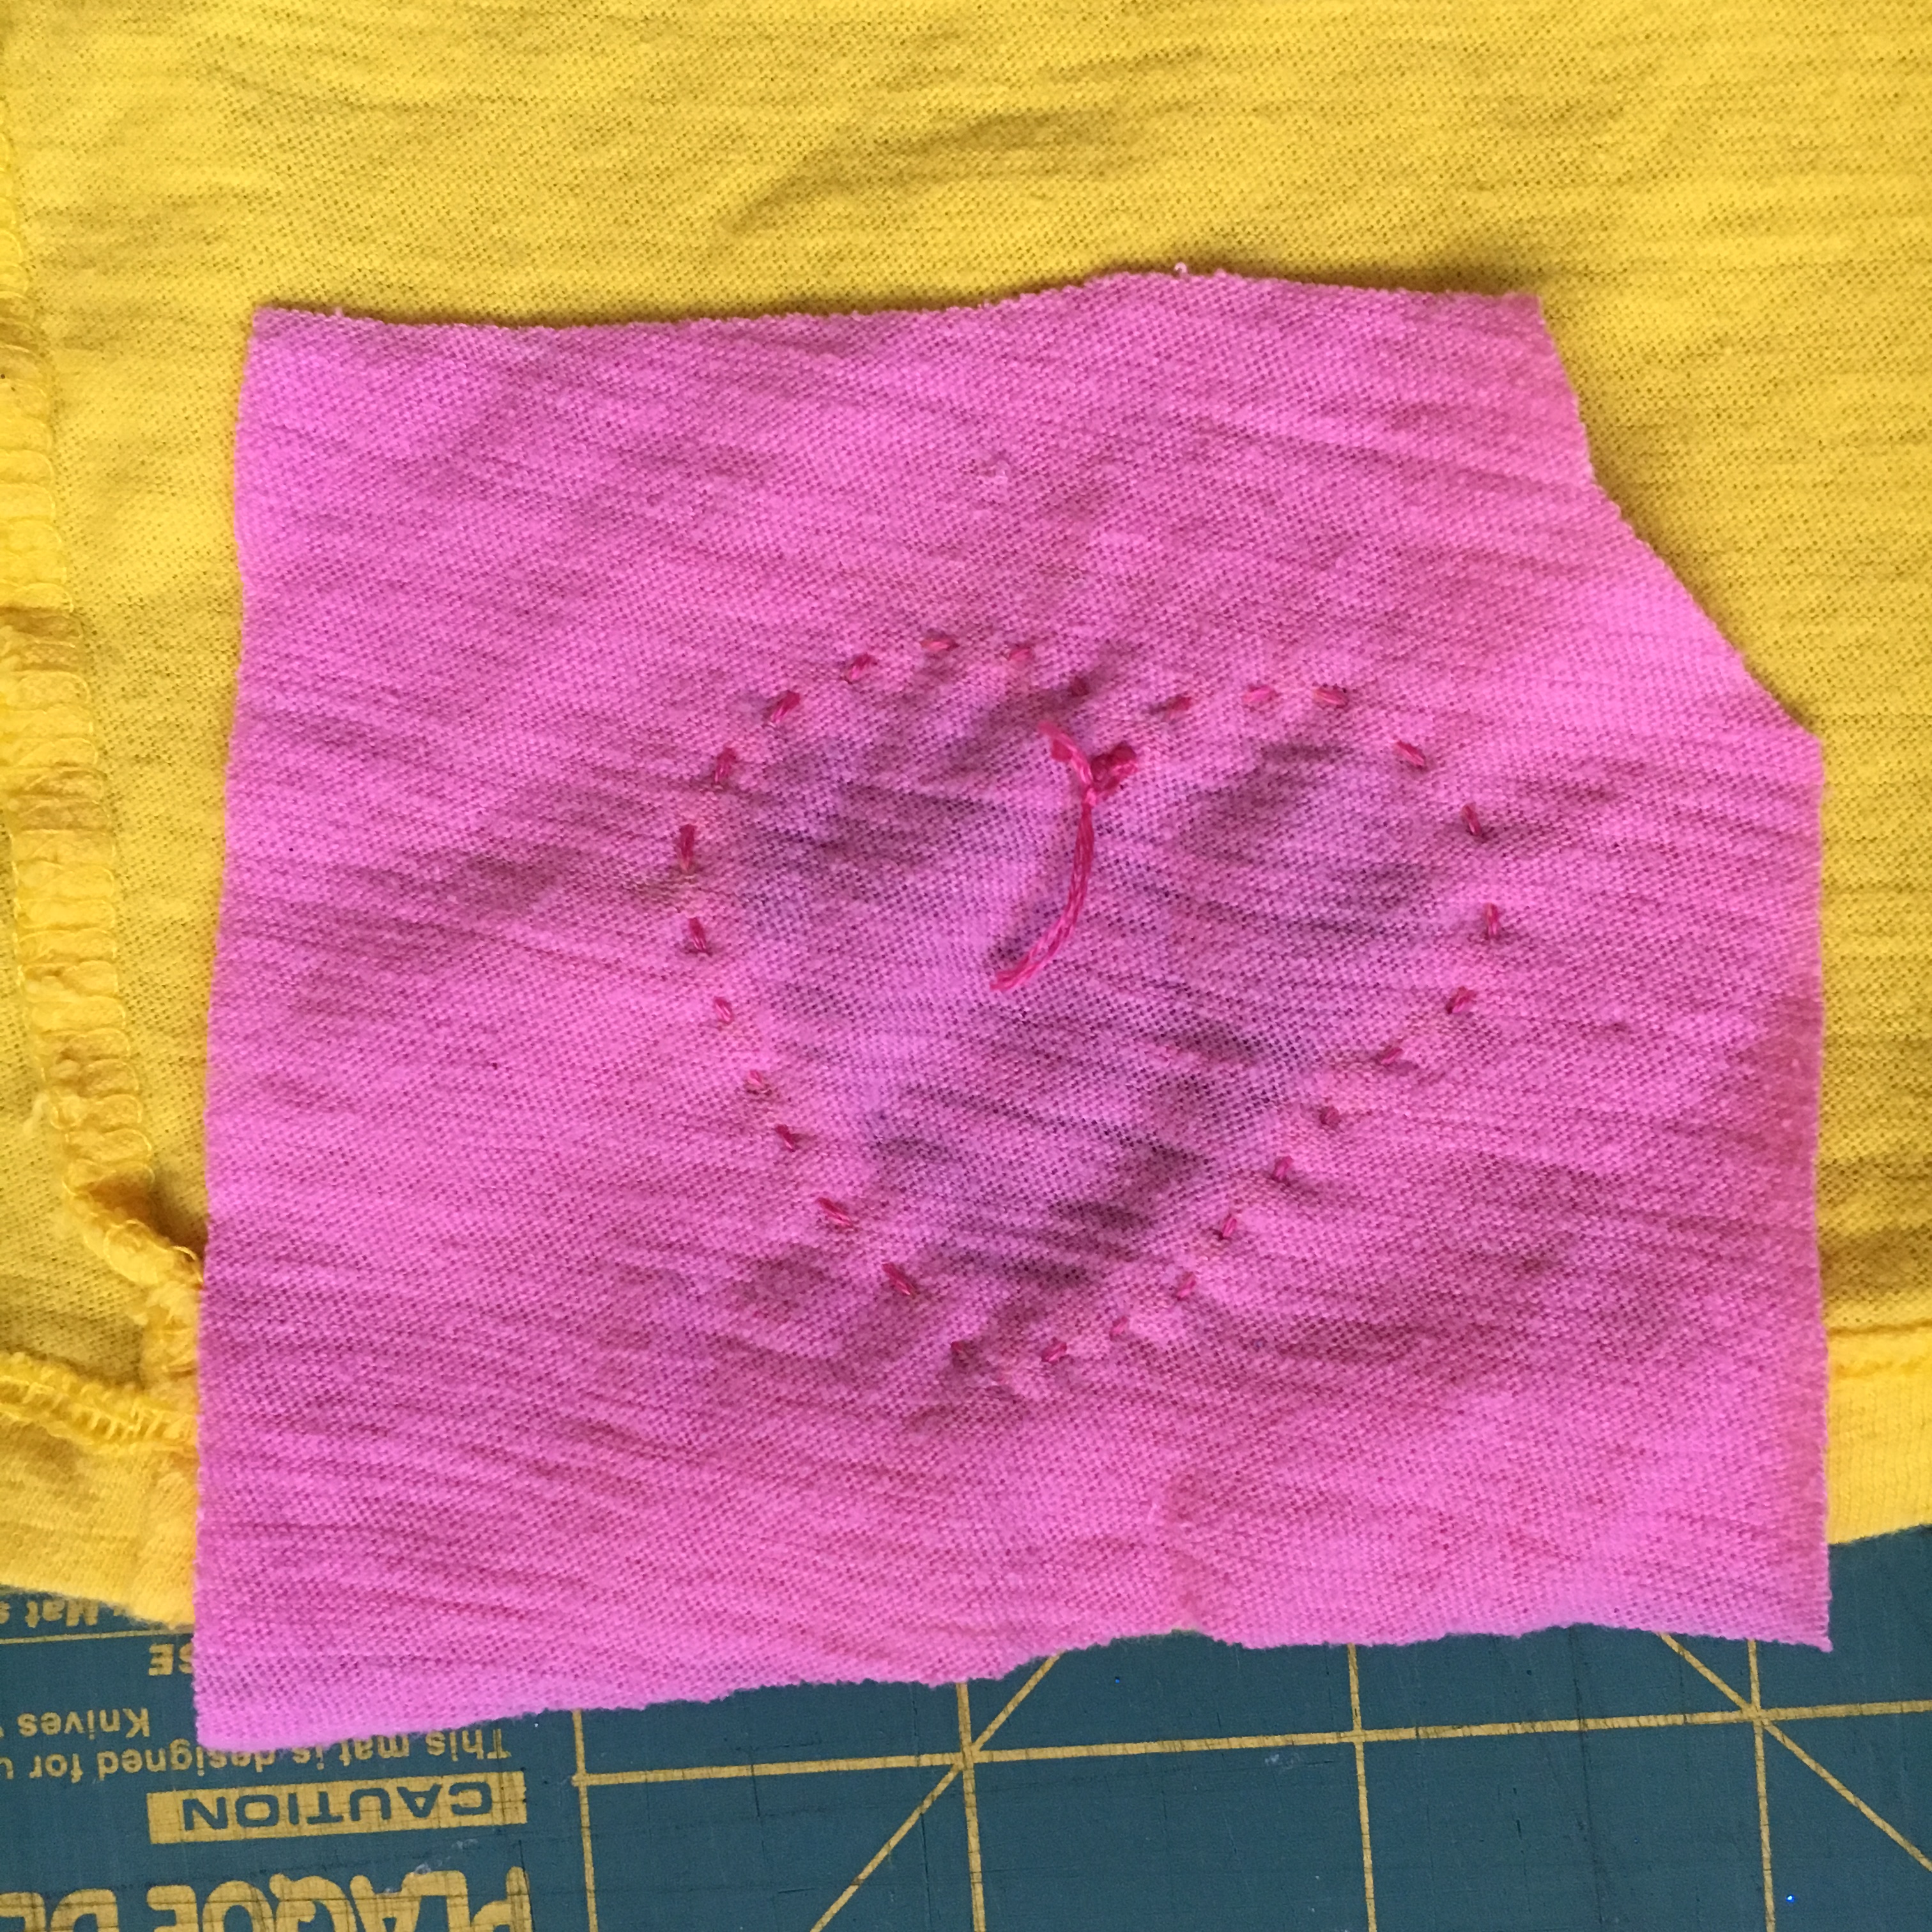
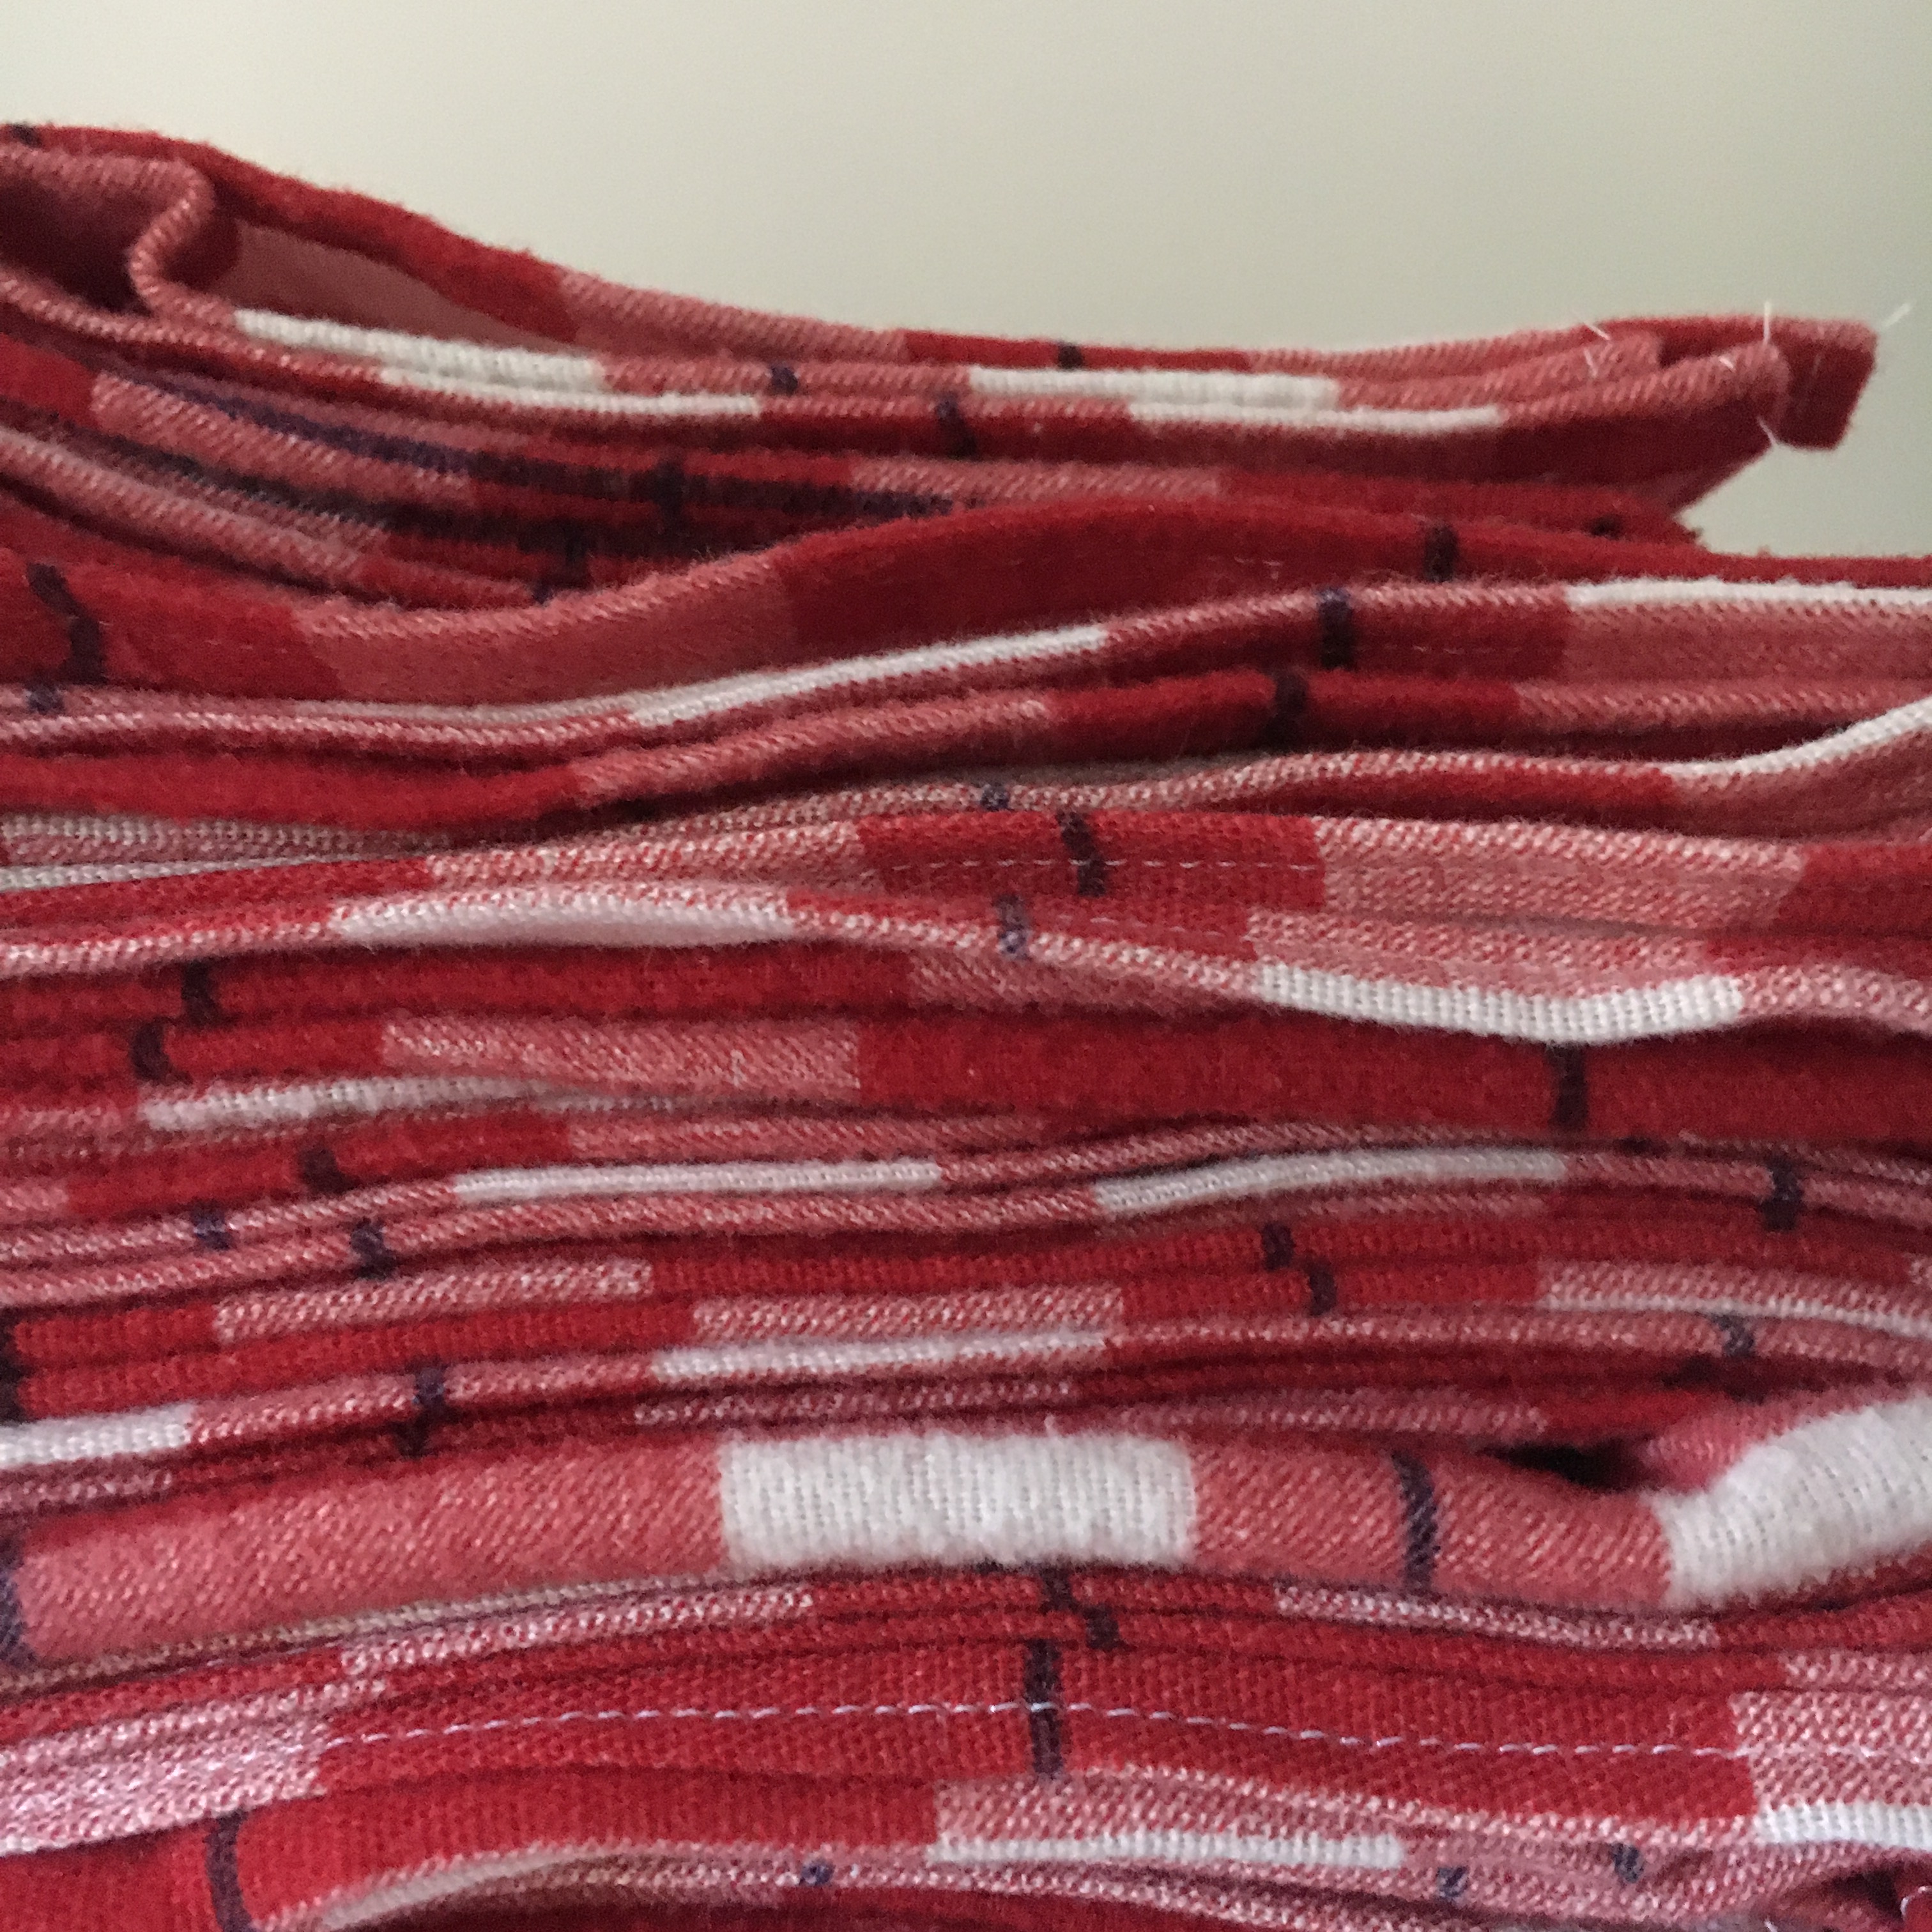
My quest started at the thrift store and my stash of material. First, I found a sweater at the thrift store. I specifically was looking for sweater in a neutral color, made from natural fibers. I scored a dark gray, 100% cotton sweater—perfect! Then, I hit my stash for material for a heart appliqué. For my daughter’s first birthday, I made her stuffed chicken toys from a pinkish-orange, cable-knit thrifted sweater. I knew I had scraps leftover, and dug them out.

I traced a heart onto a sheet of computer paper. (I could have gotten fancy with tissue paper, but the shape was so simple, a plain sheet of paper worked fine.) I trimmed around the heart leaving a little bit of paper around the edges. I did this because I wanted to make the cut of the heart from the sweater scrap itself.

I used paper from my printer to trace a heart shape, trimmed it, and pinned it to the sweater scrap to cut out the appliqué.

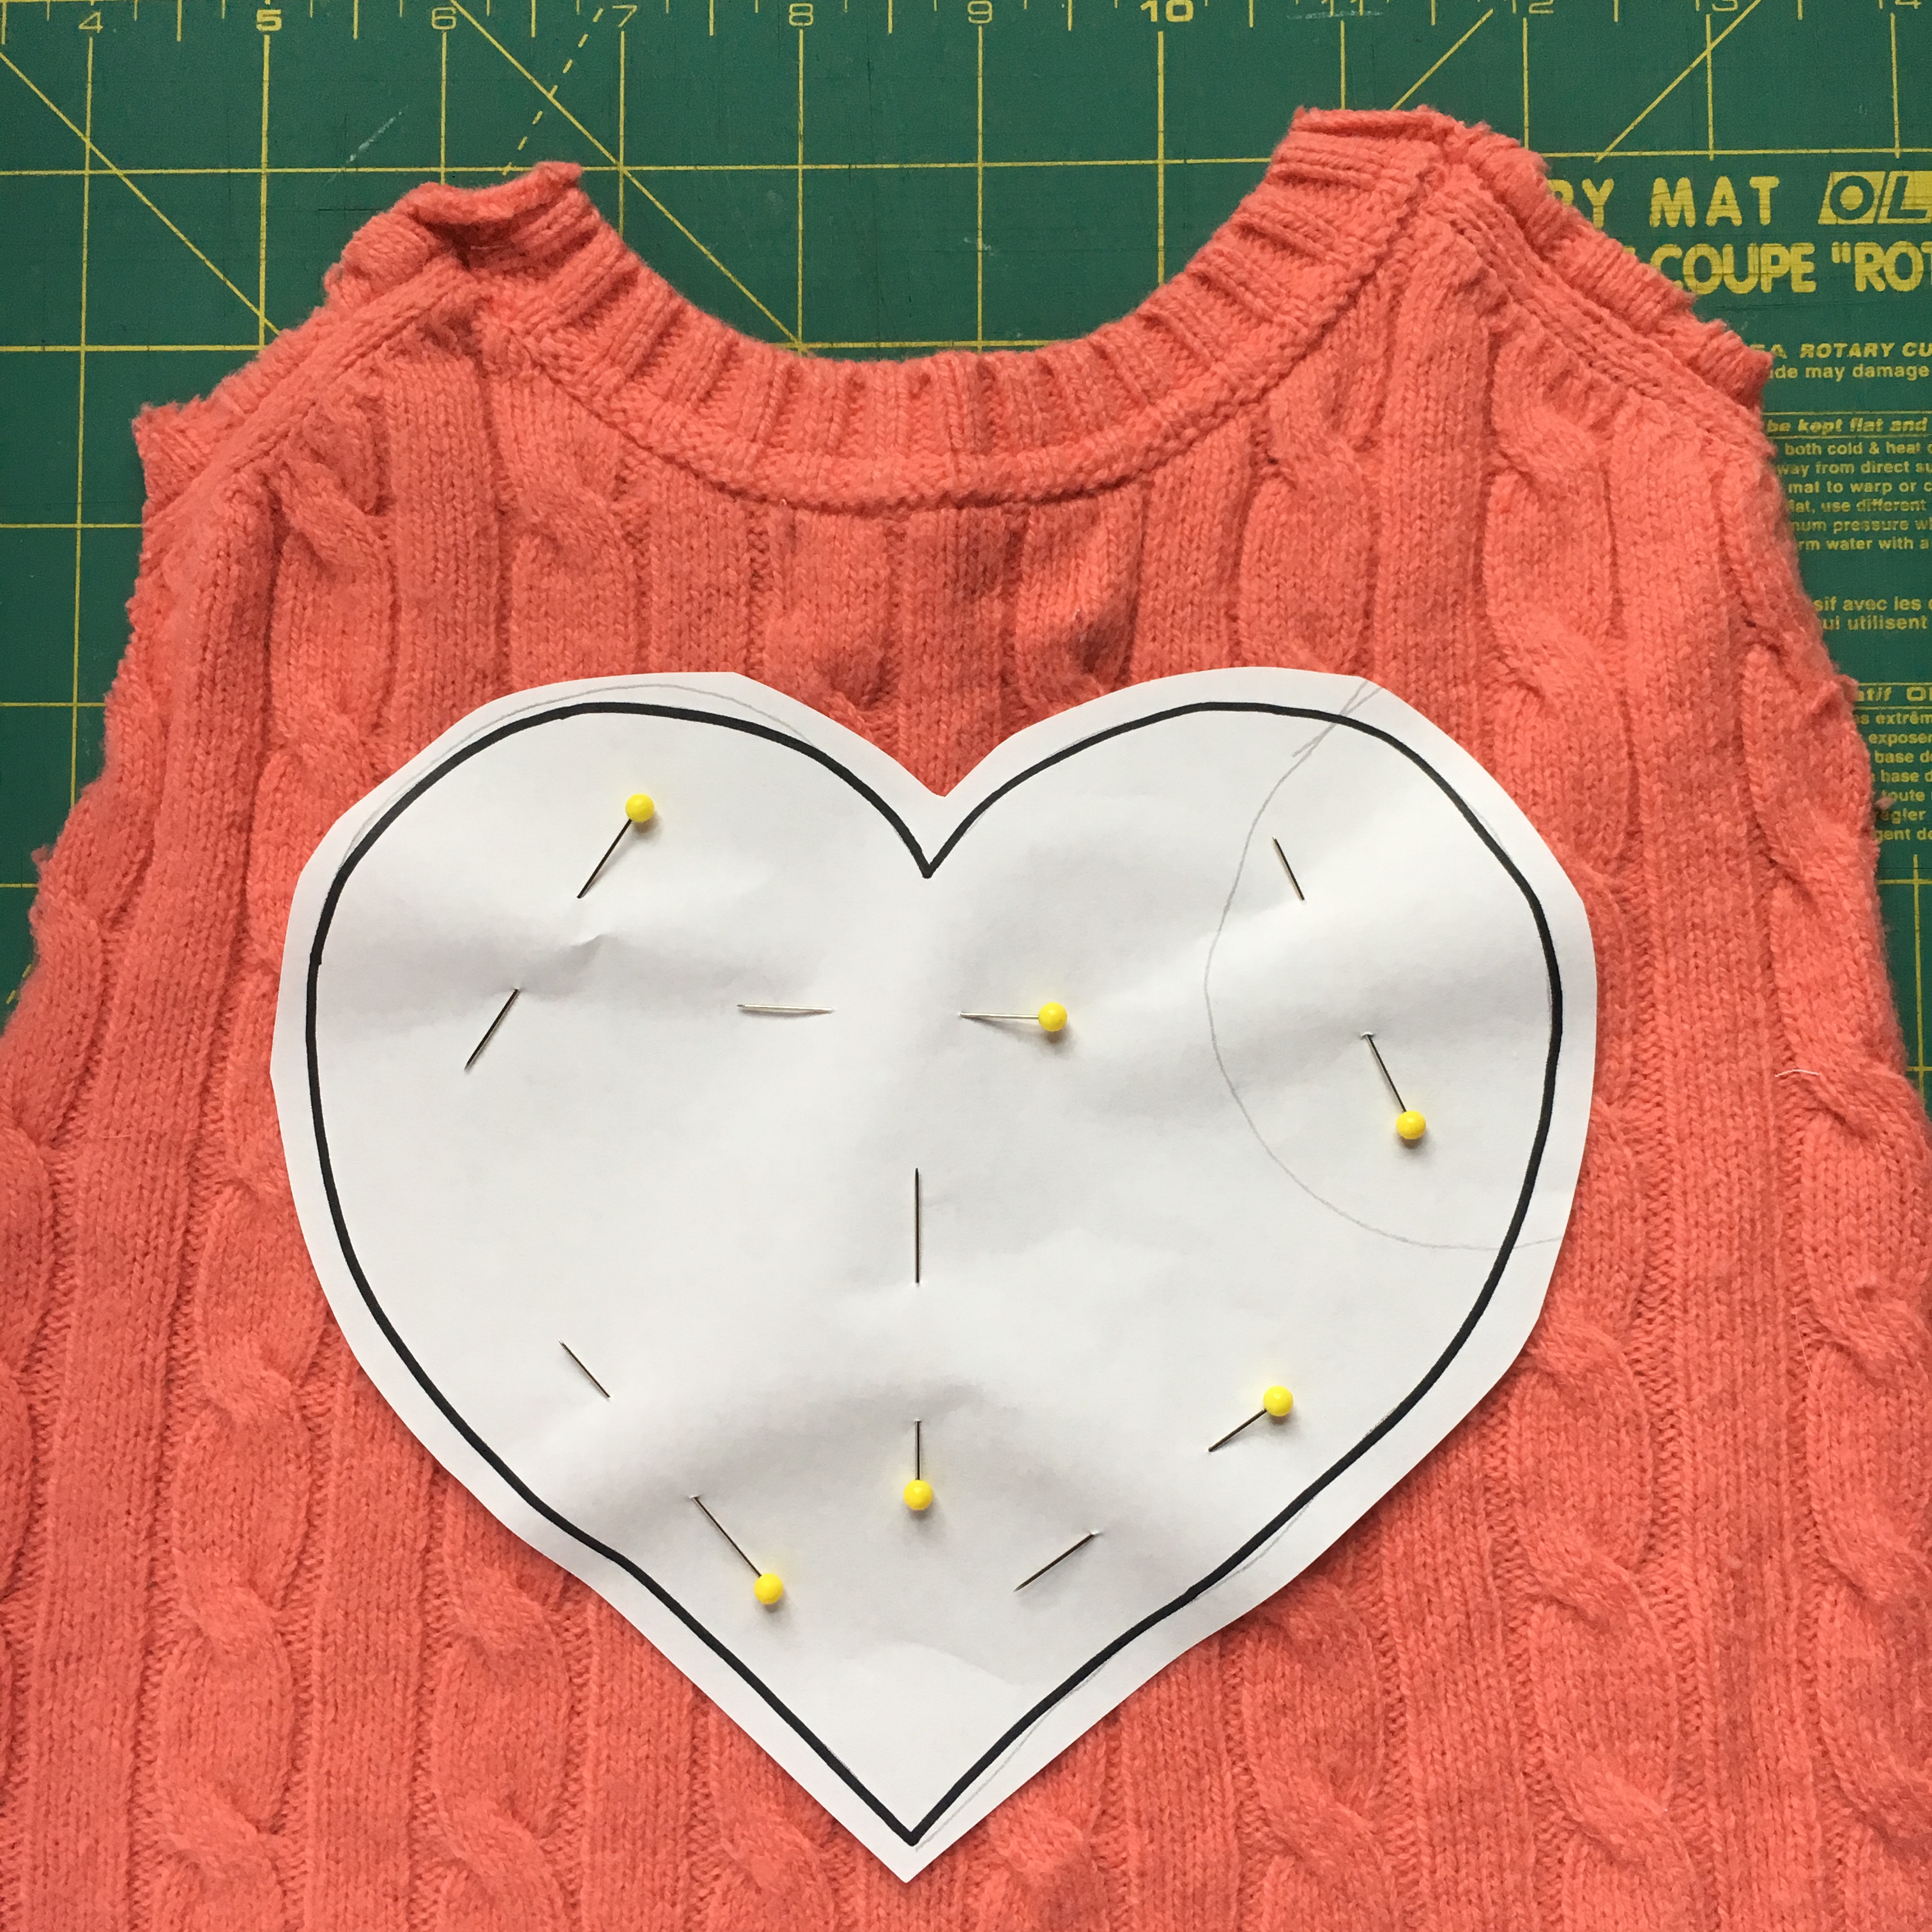
I was careful to line the pattern on the sweater scrap so that the cable knit pattern was somewhat symmetrical. After the pattern was pinned on, I carefully cut the heart out.

I used a ruler (and a lot of fussing) to place the heart on the gray sweater.

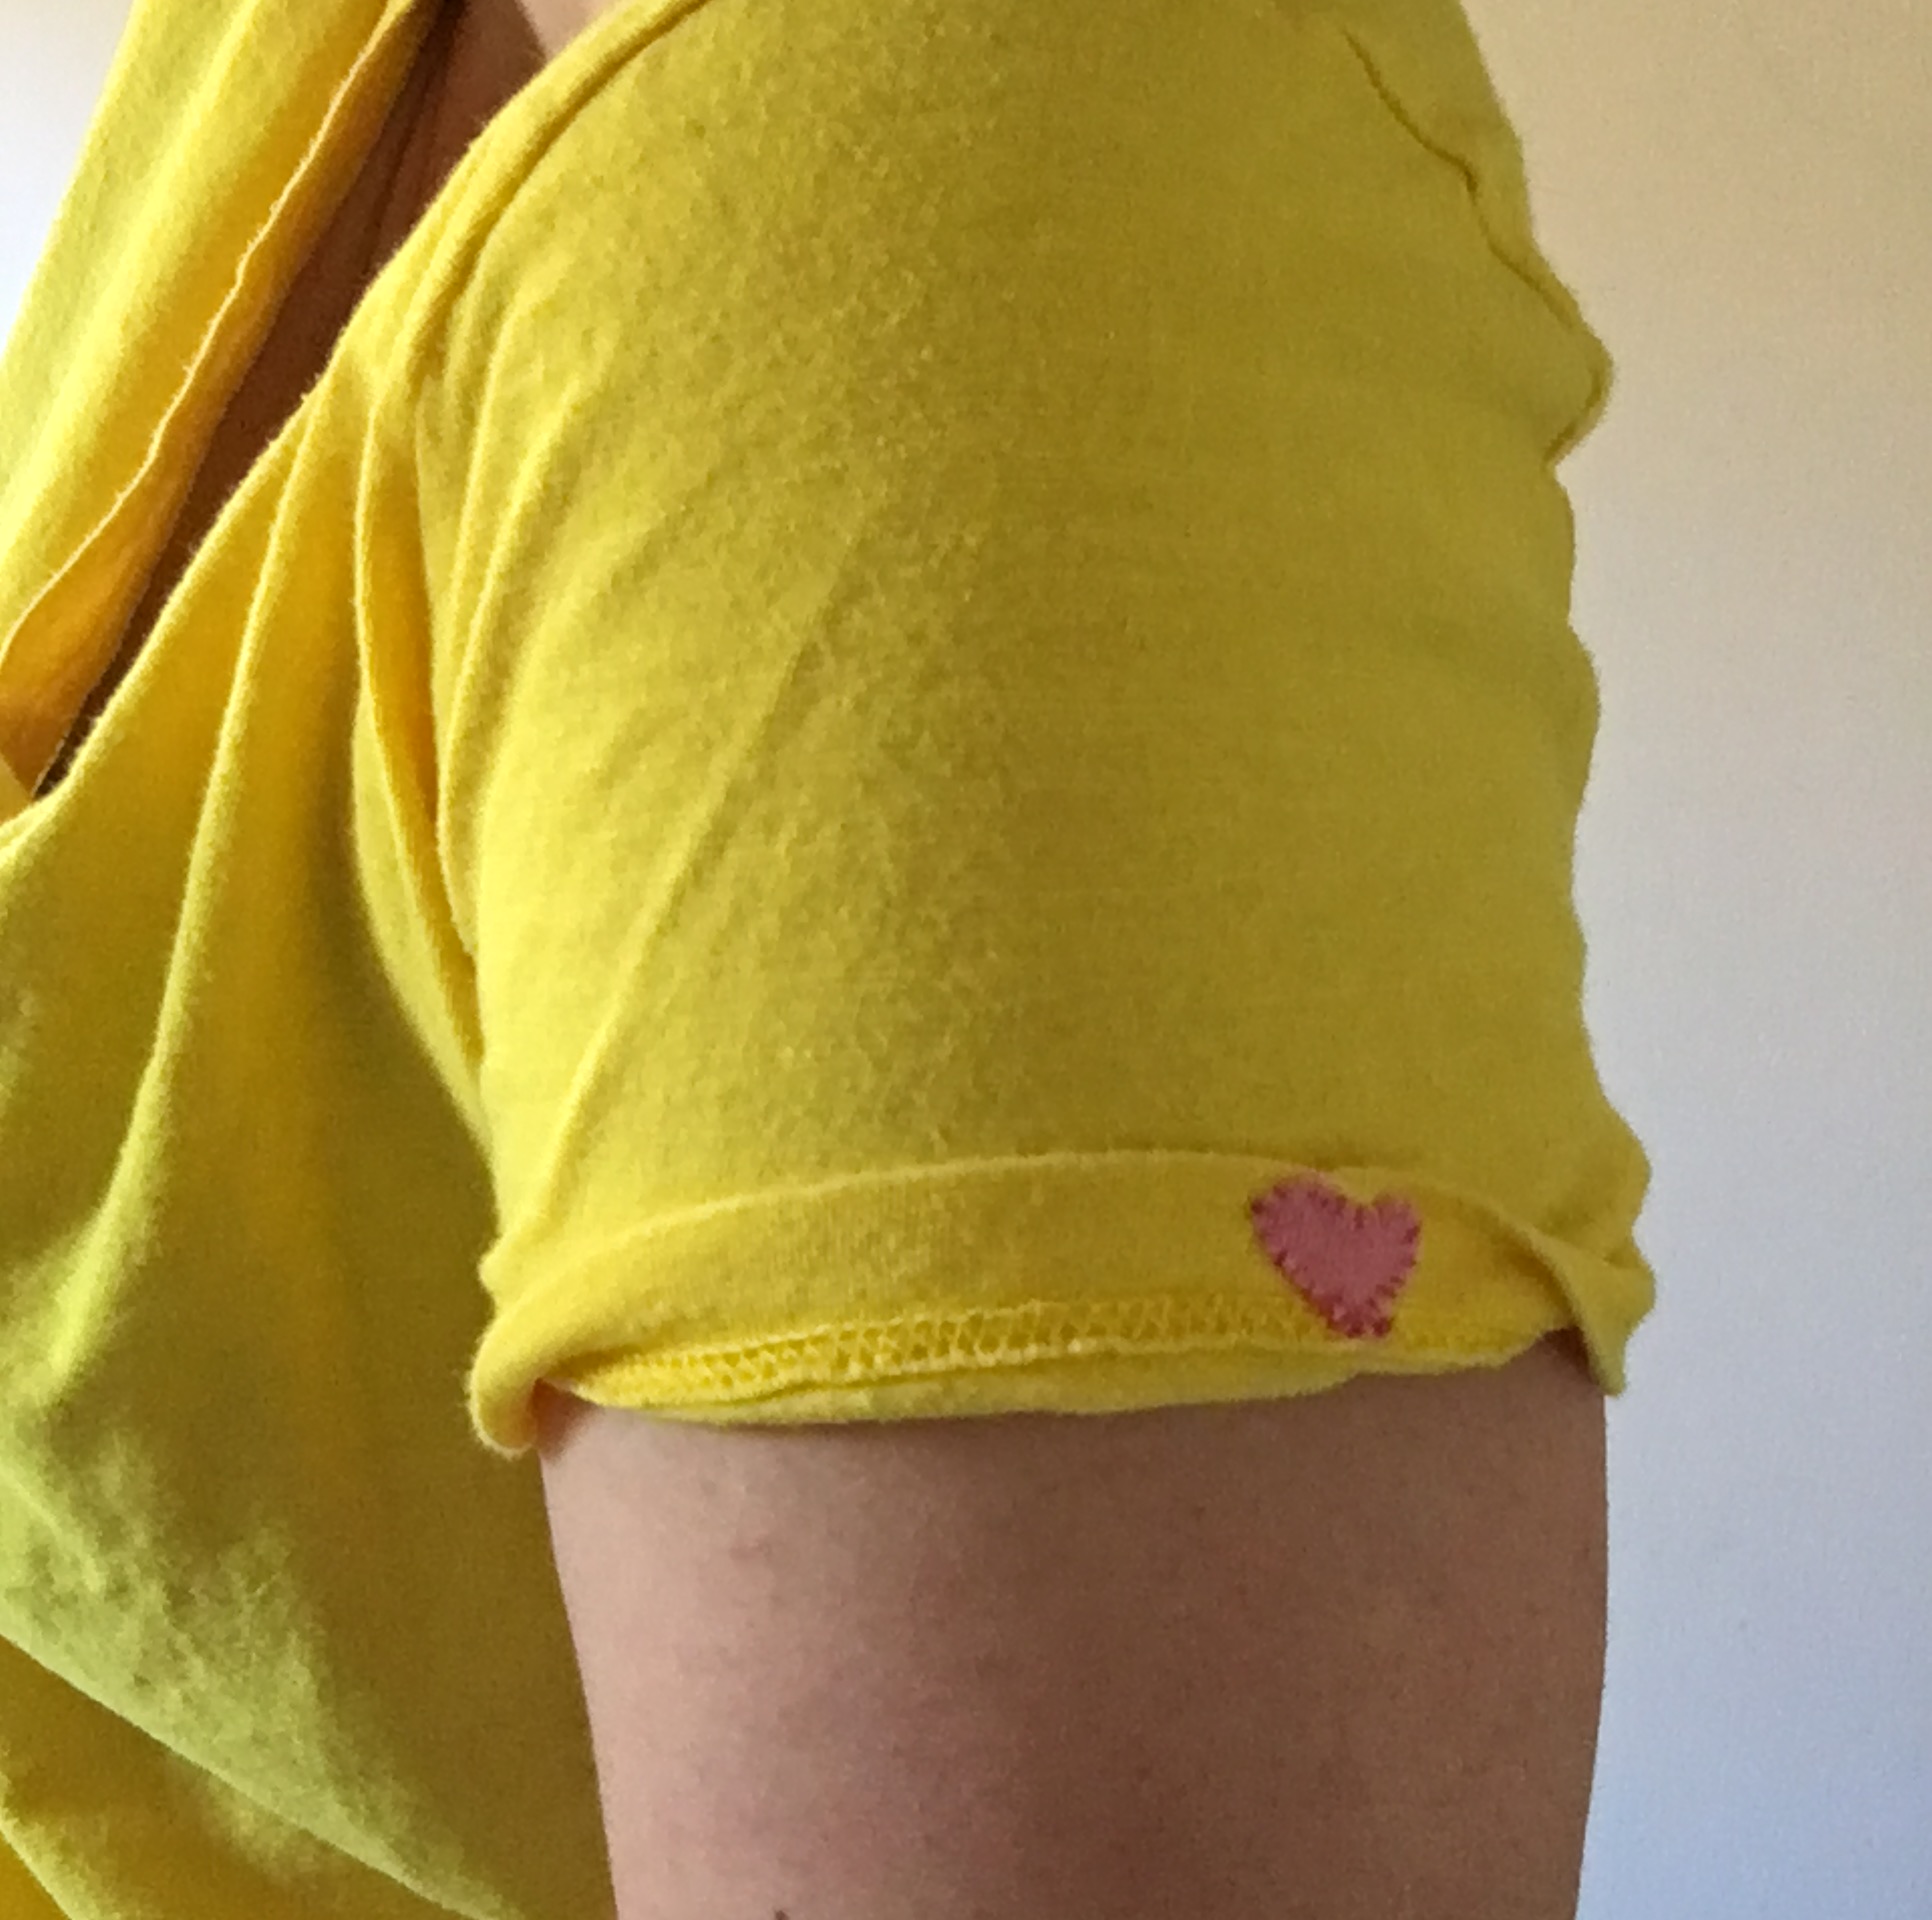
Placement is always tricky—I wanted to have the heart in a good place vertically and centered horizontally. I tried the sweater on, placed the heart where I thought it looked good, and marked the sweater so I could see where I had placed the heart after taking off the sweater. I folded the sweater in half (shoulder to shoulder) so I could find the horizontal center and placed a pin to mark it. Really, I just fussed with the heart until I was happy.

A blanket stitch is pretty simple (once I remembered how to do it) and creates a crafty style.

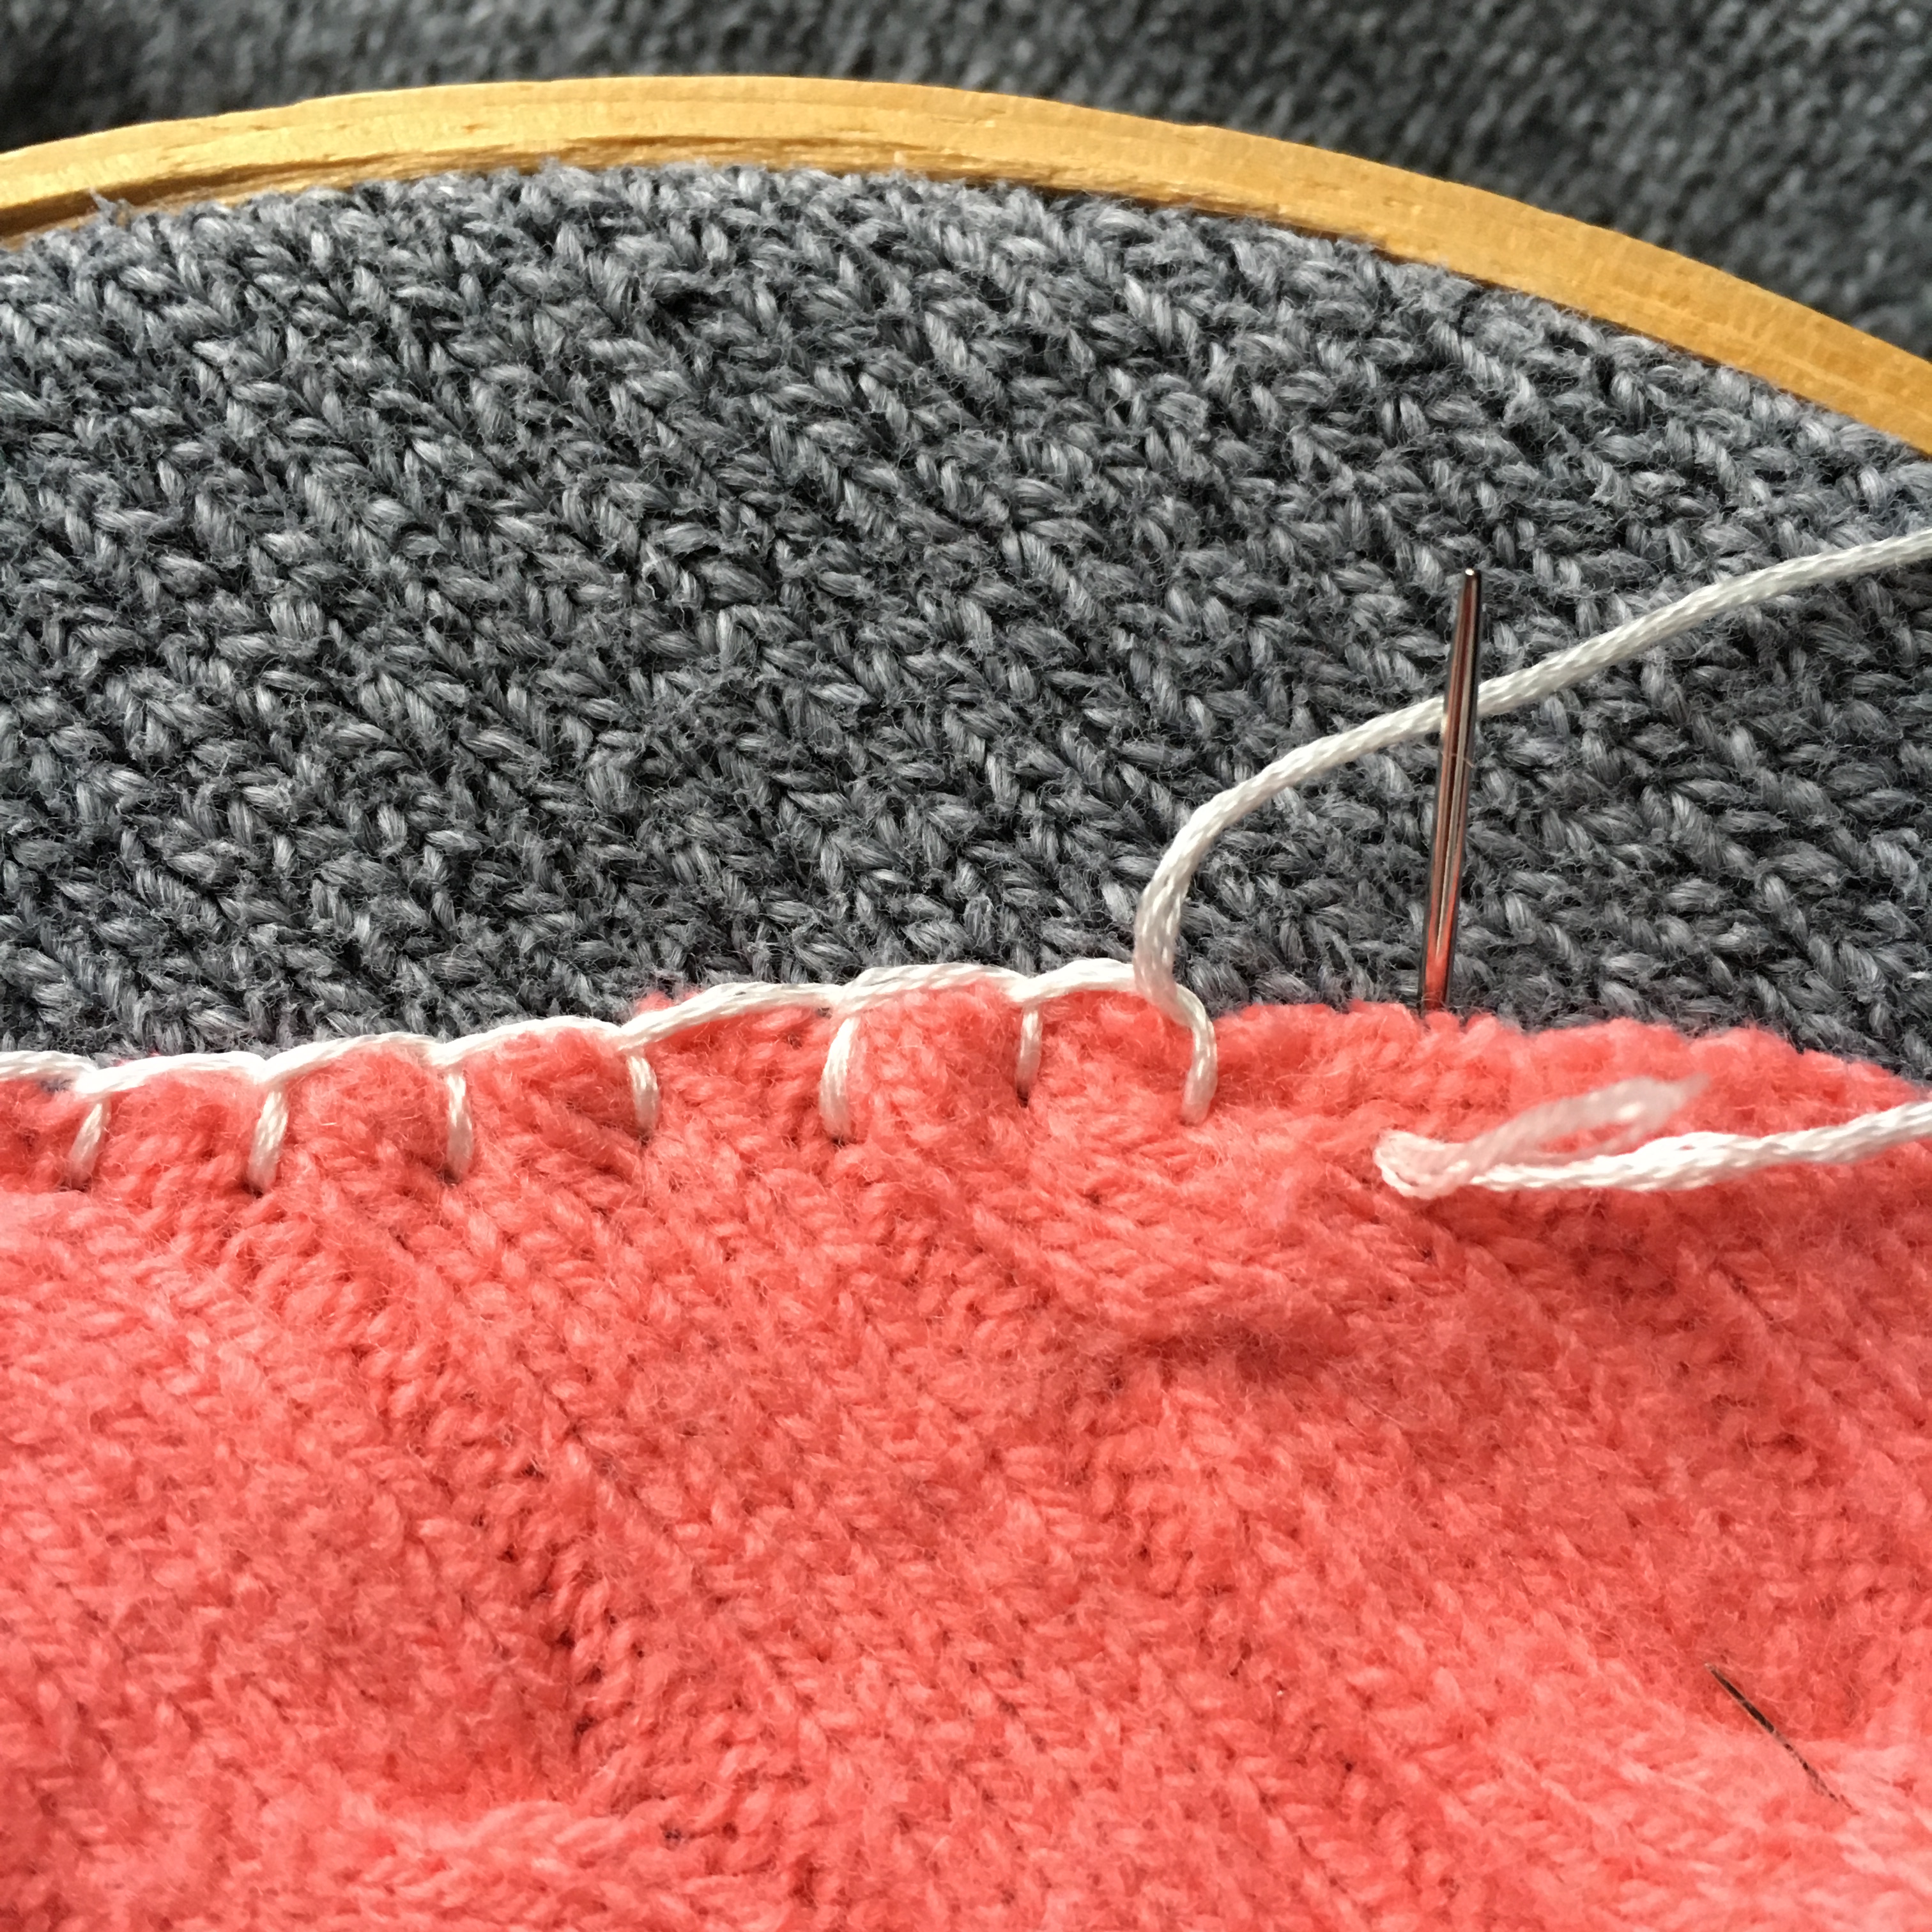
A little bit of washable glue stick and several pins later, I was ready to stitch! I used a blanket stitch with white embroidery floss I had on hand to secure the heart to the sweater. (Side note: it’s not until I actually have needle to fabric that I can remember how to do a blanket stitch. I have such a hard time visualizing it in my head. I think this is why I can’t parallel park. Haha!)


Detail of the completed heart.

Voilà! I now have a cheery Valentine’s sweater to wear in the weeks leading up to the big day! I love it! One of my favorite things about it is the contrast of the smooth, plain knit of the gray sweater and the textured, cable knit of the appliquéd heart.

Oh, say! This is a nice sweater. I just may wear it all winter long!

Full disclosure: I haven’t washed it yet. Eeep! So, I don’t know how it will fare. But! If the heart starts to come off, I have confidence that I can fix it or redecorate the sweater altogether.

Now, if you’ll excuse me, I have some Valentine’s Day cheer to spread!

My new Valentine’s Day sweater made from thrifted/upcycled sweaters!

The 7 Quilting & Sewing Projects I Finished in 2018

In January of 2017, I started a block of the month quilt and while it is still in progress, I haven’t looked back. In 2018, I started streamlining my crafts and focusing on quilting and sewing. I get a lot of energy and joy from sewing and so I naturally want to share, even though I know my work isn’t particularly special. I enjoy seeing other’s work, too. So, how about a roundup of the things I finished in 2018. (There is still plenty that was started.) Some of my finishes will look familiar, others I’m sharing here for the first time.

Dazzling Pineapple Block Study

Dazzling Pineapple Block Mini Quilt

I made this one to see what tying a quilt with sequins and beads would look like. It was an itch that I had to scratch. I like it! I started a larger pineapple quilt, but chose such snazzy colors, I don’t want to finish it with sequins—it would be too much. That quilt top is completed, but it needs to be basted, quilted, and bound. See my post about the mini quilt here.


Daughter & Mom Matching Dress & Shirt

This one has been on my “to do” list since my daughter was born. I loved how they turned out and I especially love the fit of my Grainline Scout Tee, which I’ve worn several times. However, my daughter wore her dress for the first half of a day before changing into something else. What can I say? Kids are fickle, but I’m still glad I made these! See my full post on this project here.


Welcome Blanket Quilt

Welcome Blanket Quilt

This quilt was the quickest I think I’ve ever made anything of this size (approximately 45″ square). I couldn’t dawdle, though, because there was a deadline to participate in the Welcome Blanket project. I love how this quilt came out and how simple it was to make. The hardest part of giving away a quilt anonymously is that you don’t know if it’s being used and if it’s bringing the comfort you imagine and hope it will. Read more about this one here.


Repurposed Handkerchiefs

Handkerchiefs made from an old flannel bedsheet.

I don’t know if this one really belongs on this list, but it took me just about a whole day to stitch up these handkerchiefs fashioned from an old bedsheet. And, I was just hemming each side! It’s a reminder that not all sewing is glamorous, but it still has purpose and is enjoyable. Read more about the “why” and “how” here.


Sea Glass Pop Mini Quilt

Sea Glass Pop Mini Quilt

This 5” x 7” quilt went to the 2018 Secret ArtWorks fundraiser that raised funds for ArtWorks, a local organization that promotes arts in this area. The title came after a brainstorming session with my sister and expresses how the trio of orange triangles pop like pieces of sea glass on a beach. (If you look closely, the light blue fabric has a sand dollar print and the dark blue fabric has a seaweed-inspired print.) Again, this quilt I gave away and I have no idea how it was received!


Library Totes

This year, I joined my local chapter of the Modern Quilt Guild. In November, we exchanged names for a gift swap. I decided to make a tote—um, my first one! I purchased another member’s pattern from Craftsy. (Unfortunately, I can’t find the pattern anymore. Craftsy just went through some major changes.) I decided to make two simultaneously. This project highlighted the fact that I am very much a batch sewist. If I’m going to take the time to sew up one thing, I might as well make two, because, really how much more effort will it require? I have the supplies and tools already out! Ha!

I loved making these. I gave the green/blue triangle tote to my fellow member and kept the bird one for myself. It works very well and I see myself doing more bag making.


Zipper Pouches

In fact, I’ve already done more bag making! After finishing the totes, I had a little bit more time dedicated for sewing, so I whipped up a zipper pouch using a pattern by Sotak Patterns. I was amazed at how easy it was! So, I decided to make 10 more. Batch sewist, indeed! I had my young daughter help pick out fabrics and choose who got each pouch for Christmas. It was a fun project and, again, I see myself making more bags!

Now, on to tackle my 2019 to-make list!

Mending a Fast Fashion T-Shirt

Mended fast fashion t-shirt.

I recently patched a hole in a t-shirt I purchased at Target this past summer. Sure, the shirt only cost about $8, but it was new: I didn’t want to pitch it or toss it into the rag pile.

I’ve become interested in mending and repairing clothing, but it’s rare that I wear a garment until it starts to come apart. (I’ll make an exception for the “chub rub” holes that appear in my well-loved jeans!) I figure it’s probably rare for a lot of people to wear their clothes until they need mending. Also, in some settings, it’s gauche to wear mended clothing. I don’t think wearing patched clothes would be a professional look at work. It may not be right, but it’s where we are.

So, my new t-shirt was laying on the floor of the closet and came into contact with the vacuum, ripping a hole. I wasn’t ready to let the shirt go—I had just bought it! I had another fast fashion t-shirt that I had worn for several years, but it was pilling and it didn’t fit well anymore because of, ahem, some weight gain. That shirt became my patch material.

The first step I skipped was researching how to properly repair a hole in a knit fabric. From my memory of what reverse appliqué looks like and works, I decided to use that method—or at least how I figured the technique works! Instead of using a circle or square just large enough to cover the hole, I went with a heart shape.

Heart shape drawn; patch pinned; needle threaded.

I drew a heart around the hole with a water-soluble pencil and then pinned the patch to the wrong side of the shirt. Using embroidery thread of a complementary color, I stitched around the heart through both the shirt and the patch.

Stitching finished.
The wrong side of the patch, before trimming.

I trimmed the patch about ¼” outside the stitching. Then, I trimmed the shirt about ¼” inside the stitching.

Shirt and patch trimmed. Ready to wear!

The heart lands on the hip.

Not the best place for a contrasting patch, but hey! I didn’t choose where the vacuum tore a hole!

And, just for funsies, I appliquéd a tiny heart on the inside of the left sleeve so that when I flip it up, the heart is visible. Get it? Get it? I’m wearing my heart on my sleeve!

Fun! I want to do something similar with other shirts.

I don’t plan to wear the shirt anywhere fancy. It’s a weekend-type shirt. But, that’s what it was before I patched it anyway. I’m just happy I can still get some wear out of it!

Fixing My Chicken Wall Hanging

Sometimes my first attempt isn’t my best. (Surprise!) Five years after making it, I have finally fixed the droopy top of the chicken wall hanging in my kitchen.

Sagging top–you can even see the middle hook!

I started this chicken wall hanging back in 2012 and maybe finished in 2013. It’s all a little hazy. The pattern is “Ditzy Chicks” by Sharon Berna of Redbird Designs. I love the pattern because I love chicken décor in my kitchen. I enjoyed starting this wall hanging because I began when my mom was visiting and we picked out the fabric together and she even helped me do the appliqué. Buuuut, this felt way more like a craft project than a quilt, probably because I wanted chicken décor for my kitchen, not because I necessarily wanted to make a quilt. (I have since changed, of course.)

As an amateur, I stitched plastic rings to the top of the back “wherever seemed good” and then stuck a trio of Command hooks on my kitchen wall. Well, the top 2-3” have always drooped. It took me so long to complete the darn thing and a whole lot of motivation, I just ignored it, until recently, when I decided to remedy the droop—or, at least, decided to attempt to remedy.

The plastic rings before: stitched on only at the bottom.

First, I took the wall hanging off the hooks. It was dusty—hello, it hadn’t been touched in 5 years! So, I popped it into the washer. Luckily, I’m in the prewash camp, so I didn’t have to worry about colors bleeding or shrinkage. Of course, it still came out a bit wrinkly. That just adds charm, right?

Next, one by one, I snipped off each plastic ring and raised it so that the top of it was about 0.75” from the top of the wall hanging. (I did a bit of measuring, math, and testing to ensure that the wall-mounted hooks wouldn’t show after the wall hanging was up.) I stitched the rings down at three points: 90, 180, and 270 degrees. (I feel hella-fancy describing it in that manner, by the way.)

The plastic rings after: stitched down at 3 points.

After all the plastic rings were repositioned, I added one more thing: one of my brand-new quilt labels! Sure, this is NOT my best work (please don’t look at the quilting—what was I thinking?!), but I think it’s important to label your work. For me, it feels even more so, since I have kids. My 3-year-old son immediately noticed that this wall hanging was gone when it was in the wash. He asked why I took down the chickens. This piece of handmade décor is being ingrained in his childhood memories. With any luck, I’ll get to hand it down to one of my kids.

Here’s hoping this chicken wall hanging will stay up on the wall another five years when I decide to wash the dust off again!

Ta-da! The non-droopy, not sagging wall hanging. Of course, now it’s a bit wrinkly from the wash. I’m going to consider that “charm”…at least until I’m motivated to steam it. 😉

Handkerchiefs from a Repurposed Bedsheet

Handkerchiefs made from a torn bedsheet.

Not all sewing is glamorous and Insta-worthy. Nope. Sometimes I’m stitching things I need or making the most out of some fabric so it doesn’t end up in a landfill.

Apparently, I like to run marathons in my sleep, because I wore a hole in a flannel fitted sheet. Now, to my defense, these are fast home décor (think fast fashion, but with home décor). We’ve only had the sheets for a couple of years (and use them seasonally because they’re flannel), but still, a hole showed up.

To my credit, I made the hole larger so that I WOULD NOT MISS IT and try to put it back on the bed.

The sheet is queen-size. That’s a lot of fabric without a hole. I washed the sheet and kept it because I knew I’d think of something to use it for. Finally, I decided on handkerchiefs. I grew up using handkerchiefs, or hankies, when I had a cold. Granted, they’re gross. You blow your nose on them. And, you don’t throw them away like you would with a tissue. But, because you DON’T throw them away, you always have one handy. Also, you don’t have to remember to buy tissues or use toilet paper.

Because this sheet was to become hankies, I wasn’t too worried about how they looked in the end. I mean, they’re going to wipe up snot. I simply cut out as many squares as I could by cutting along the plaid pattern. Further evidence of this sheet being fast home décor? The plaid isn’t yarn-dyed, it’s piece-dyed (piece-printed?). Most plaids are yarn-dyed. Go to your closet and check out your favorite plaid shirt and flip it over to the reverse side. The reverse should look like the front and not plain. The reverse of this sheet is white, not plaid: piece-dyed. Because of this, cutting along the plaid pattern didn’t necessarily result in true square pieces. But, whatever—snot.

Plaid on one side; plain on the reverse.

I took the time to press a ¼” hem on two opposite sides of each hankie. Then, I stitched it down. I was going to press the remaining two sides, but it took a long time the first round. I decided to wing it and just fold the hem over as I stitched, because boogers. It worked! They didn’t turn out too shabby—for hankies.

Artsy shot of a snot rag.

The result is 20 or so hankies for my family to use. And, bonus! I came down with a cold only a week or so after I finished making these. I used them and I’m satisfied with how they turned out. One sheet saved from the landfill and a house of happy noses!

Stitched. Folded. Stacked. Ready for boogers.