Knowing When It’s Time to Throw Away Mended Clothing

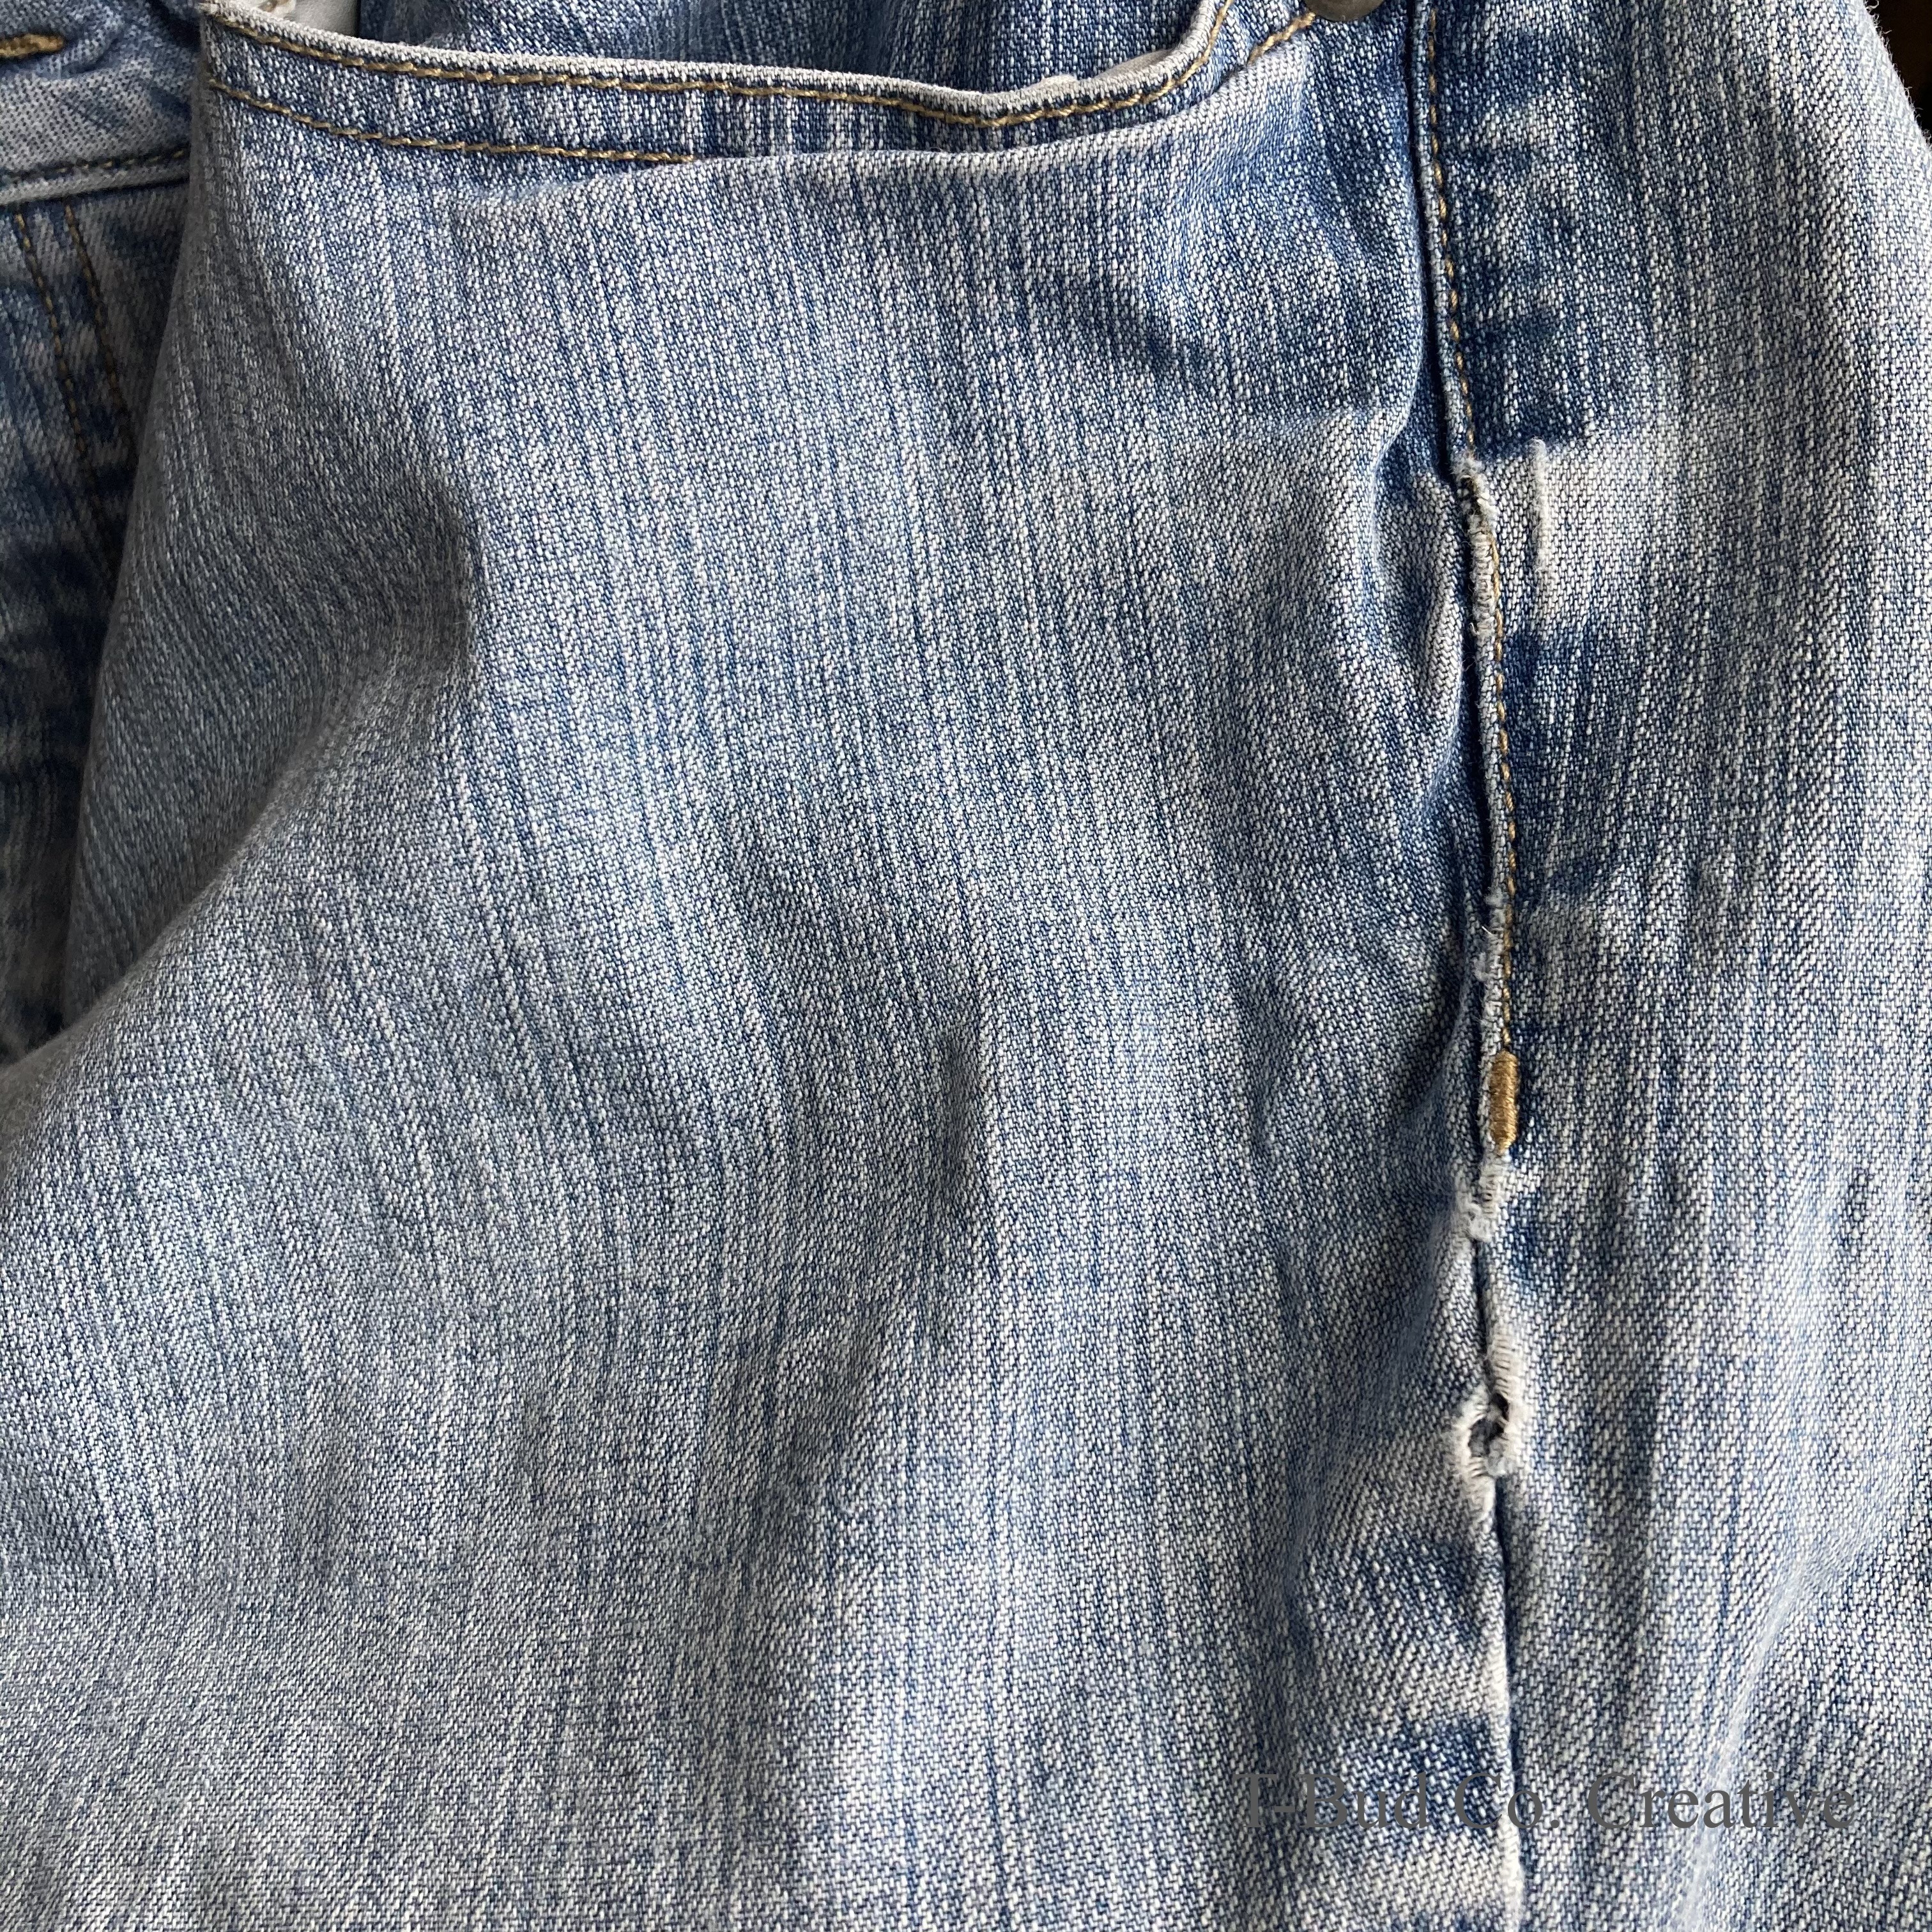
When my mended pair of jeans needed to be repaired again, I knew it was time to let them go. I patched them after a year of wear and then wore them for another year.

It’s time to let these jeans go.

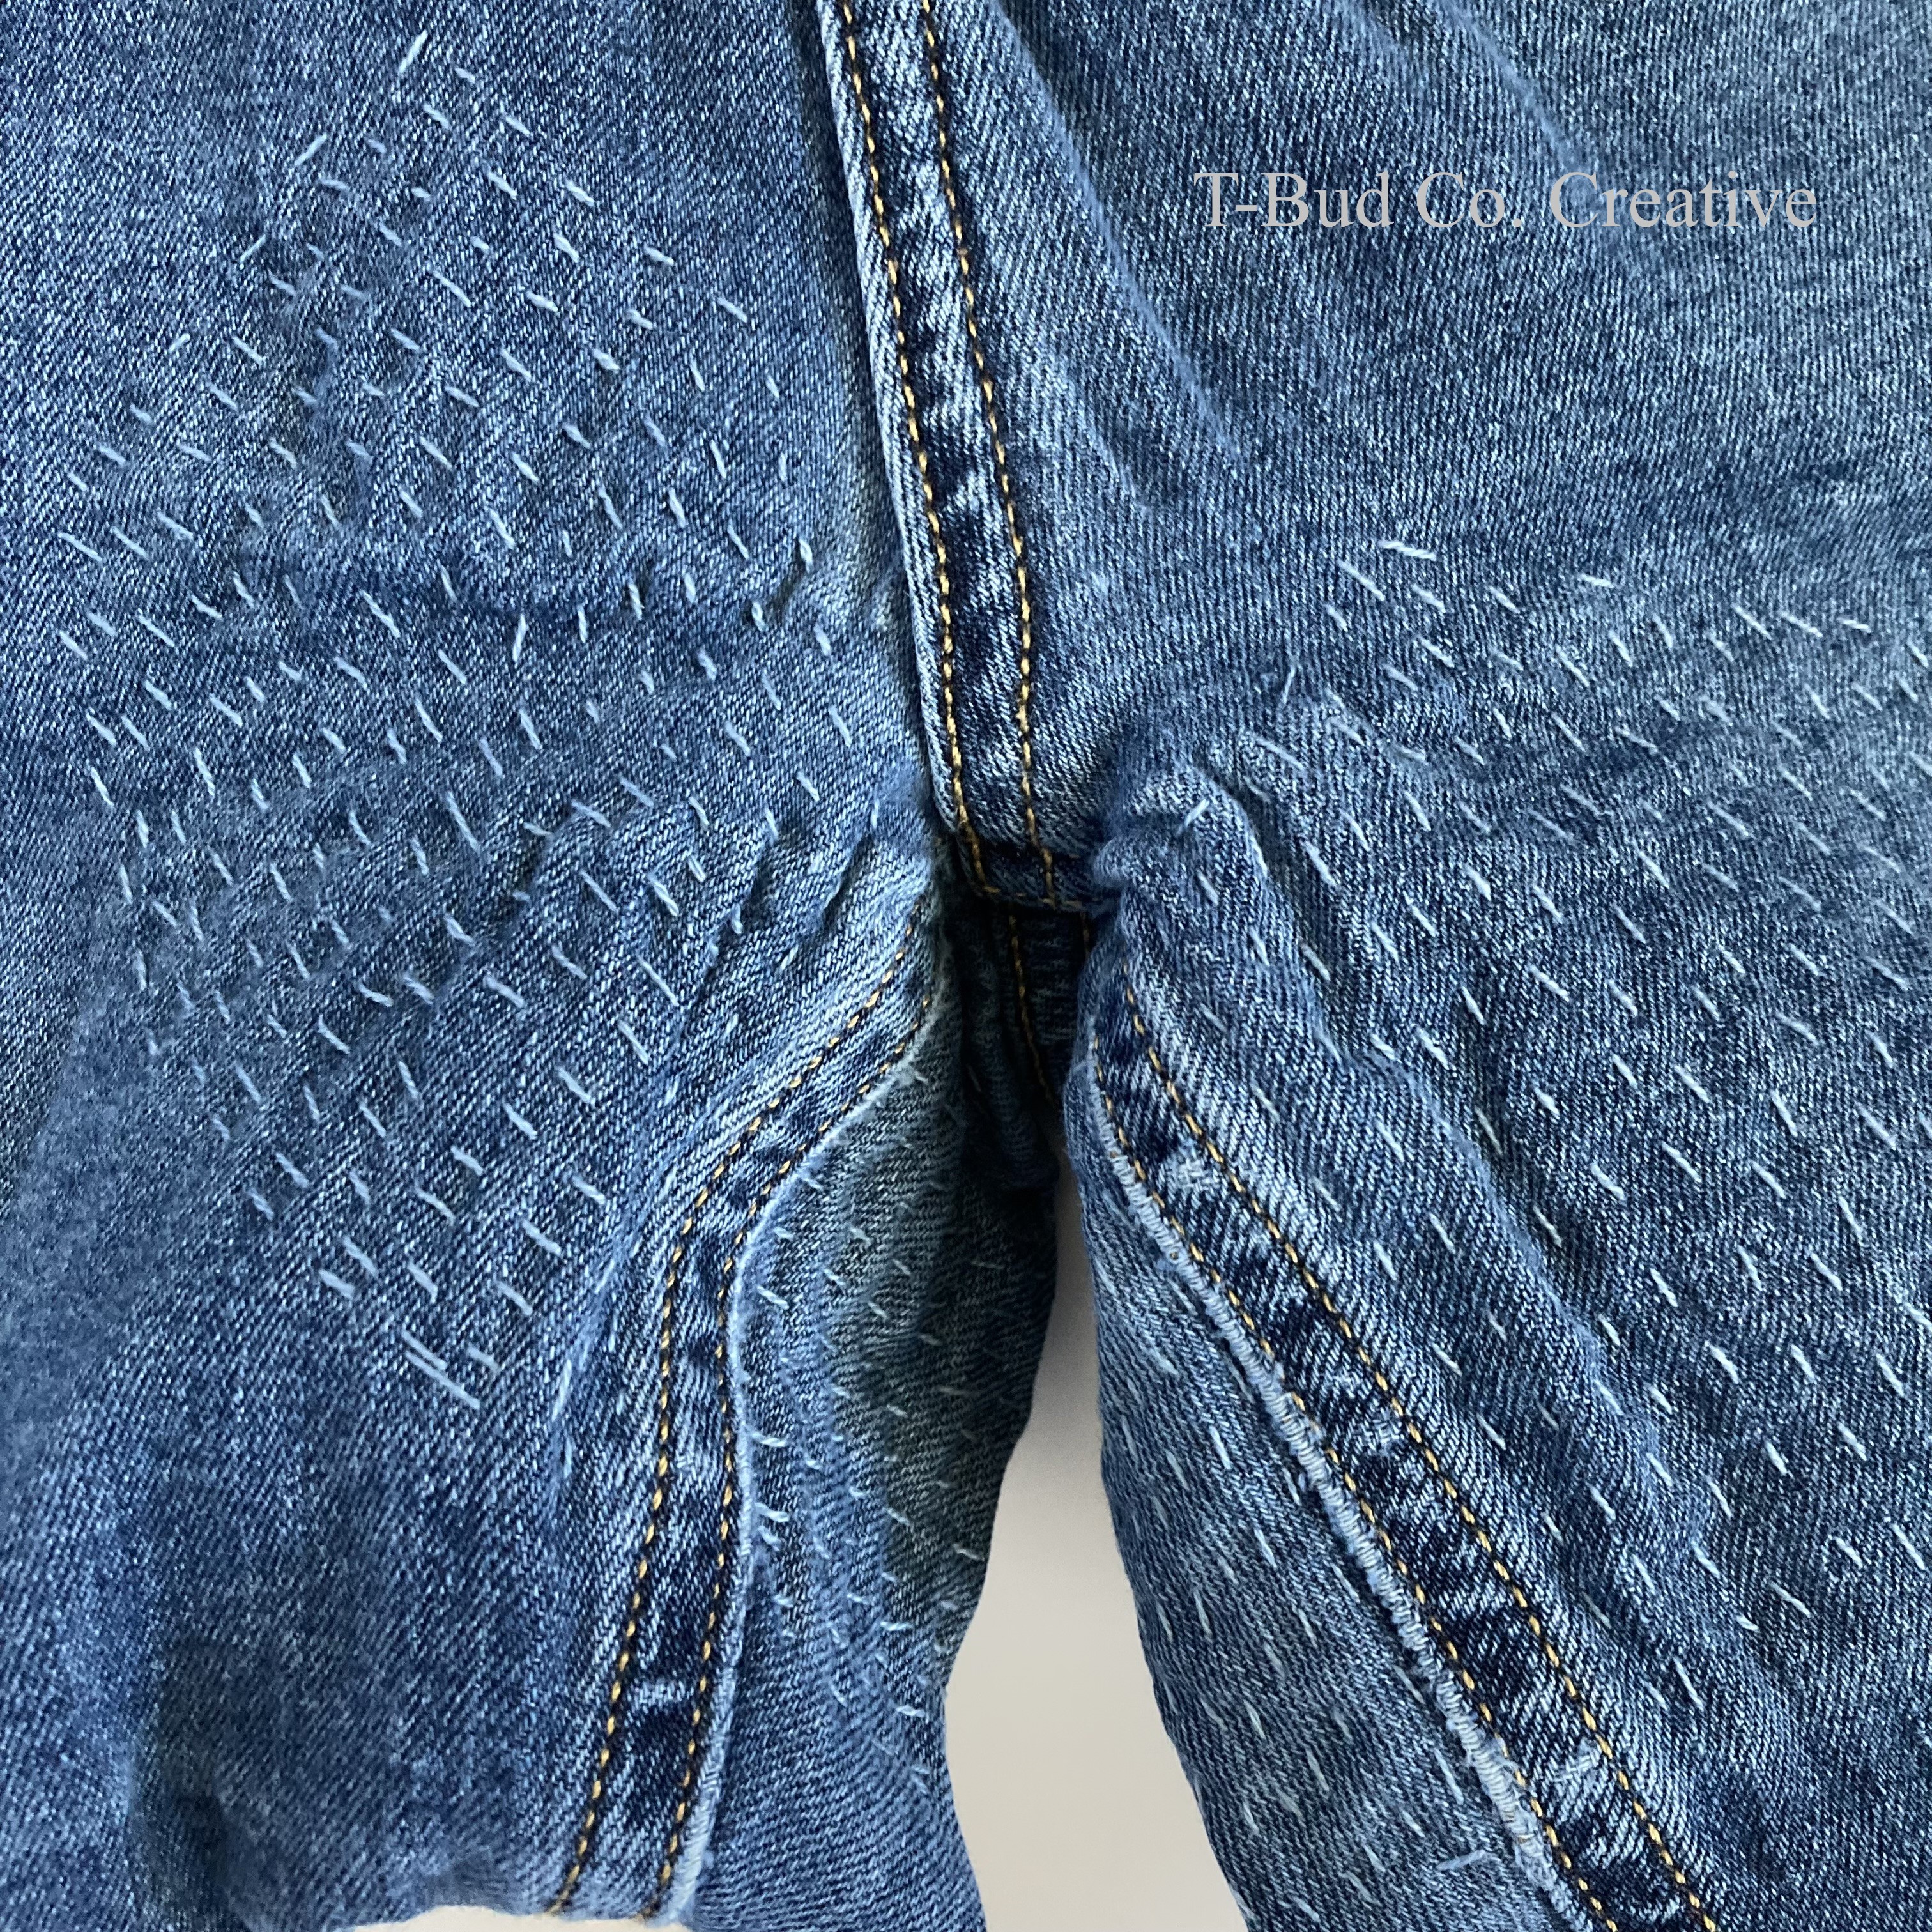
Nothing lasts forever, unfortunately, and while I could have mended these jeans for a second time, I just wasn’t feeling comfortable wearing them. I tend to wear out my jeans in the crotch. So, visible repairs are in an awkward place and I certainly don’t want to draw attention to my crotch! The layered fabric in the crotch creates a different kind of discomfort—it’s physically uncomfortable.

Right after the mending a year ago.

I took photos of these jeans when I originally mended them. The date linked is March of 2022. I estimate that I wore them for a year before they needed repair. I wore them for two years: one year as-is and a second year patched. Full disclosure: I am on sabbatical from working outside the home. A lot of days I just don’t leave home—I can get away with wearing the same clothes every day, from week to week. I wore these jeans multiple days per week for two years straight. Conservatively, I’ll say I wore them only 2 days per week. Let’s do some math!

52 + 52 = 104 weeks in the 2 years I wore them

104 x 2 = 208 days worn

I do laundry once a week. They were washed 104 times.

208 days of wear. 104 washes. Now, they’re done.

That’s pretty good and beats NPR’s LifeKit’s suggestion that you wear an article of clothing 30 times.

I learned a lot from this pair of pants. First, there’s a lot of stretch in these jeans. Look at how they wore out. It’s amazing how much the wear looks like stretch marks on skin.

Denim wore right down to the patch material.

Second, I think the stitching frayed and broke because I mended these jeans while they were clean. There’s a difference in the fabric when it’s freshly washed and when it has been worn a couple of times.

I used a single strand of DMC Cotton Pearl thread in a medium blue to blend with the color of the denim as much as possible.

The next pair of jeans, I will wear them a day or two before mending. Then, I’ll be stitching on fabric at its maximum stretched size, not at a shrunken size.

Layers of fabric

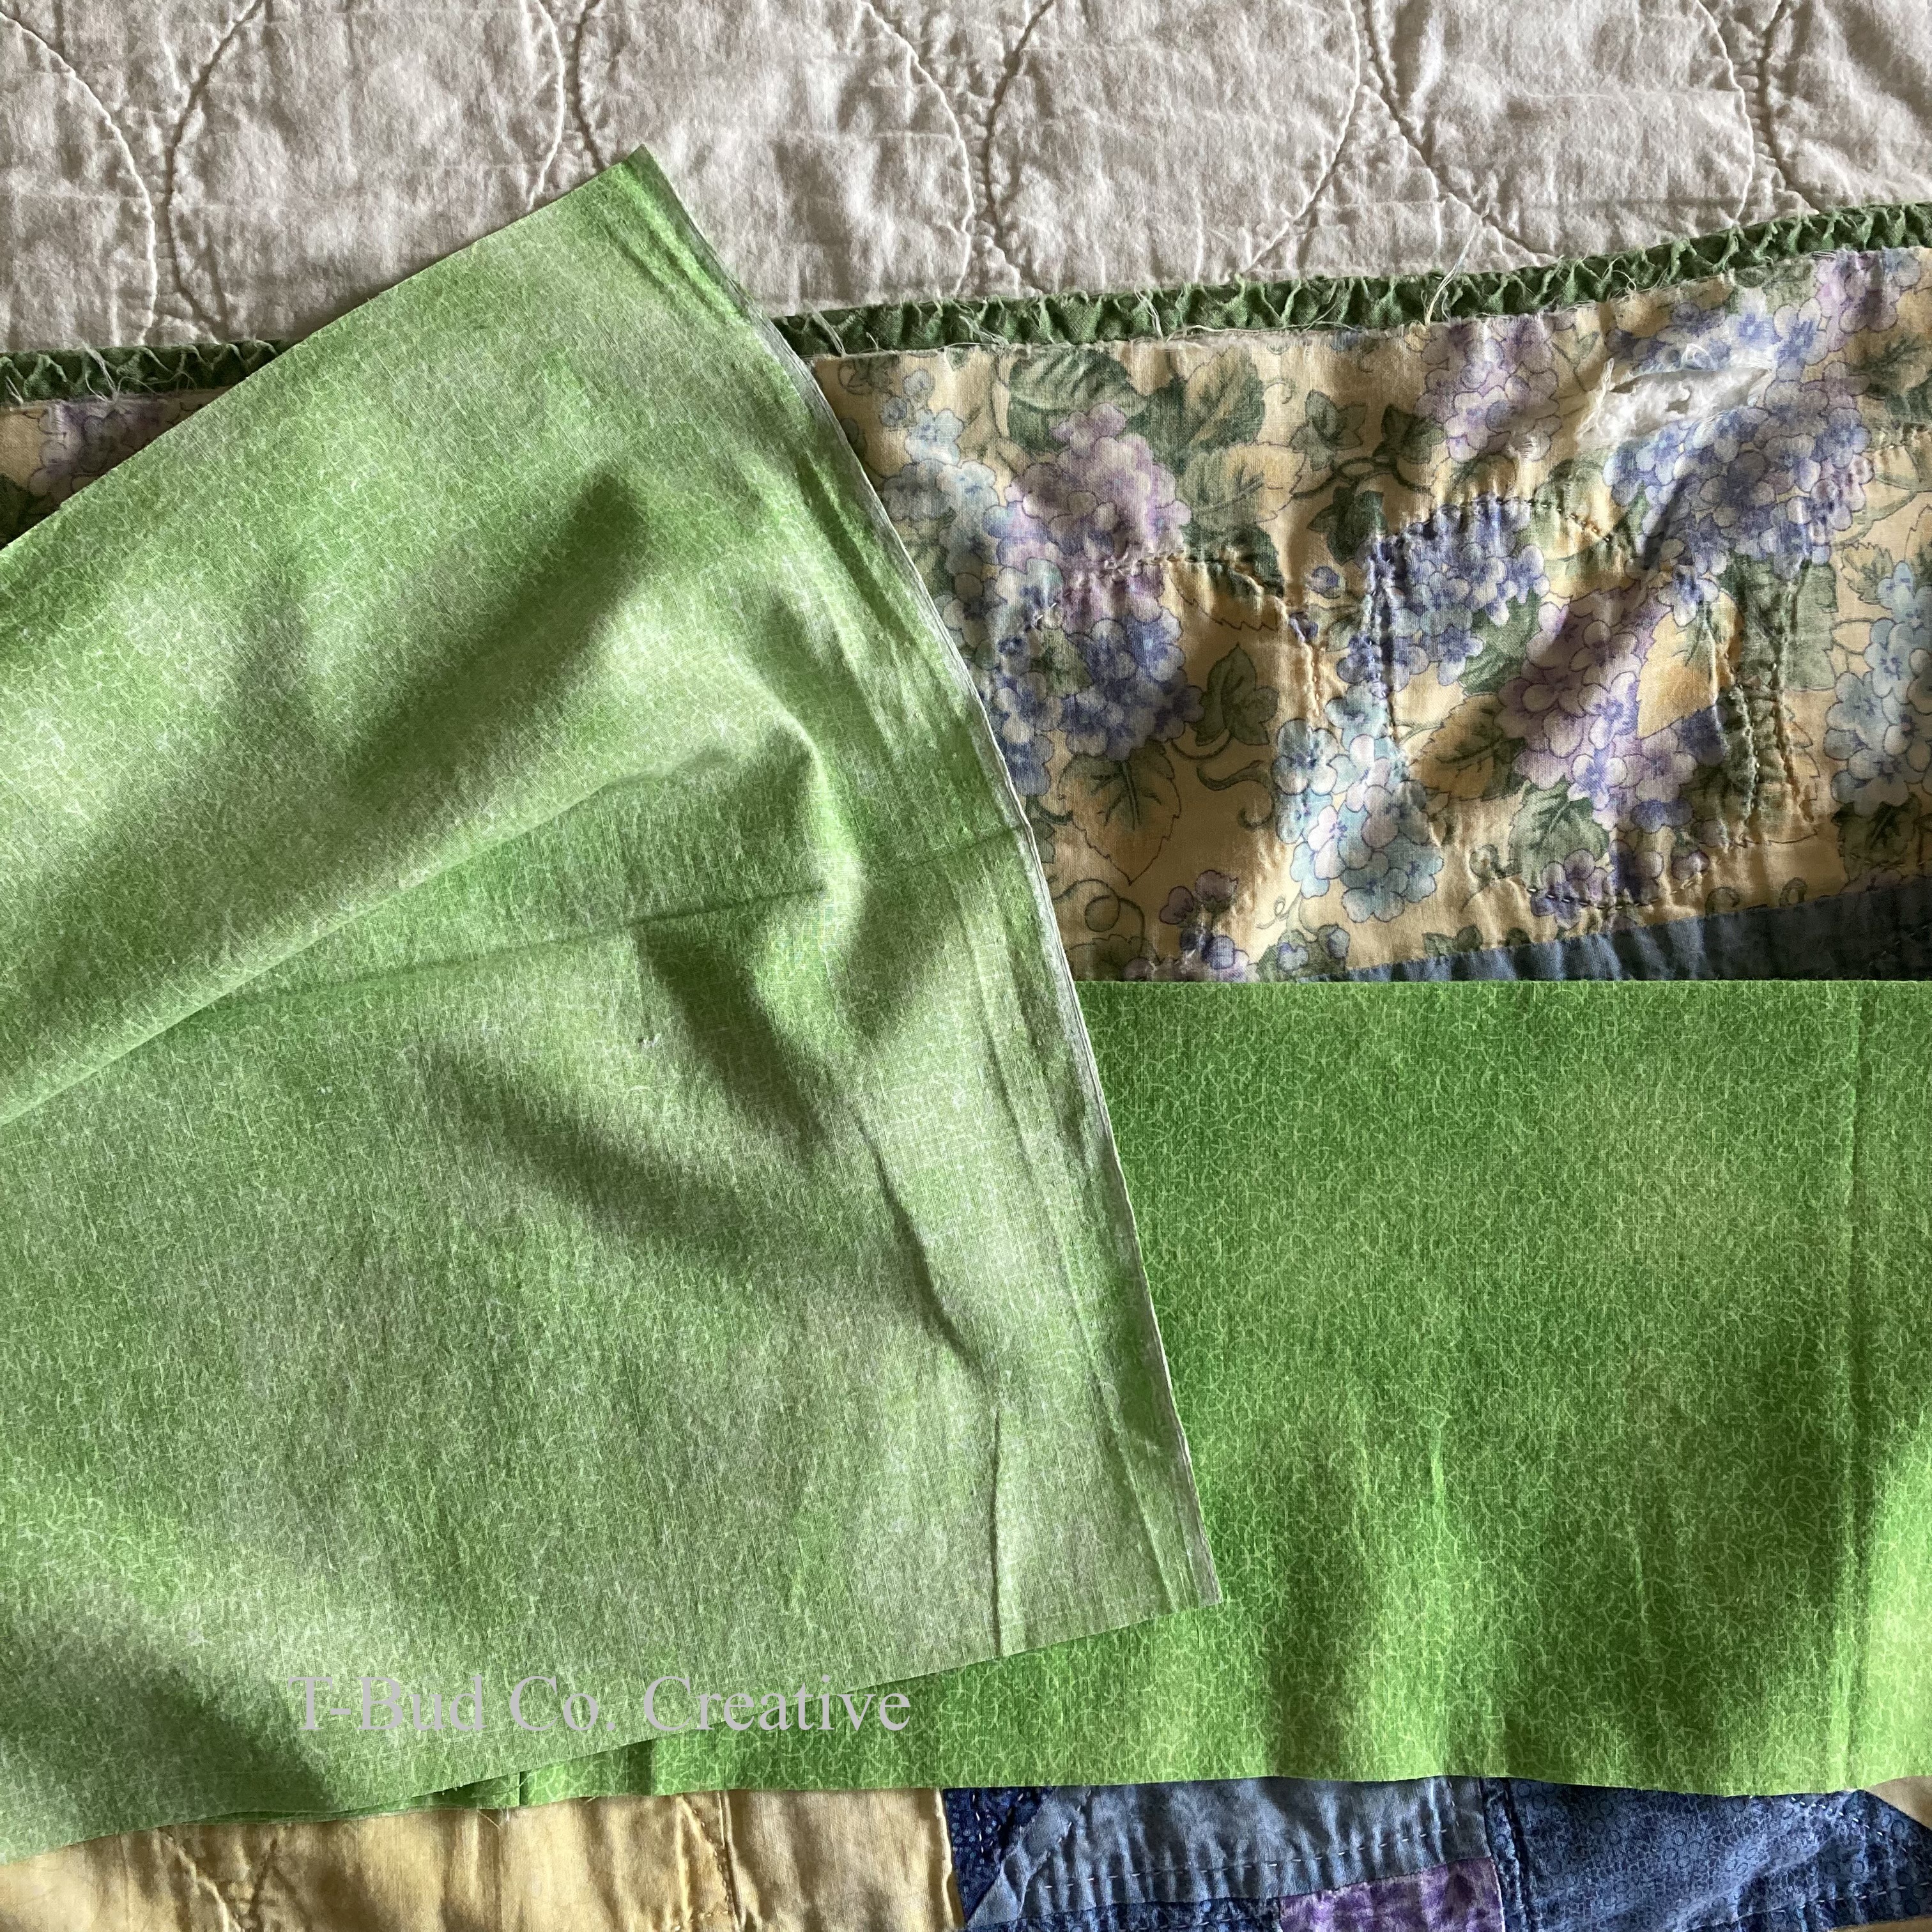
Finally, I’m not sure I’ll heave the whole pair into the trash bin. I’m going to try part them out—I’ll try to take out the zipper and maybe cut out swatches of relatively unworn fabric on the legs for future mending or other projects. All in all, eventually everything has to go. While only having this pair of jeans for two years seems paltry, after doing the math, I realize that I actually got a lot of wear out of them. Now it’s time to put them to rest.

Pretty stitches.
Advertisement

Mended Buttonhole on Men’s Jeans

The buttonhole on my husband’s jeans frayed, so it was too large to securely hold the button. I was able to mend the hole, but it wasn’t without trial and error.

When the buttonhole on a pair of my husband’s jeans frayed so much that it could no longer hold the button securely, I offered to give mending them a try. I ran into some snags throughout the process, but I was able to do it.

First, I reinforced the area with a scrap of quilting cotton. I sewed a patch on the front and back of the waistband over the buttonhole. Then, I put in a few rows of running stitches where the frayed hole was since this area really only had the two layers of cotton fabric. 

Next, I popped my buttonhole foot onto my sewing machine and threaded it with heavy duty thread. I set the size of the buttonhole, positioned the waistband under the needle, and pushed the pedal. Fail! The reinforced denim waistband was too thick for my machine to scooch along under the needle. The fabric pretty much remained stationary and all I got was a mess of thread. So, went back to the drawing board. Or should I say that I went running to Google.

I searched how to hand sew a buttonhole. There are plenty of really good tutorials that showed me the way. So, I broke out the pearl cotton thread and a touch of Dritz Fray Check (I dabbed the cut edges of the buttonhole with the Dritz Fray Check to help prevent fraying…and recreating the original problem!).

It worked! My husband has put these jeans back into rotation, which is the whole point, right—to get at least one more wear out of them?

How I Mended a Quilt by Reinforcing It with Fabric

I have a quilt that is about 15-years-old and had started to deteriorate on one side. I mended it by sandwiching the worn area between two layers of fabric and quilting it with big stitches.

Yellow quilt repaired and ready for bed.

A little history on this quilt: my mom made this quilt from a block-of-the-month quilt kit she got from Joann Fabrics & Crafts circa 2000. In 2006 or 2007, she mailed it to me as a college graduation gift (I graduated in 2005). Readers, this quilt is hand quilted. It has a muslin backing that is so soft. (Y’all know I love a muslin backing.) I love this quilt.

Wear is visible along the binding.

Unlike my M&M’s quilt that I mended by simply cutting off the worn area and re-binding the cut side, I didn’t want to lose size with this quilt. Inspired by Japanese Sashiko and Boro methods and aesthetics, I decided to reinforce the worn area of this quilt. Head over to Upcycle Stitches to learn more about Sashiko and Boro and to be inspired.

At some points, batting was exposed.

Since the worn area was about 6” wide along one side of the quilt, I simply cut a 13” x 72” strip of complementary fabric—at least the fabric in my stash that matched the best and that I had enough yardage of—ha! And, I had to cut and stitch together a couple of pieces to get a patch that size. 

Here the patch is cut, ironed, and ready to be machine-stitched onto the front.

I then folded the fabric patch in half, longwise (wrong sides together) and ironed it. The ironed fold allowed me to see the halfway mark along the patch, which I wanted to land right on the original binding. 

Pinned into place and then stitched on.

Next, I pinned the fabric to the quilt (right sides together), machine-stitched it down with my quilting foot, and then folded it over and gave it a little iron. Think of this patch going on like a really wide binding. 

Pin-basting, getting it ready for quilting.

This is where it got a bit tricky, because I needed to quilt the fabric down before attaching the edge of the backside of the patch. I pin-basted the patch in place. Once that was done, I went to town with stitching big stitches in pearl cotton thread.

Stitch! Stitch! Stitch!

Finally, I stitched down the short sides and the edge of the backside using a needle-turn appliqué technique. I folded back and tucked in about a ¼” of the edge of the fabric and stitched the patch down right at the fold.

Needle-turn-like appliqué to finish the sides and back edge of the patch.

So, the repair is like a wide single-layer of binding that I quilted with big stitches and attached like an appliqué. 

Finished patch.

Is it perfect? No. Is this the proper way to repair a quilt? Probably not. Is the quilt now usable and back on my bed? Absolutely! Does it sleep like a dream? You know it! And, really, isn’t that all that matters?

Now, let’s take an appreciation tour of my mom’s original quilting:

My favorite: she stitched in a chicken!

Tiny, perfect stitches.
For all you crinkle lovers. There’s no softer thread count than 15-year-old, well-used quilt!

How do you repair your quilts? Leave a comment if you’ve got a tip or trick that I just gotta know!

How I Visibly Mended a Pair of Secondhand Jeans

Using a scrap of quilting cotton and pearl cotton thread, I reinforced and mended a thinning and fraying area of my secondhand jeans.

Visibly mended jeans

Remember the jeans I visibly hemmed? Well, I recently visibly mended them right at the seam on the upper thigh. I noticed that a twist in the seam allowance had created a thinning and fraying spot. As a person who has ripped her jeans in an embarrassing spot whilst wearing them before, I decided to take care of these jeans before an incident occurred. I chose to reinforce the area with a patch of woven cotton fabric on the inside using a Sashiko-like running stitch with pearl cotton.

Fraying and thinning area right at the seam

There wasn’t quite a hole, yet, and no mending to do per se, but with these being my—ahem—only pair of jeans that I can wear regularly, I wanted to be proactive. (Side note: Why is it so hard to find a pair of jeans that fit and fit comfortably? Hello, my third child is a little over a year old and I’ve spent a year staying at home as much as possible, thank you, pandemic. My body has capital-C changed. Also, WHY DO JEANS HAVE SO MUCH NON-COTTON FIBERS IN THEM?!? I get that a touch of stretch can make them comfortable, but when a quarter of the total fibers are not cotton, the fabric REALLY stretches. I’m already trying to find my new size, fiber content matters and is messing with my head!) Rant over—haha! 

A small piece of quilting cotton for the patch

I simply pulled a scrap of quilting cotton from my stash and cut it to size. Then I finger-pressed a 1/4” hem around the edges of this patch (I eyeballed it since I put it inside the jeans—no one else will be eyeballing it!).

Pin-basted patch on inside of jeans

Then, I pin-basted it into place. My first stitches were around the hem. The raw edges of the patch are completely concealed and contained between the patch and the jeans, because I didn’t want to deal with the patch fraying. 

Quite simply, I just did a running stitch zigzagging from side to side in between the perimeter stitches. Done and done. My stitching is inspired by the “visible mending” trend, some of which is based on Japanese Sashiko. I found a great website for learning more about the culture and the craft. Click over to Upcycle Stitches.

Stitched around the perimeter first to secure the raw edges of the patch.

I’ve worn and washed these jeans a few times and the patch and stitching have stayed in place. Also, the repair is very subtle. The white thread is perfect on the light wash. While I love the “visible mending” aesthetic, I’m not about to draw attention to my hips and thighs!

You can see the jeans have been mended, but it’s not bold.

So, what do you think? Have you visibly mended any clothing? Did you use a technique that worked really well? Have I missed anything here? Let me know! I read all the comments whether you write them the day I publish a post or 5 years after!