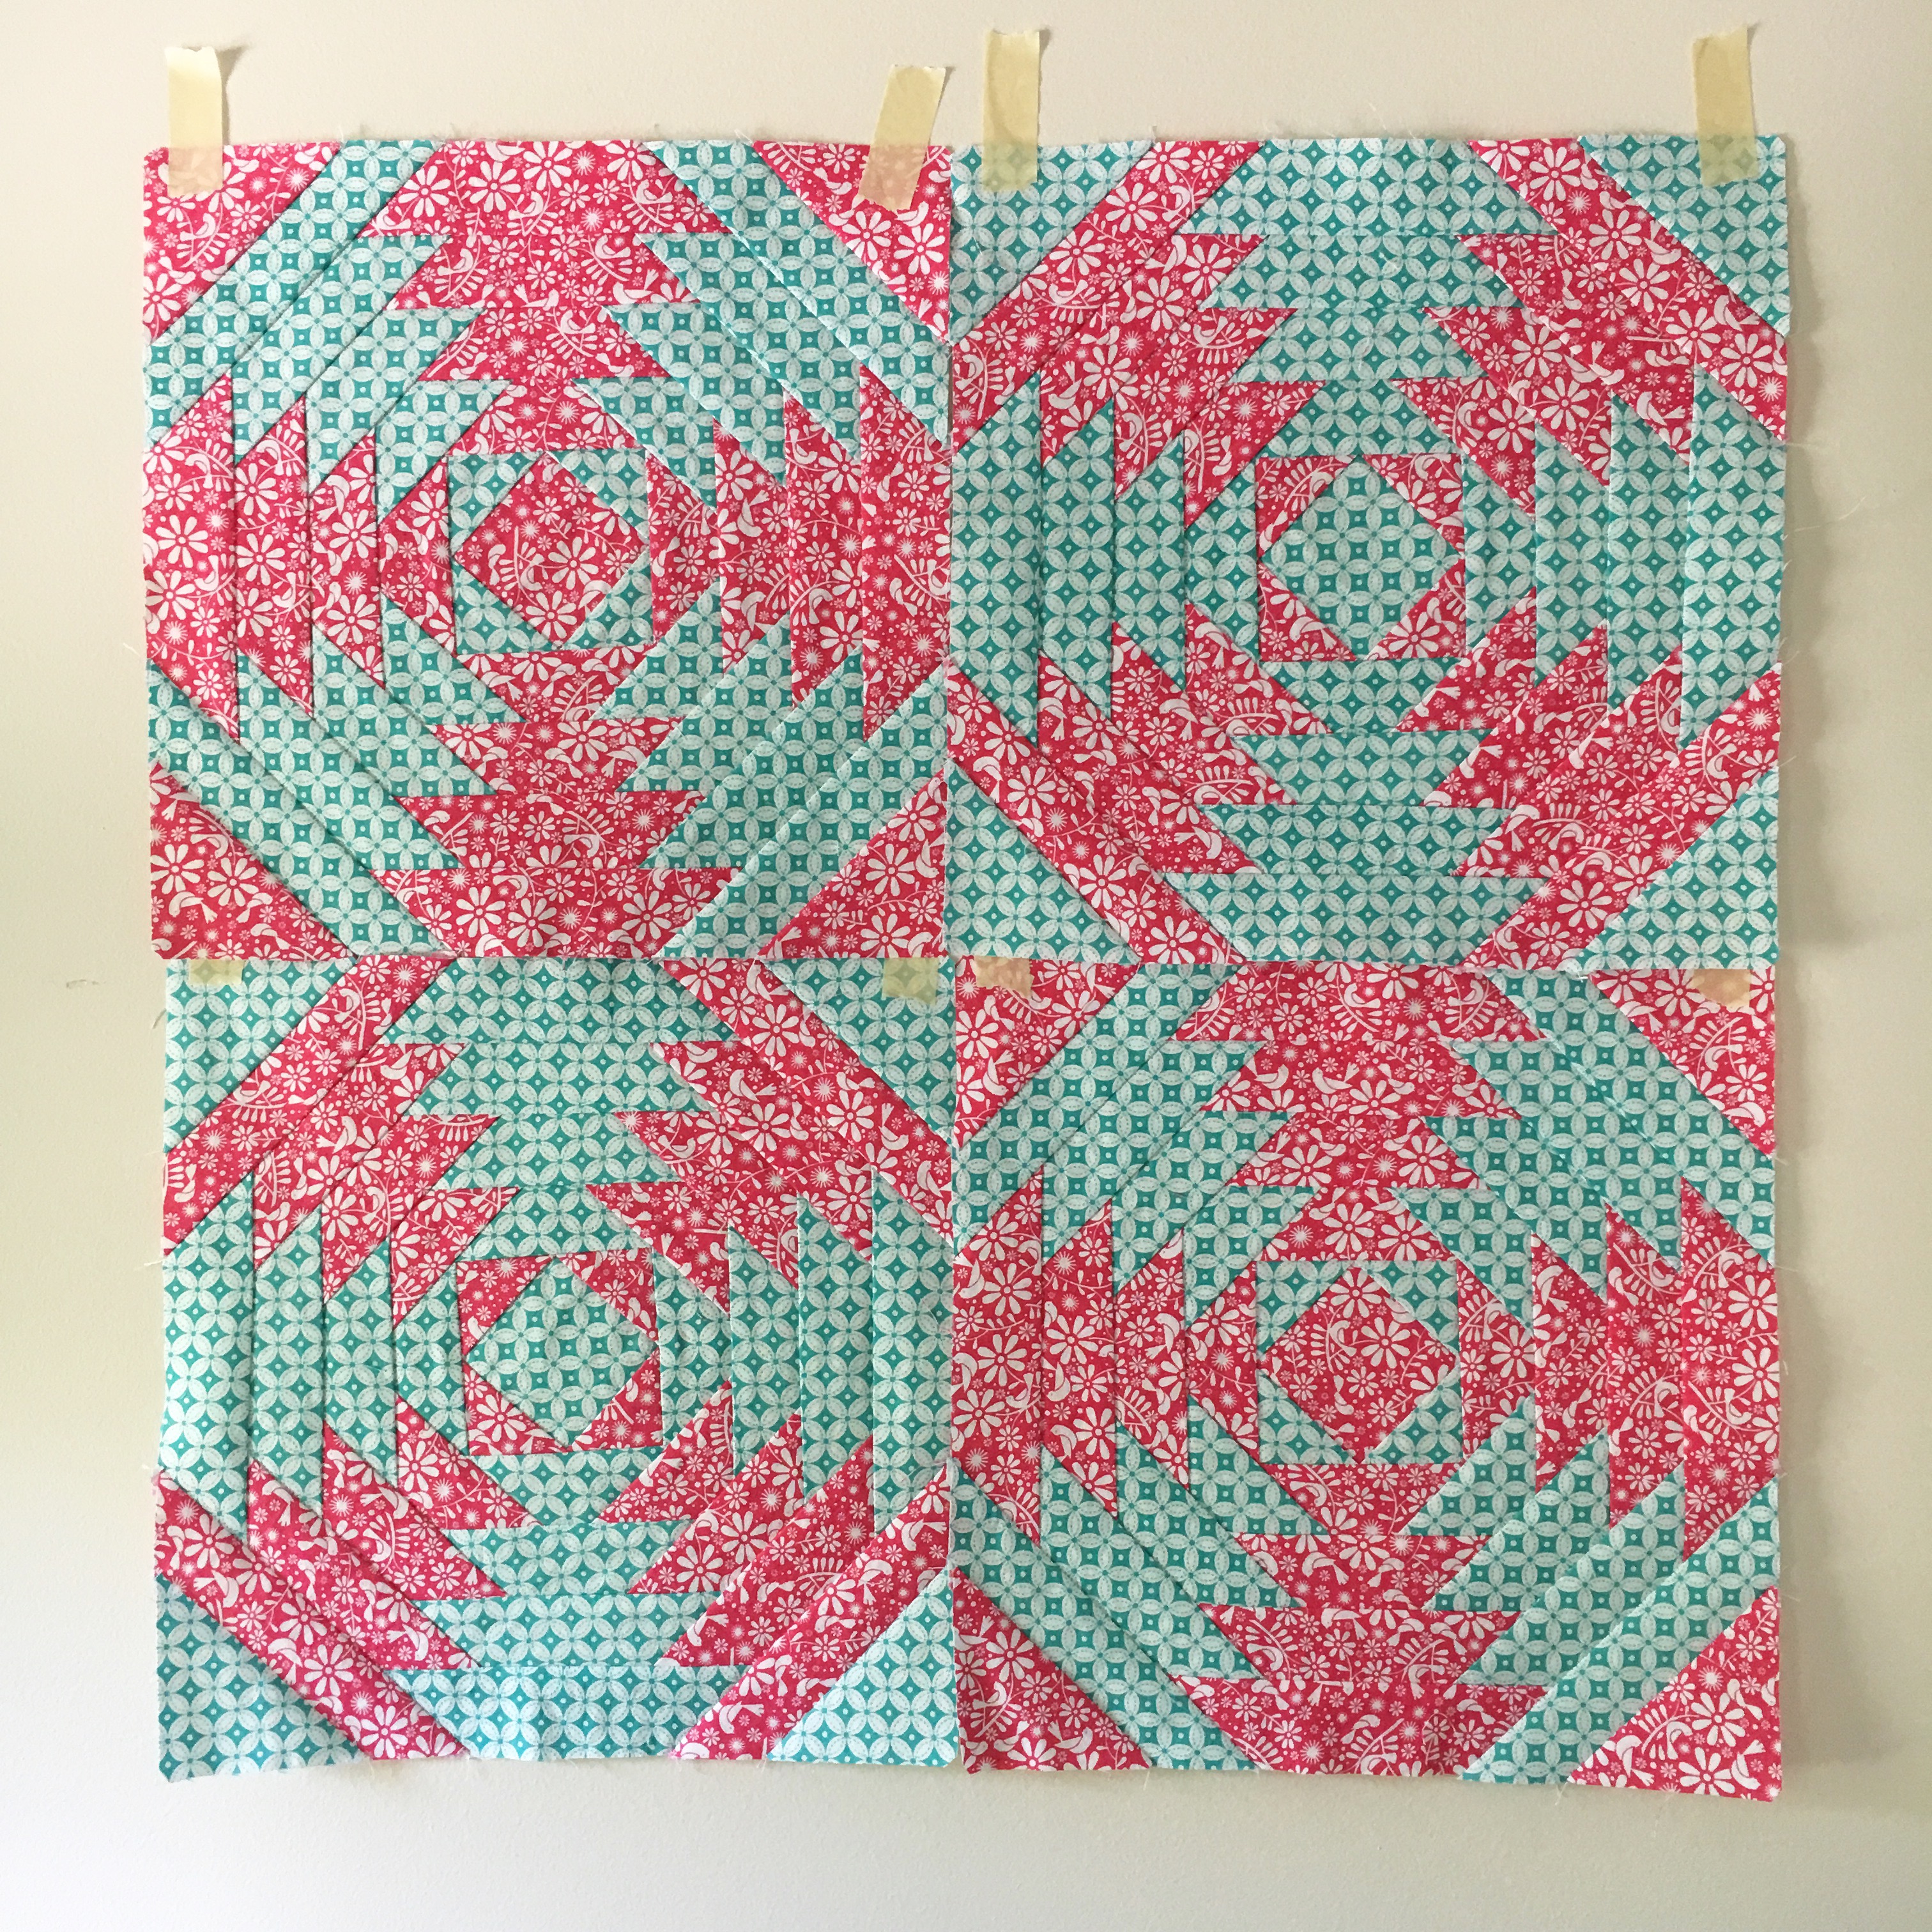
Completed top to my Dazzling Pineapple Patch Quilt
A couple of weeks ago, I finished the top to my Dazzling Pineapple Patch Quilt, the quilt inspired by my obsession with pineapple motifs. Because I have an eye for everything pineapple, my mom sent me a couple of pineapple block templates. I made a mini pineapple quilt as a study to see how the block worked and whether I liked it or not. Well, I loved it and jumped right in.
I wanted to do the block in colors that make my eyes pop. I started with leftover fabric from my mother-daughter matching outfits and some fabric I already had in my stash. After making my first block, I decided that doing less than 4 blocks at a time was too tedious. (There’s a lot of cutting and sewing involved in a single block!) So, I made 4 red and aqua blocks.
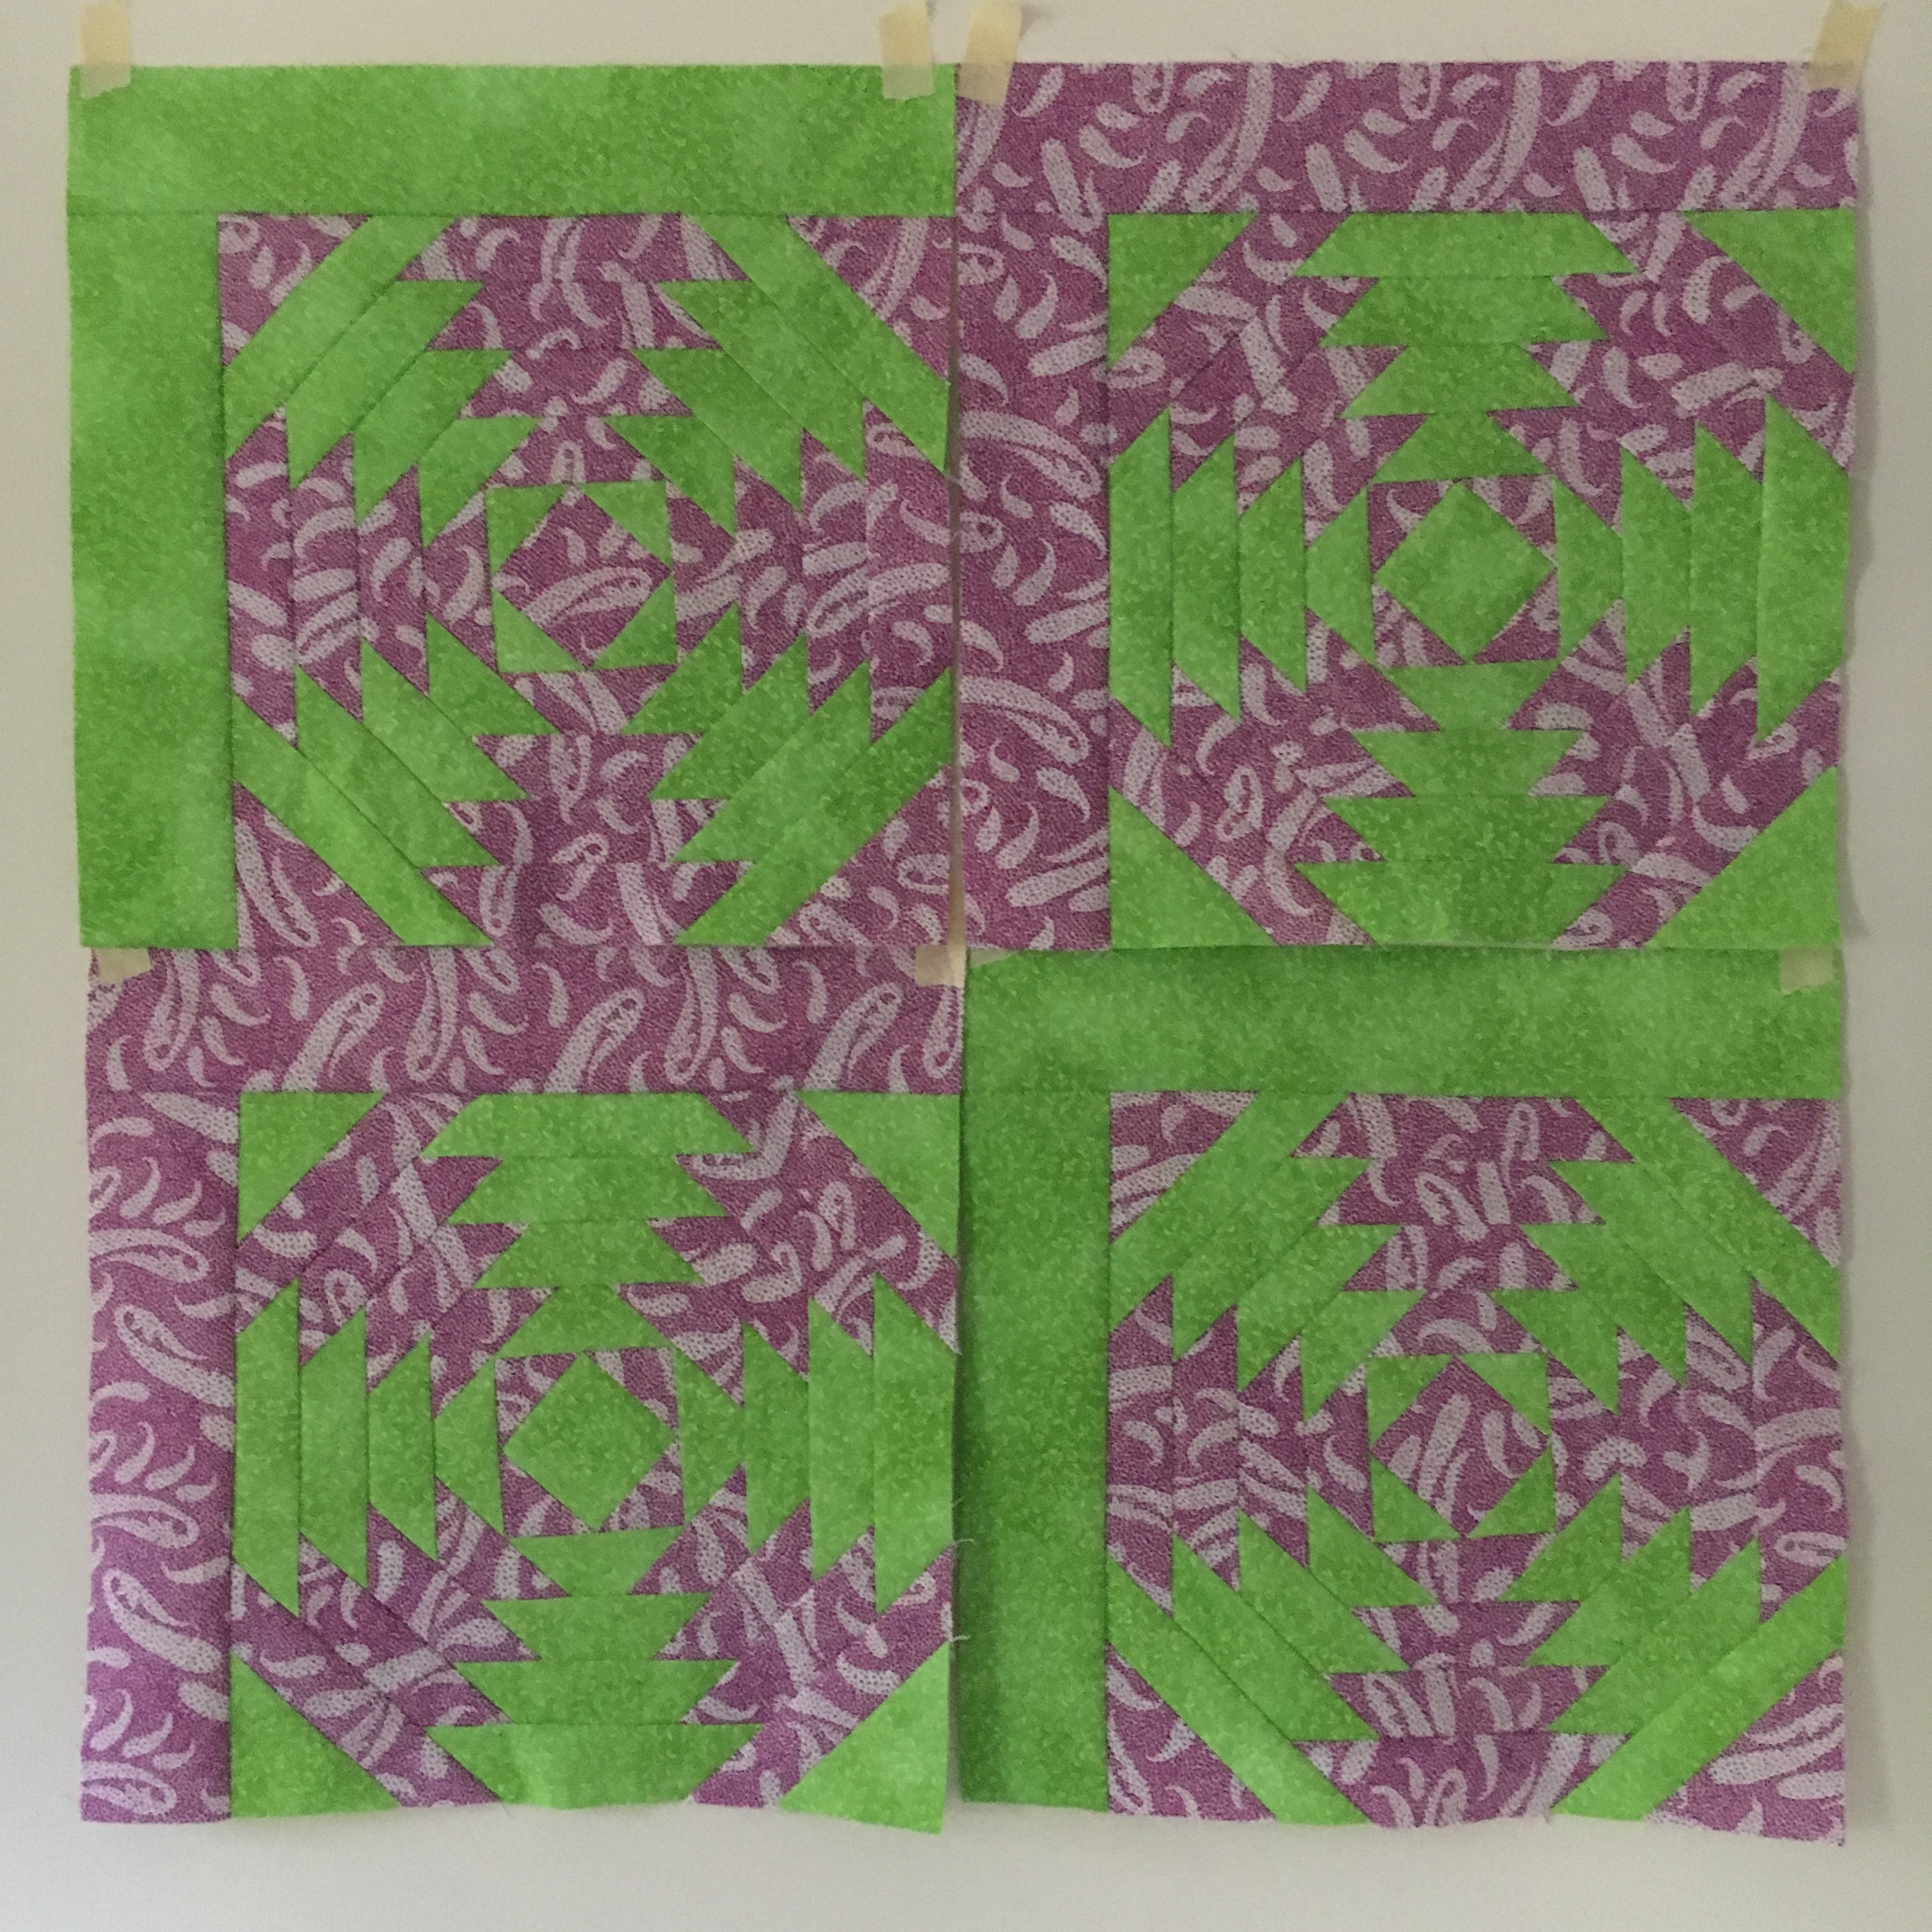
I felt like I needed one more batch of blocks. Digging around my stash, I found the perfect combination of purple and lime green. Again, eye-popping colors.
Third and final set of pineapple blocks in purple and green. Here, the borders are sewn on.
Because I was working with limited yardage of each fabric and I didn’t want to introduce yet another color, I added a border of contrasting fabric to two sides of each block. Then, I arranged the blocks until I was happy with the layout. I added more borders as necessary to give it a finished look. As you can see, I worked from left to right, top to bottom, so the blocks on the right and bottom have more borders of the same fabric.
Completed top to my Dazzling Pineapple Patch Quilt
I think I’ll machine quilt it with a large grid and diagonally. It’s not as large as I would like it to be—it’s a throw or large baby size—but after making 13 pineapple blocks, I’m ready to set my templates aside. I can’t wait to keep working on it, but I have other quilts I want to finish first!
Inspiration for the color palette of a new quilt project can come from a variety of unexpected sources. Look to items that were thoughtfully designed, from packaged food wrappers to clothing.
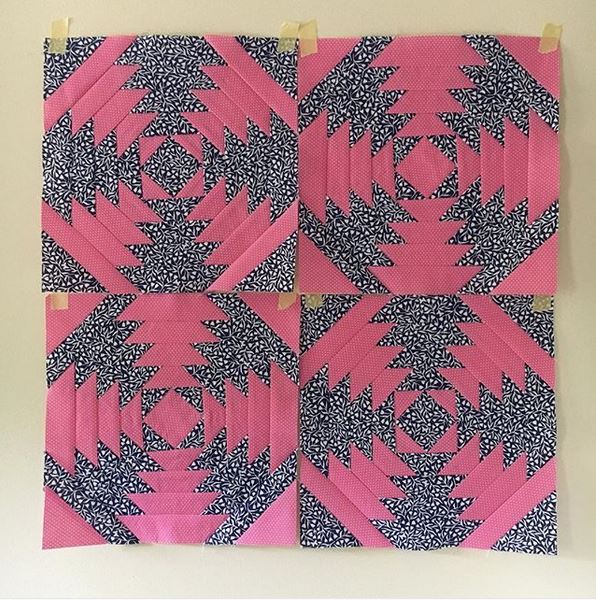
Pink and Navy Pineapple Quilt Blocks
I recently gave color selection some thought after I heard a fellow quilter lament that she had a hard time selecting and coordinating fabrics for quilts and that she ended up just using a lot of bundles of coordinating fabric. And, you know what? There’s no shame in that game! But, I think one of the easiest, eye-pleasing sources of color inspiration is designed objects, like clothing, beauty products, and furniture—anything that has been thoughtfully designed. That is, a designer (or team of designers) have spent a lot of time thinking through and trying different colors for the object. These objects are anything and everything, like packaging, clothing, etc. They’re readily available—pretty much everything you purchase or use on a daily basis has been designed. The colors used for a quilt project don’t have to match the designed object exactly. The colors on the object are for inspiration, not for copying, so this isn’t a meticulous way to go about choosing colors. Once you start seeing the colors used on everyday objects, you’ll discover there are endless sources of eye-catching inspiration.
First, designed objects have been, well, designed. A lot of thought and study went behind choosing the best graphics, colors, and words for the item. A shampoo bottle, button-front shirt, cereal box and more have all been carefully designed. This includes the colors that were and were not included in the design. The designer spent countless hours finessing the colors before it ever got into your hands. Even if it is something as simple as a candy wrapper, the person who designed it knows their stuff. They’ve studied color before and every other facet of graphic design. I know because I have worked at a design agency and sat through many meetings where just the right color was selected. Trust me, they’ve put thought into every detail, especially the color. So, why not use an object that has been professionally designed as a source of color inspiration for your next quilt?
These objects are everywhere. If you’re a quilter, or a crafter/creator of any sort, you have a sense of style. Chances are, if you head to your closet, vanity, or even your pantry, you’ll find an item that you love simply for its design. I’ve bought boxes of tissues because I liked the pattern on the box! You don’t have to go to a specialty or high-end store to find things you love—head to the beauty aisle of your grocery store and you’re sure to find a tube of hand cream with colors that speak to your taste. But, be forewarned, just because someone spent time designing it, doesn’t mean it is “beautiful.” Sometimes designers take a specific approach not because it’s eye-pleasing, but because there’s already a brand of shampoo with a green bottle sold in stores. Or they have to put “VALUE PACK” in giant, bright red font smack dab in the middle. (I speak from past work experience here!) Choose your inspiration carefully.
Finally, the fabrics chosen for a quilt that are inspired by a designed object don’t have to match exactly. Inspiration is a starting point, not directions to be followed or the quilt will self-destruct. Plus, there’s no way to ever find the exact match of colors, even if you’re a fan of solids and love using those little bitty swatches to plan colors. But this is one of the joys of creating: the freedom to break the rules, follow your gut, and find joy in it all.
Liz Claiborne Pink and Navy Nightshirt
I recently made a set of four quilt blocks for my Dazzling Pineapple Patch Quilt using color inspiration from a designed object, specifically a nightshirt I recently purchased. I’m a function over form kind of gal when it comes to my nighttime attire. I found a Liz Claiborne night tee on clearance at JC Penny. I liked it first for the function: a loose, comfortable silhouette in a soft jersey knit. The pattern of the fabric was icing: a tropical print in navy blue and pink-salmon colors. I found this color combination to be surprising. I’ve never thought to pair navy blue and pink. But, a designer at Liz Claiborne thought to put them together! So, when I needed a second colorway for my pineapple quilt, I decided to use this nightshirt as inspiration and purchased fabric in similar colors. As you can see, the colors in my blocks don’t match the shirt exactly (I don’t think my iPhone capture the true colors of the shirt either). That’s okay. The quilt blocks have a similar eye-popping effect as the shirt.
Next time you’re stumped choosing colors for a quilt, use a designed object as inspiration. These objects are meticulously designed by a person who makes a living putting the principles of good design into practice. And, these objects are all around us! From home décor to the wrapper on a granola bar. Precision isn’t a requirement. Use the designed object as inspiration and feel the freedom of not having to use exact color matches. You just may find yourself using colors and combinations you’ve never thought to before!
New storage bins filled with 2 of my in-progress quilts.
I recently decided that my office/sewing/crafting room needs to be about 1000x more organized than what it is. I’m slowly, but surely, tackling this task.
First up was organizing my in-progress quilts. I have 3 quilts that are in different stages of completion. One is clearly in need of being finished first and I have moved it to the front burner. The other two have been pushed to the back burners—or should I say, into storage bins? My Dazzling Pineapple Patch Quilt and my Down the Rabbit Hole Quilt are neatly tucked into these bins, but they won’t be forgotten!
The bins have EVERYTHING I need for these quilts. The Down the Rabbit Hole Quilt has an extensive pattern and lots of templates. All of this is at the bottom of the bin. All of the fabric I’ve been using is in the bin. The partially finished top and partially finished, unattached borders are in the bin. Ditto for the Dazzling Pineapple Patch Quilt—everything is in the bin.
My quilting/sewing notebook.
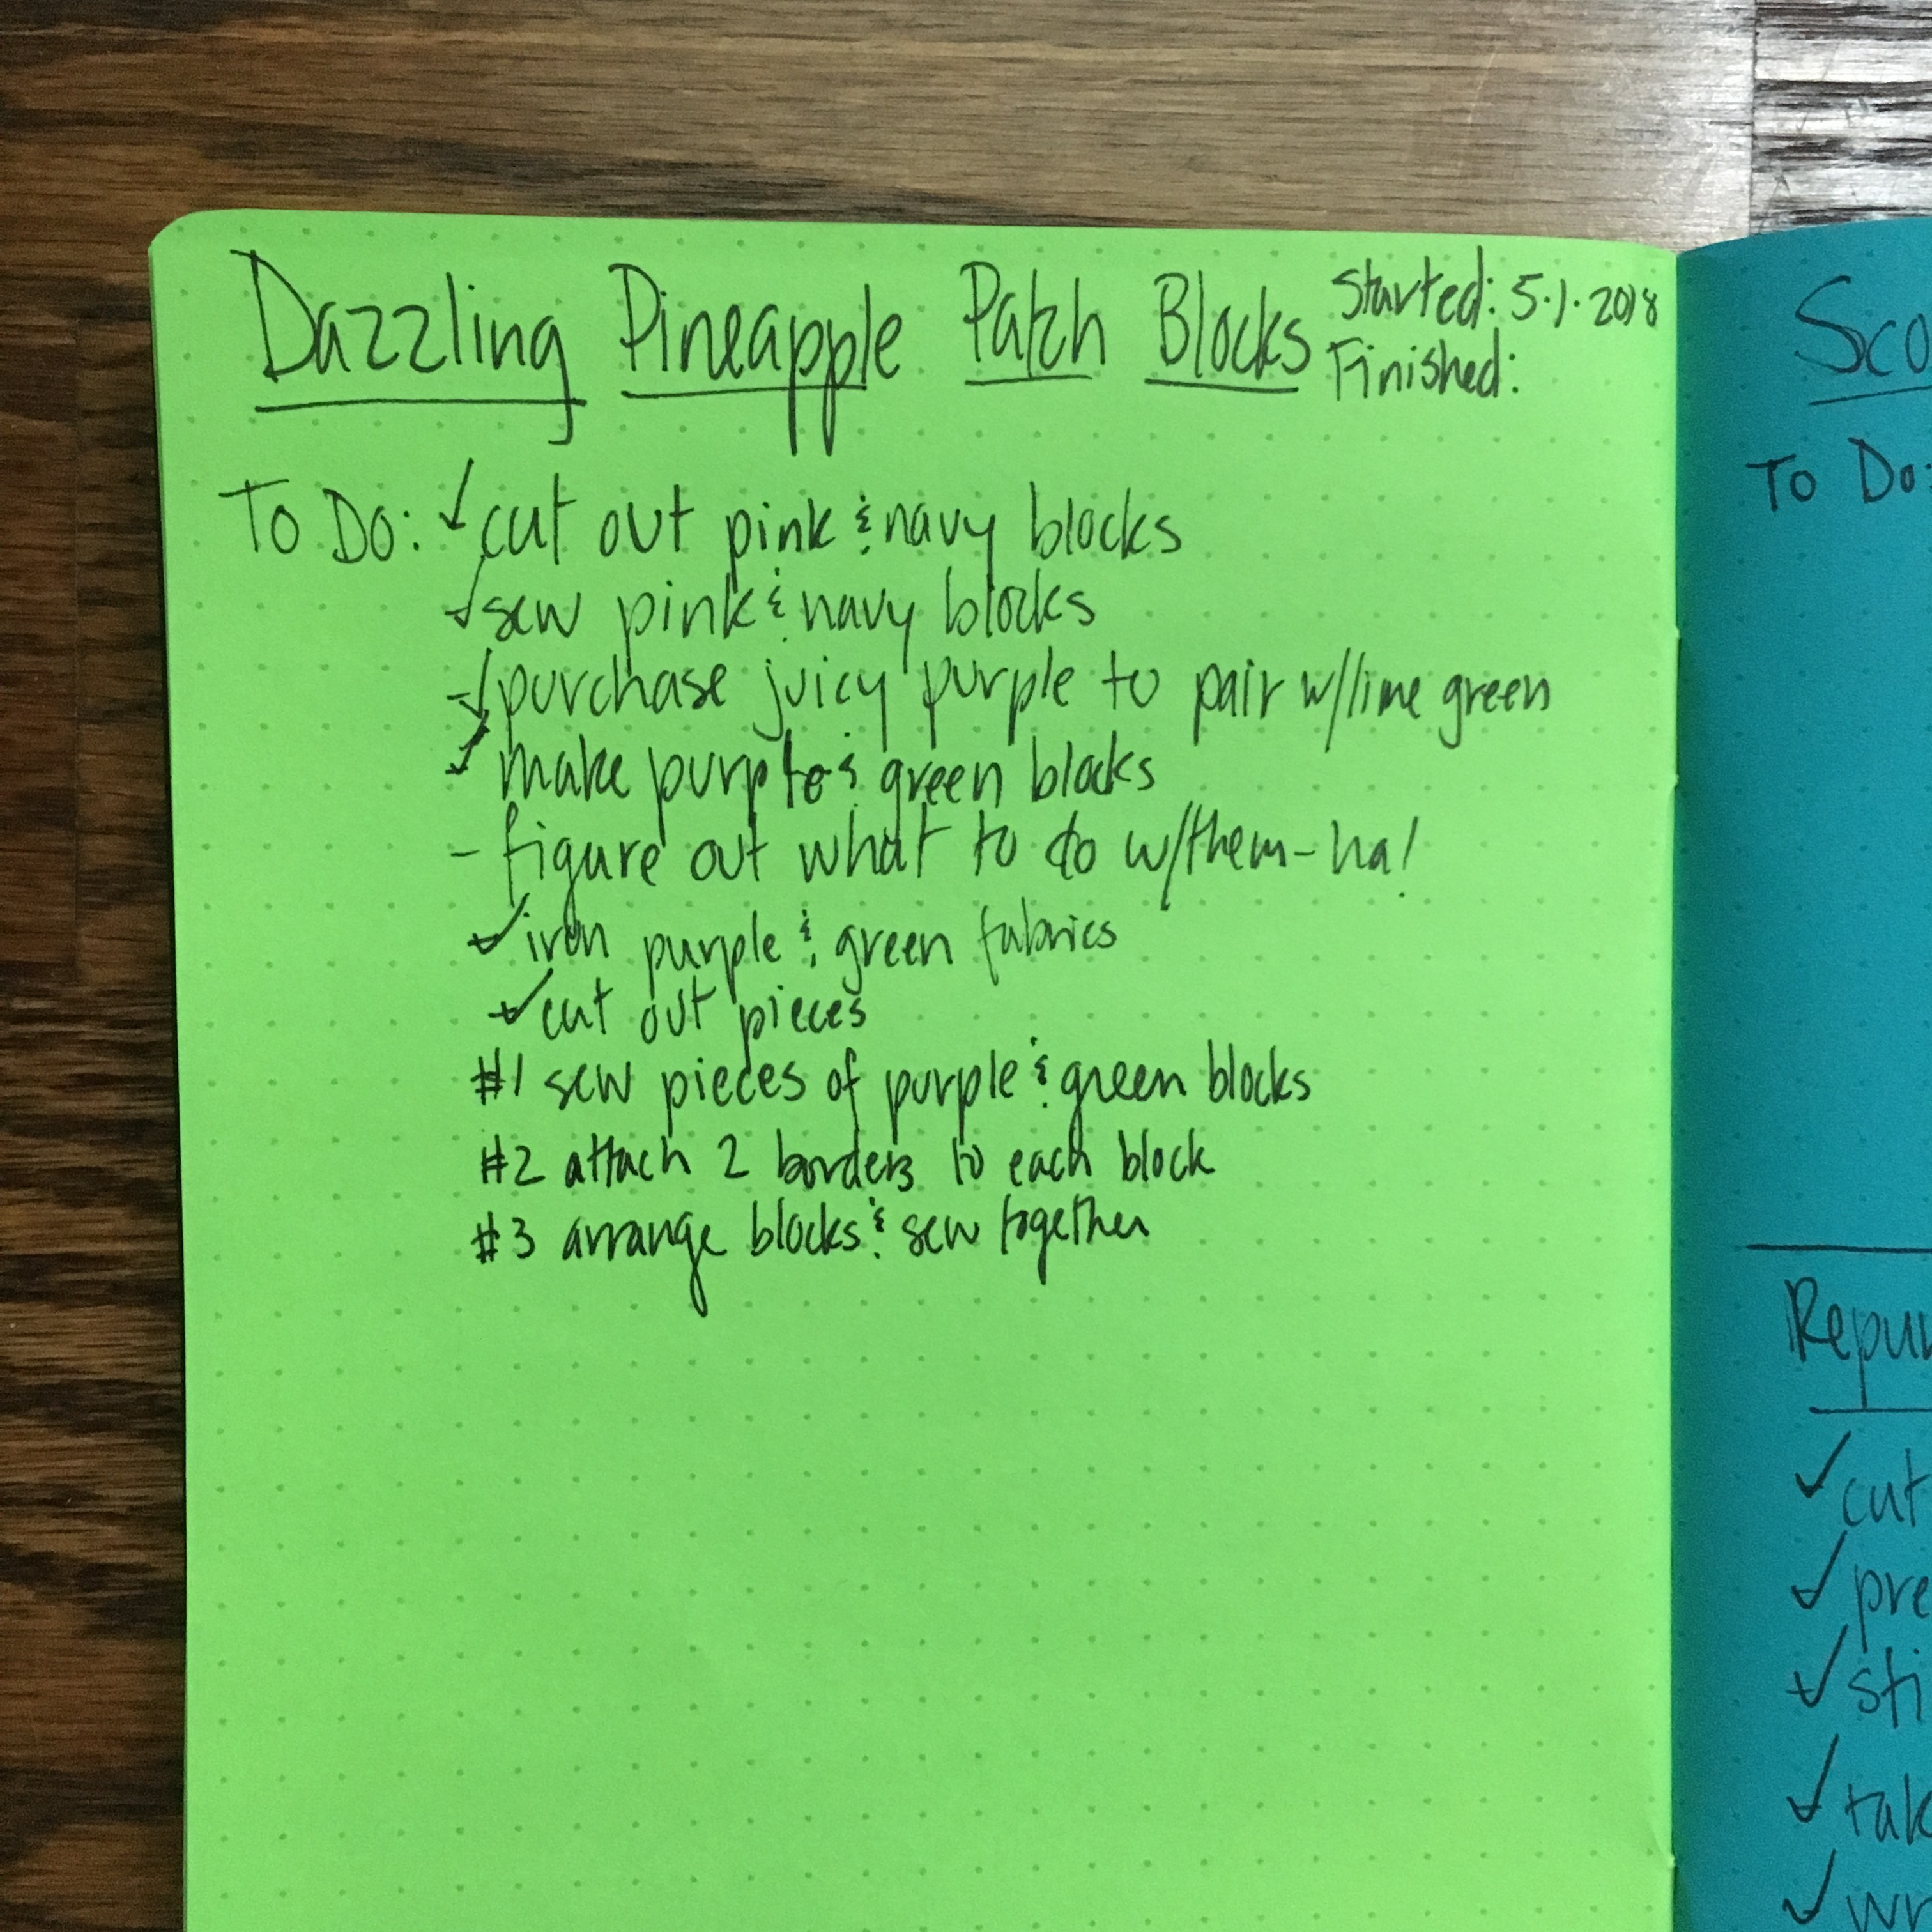
To make it easier to quickly pick back up where I left off with these quilts, I started a quilting/sewing notebook. I’ve written each quilt or project at the top of a page and listed out what needs to be done. Sometimes I write steps out, work on the quilt, and then re-prioritize the steps. Not a big deal. These are just quick notes to jump-start progress when I’m ready.
My notes on what needs to be done next with my Dazzling Pineapple Patch Quilt.
Organizing the rest of the room is going to be a slow process, but it has inspired a couple of things. First, I now feel a new motivation to HURRY UP AND FINISH a handful of projects that are in various stages of completion. (This, of course, doesn’t apply to those 2 quilts sitting quietly in their bins—ha!) I have an afghan that needs to be repaired. I have a quilt with binding that is falling off. I have half a dozen painted secondhand picture frames that just need to be reassembled. For some good old-fashioned organization, I’m ready to start seriously tackling these projects and moving them out of the room.
Also, I have discovered that I’m at willing to put a lot of other crafts on hold indefinitely. That is, I’ve always dabbled in this and that—paper crafting, painting objects, knitting/crocheting—but, I’m ready to simplify to make more time and space for quilting. Not that I have a ton of that kind of stuff, but it’s enough. Of course, this is a chicken-egg situation: did my desire to organize spawn the willingness to reduce my craft supplies; or is my craft-downsizing motivating my organization? I don’t know, but I’m rolling with it!
Sometimes my first attempt isn’t my best. (Surprise!) Five years after making it, I have finally fixed the droopy top of the chicken wall hanging in my kitchen.
Sagging top–you can even see the middle hook!
I started this chicken wall hanging back in 2012 and maybe finished in 2013. It’s all a little hazy. The pattern is “Ditzy Chicks” by Sharon Berna of Redbird Designs. I love the pattern because I love chicken décor in my kitchen. I enjoyed starting this wall hanging because I began when my mom was visiting and we picked out the fabric together and she even helped me do the appliqué. Buuuut, this felt way more like a craft project than a quilt, probably because I wanted chicken décor for my kitchen, not because I necessarily wanted to make a quilt. (I have since changed, of course.)
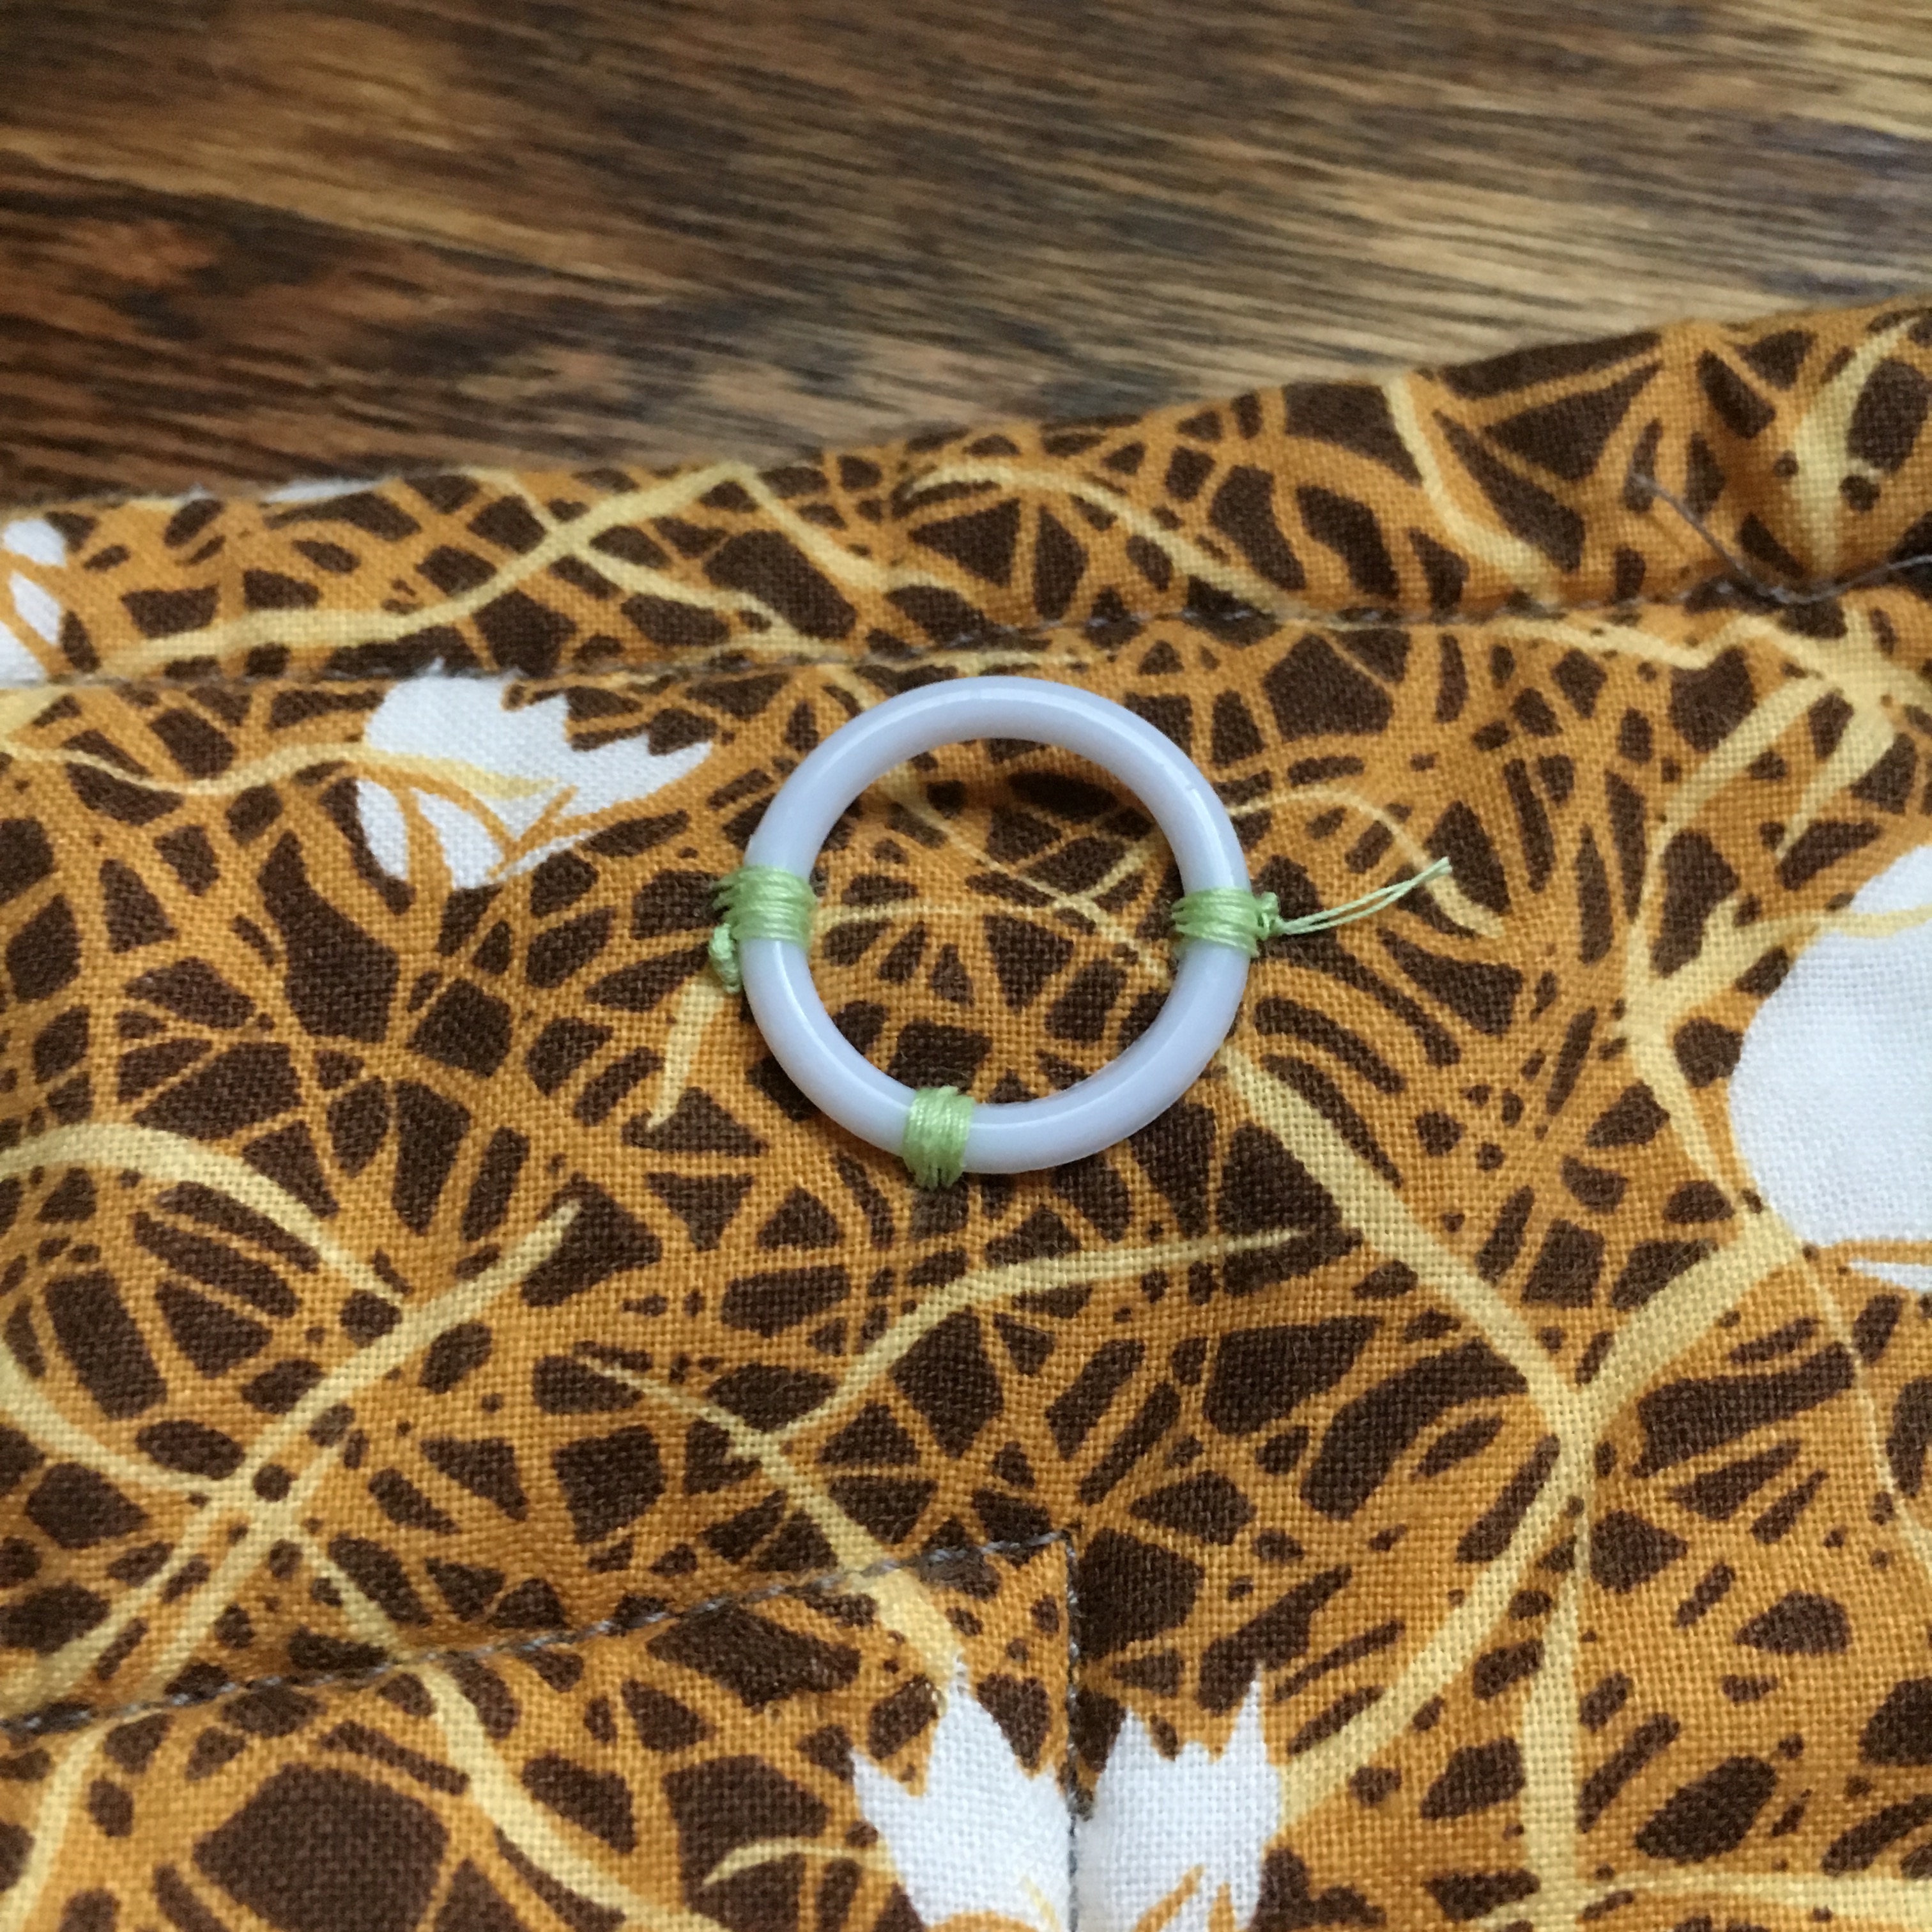
As an amateur, I stitched plastic rings to the top of the back “wherever seemed good” and then stuck a trio of Command hooks on my kitchen wall. Well, the top 2-3” have always drooped. It took me so long to complete the darn thing and a whole lot of motivation, I just ignored it, until recently, when I decided to remedy the droop—or, at least, decided to attempt to remedy.
The plastic rings before: stitched on only at the bottom.
First, I took the wall hanging off the hooks. It was dusty—hello, it hadn’t been touched in 5 years! So, I popped it into the washer. Luckily, I’m in the prewash camp, so I didn’t have to worry about colors bleeding or shrinkage. Of course, it still came out a bit wrinkly. That just adds charm, right?
Next, one by one, I snipped off each plastic ring and raised it so that the top of it was about 0.75” from the top of the wall hanging. (I did a bit of measuring, math, and testing to ensure that the wall-mounted hooks wouldn’t show after the wall hanging was up.) I stitched the rings down at three points: 90, 180, and 270 degrees. (I feel hella-fancy describing it in that manner, by the way.)
The plastic rings after: stitched down at 3 points.
After all the plastic rings were repositioned, I added one more thing: one of my brand-new quilt labels! Sure, this is NOT my best work (please don’t look at the quilting—what was I thinking?!), but I think it’s important to label your work. For me, it feels even more so, since I have kids. My 3-year-old son immediately noticed that this wall hanging was gone when it was in the wash. He asked why I took down the chickens. This piece of handmade décor is being ingrained in his childhood memories. With any luck, I’ll get to hand it down to one of my kids.
Here’s hoping this chicken wall hanging will stay up on the wall another five years when I decide to wash the dust off again!
Ta-da! The non-droopy, not sagging wall hanging. Of course, now it’s a bit wrinkly from the wash. I’m going to consider that “charm”…at least until I’m motivated to steam it. 😉
Not all sewing is glamorous and Insta-worthy. Nope. Sometimes I’m stitching things I need or making the most out of some fabric so it doesn’t end up in a landfill.
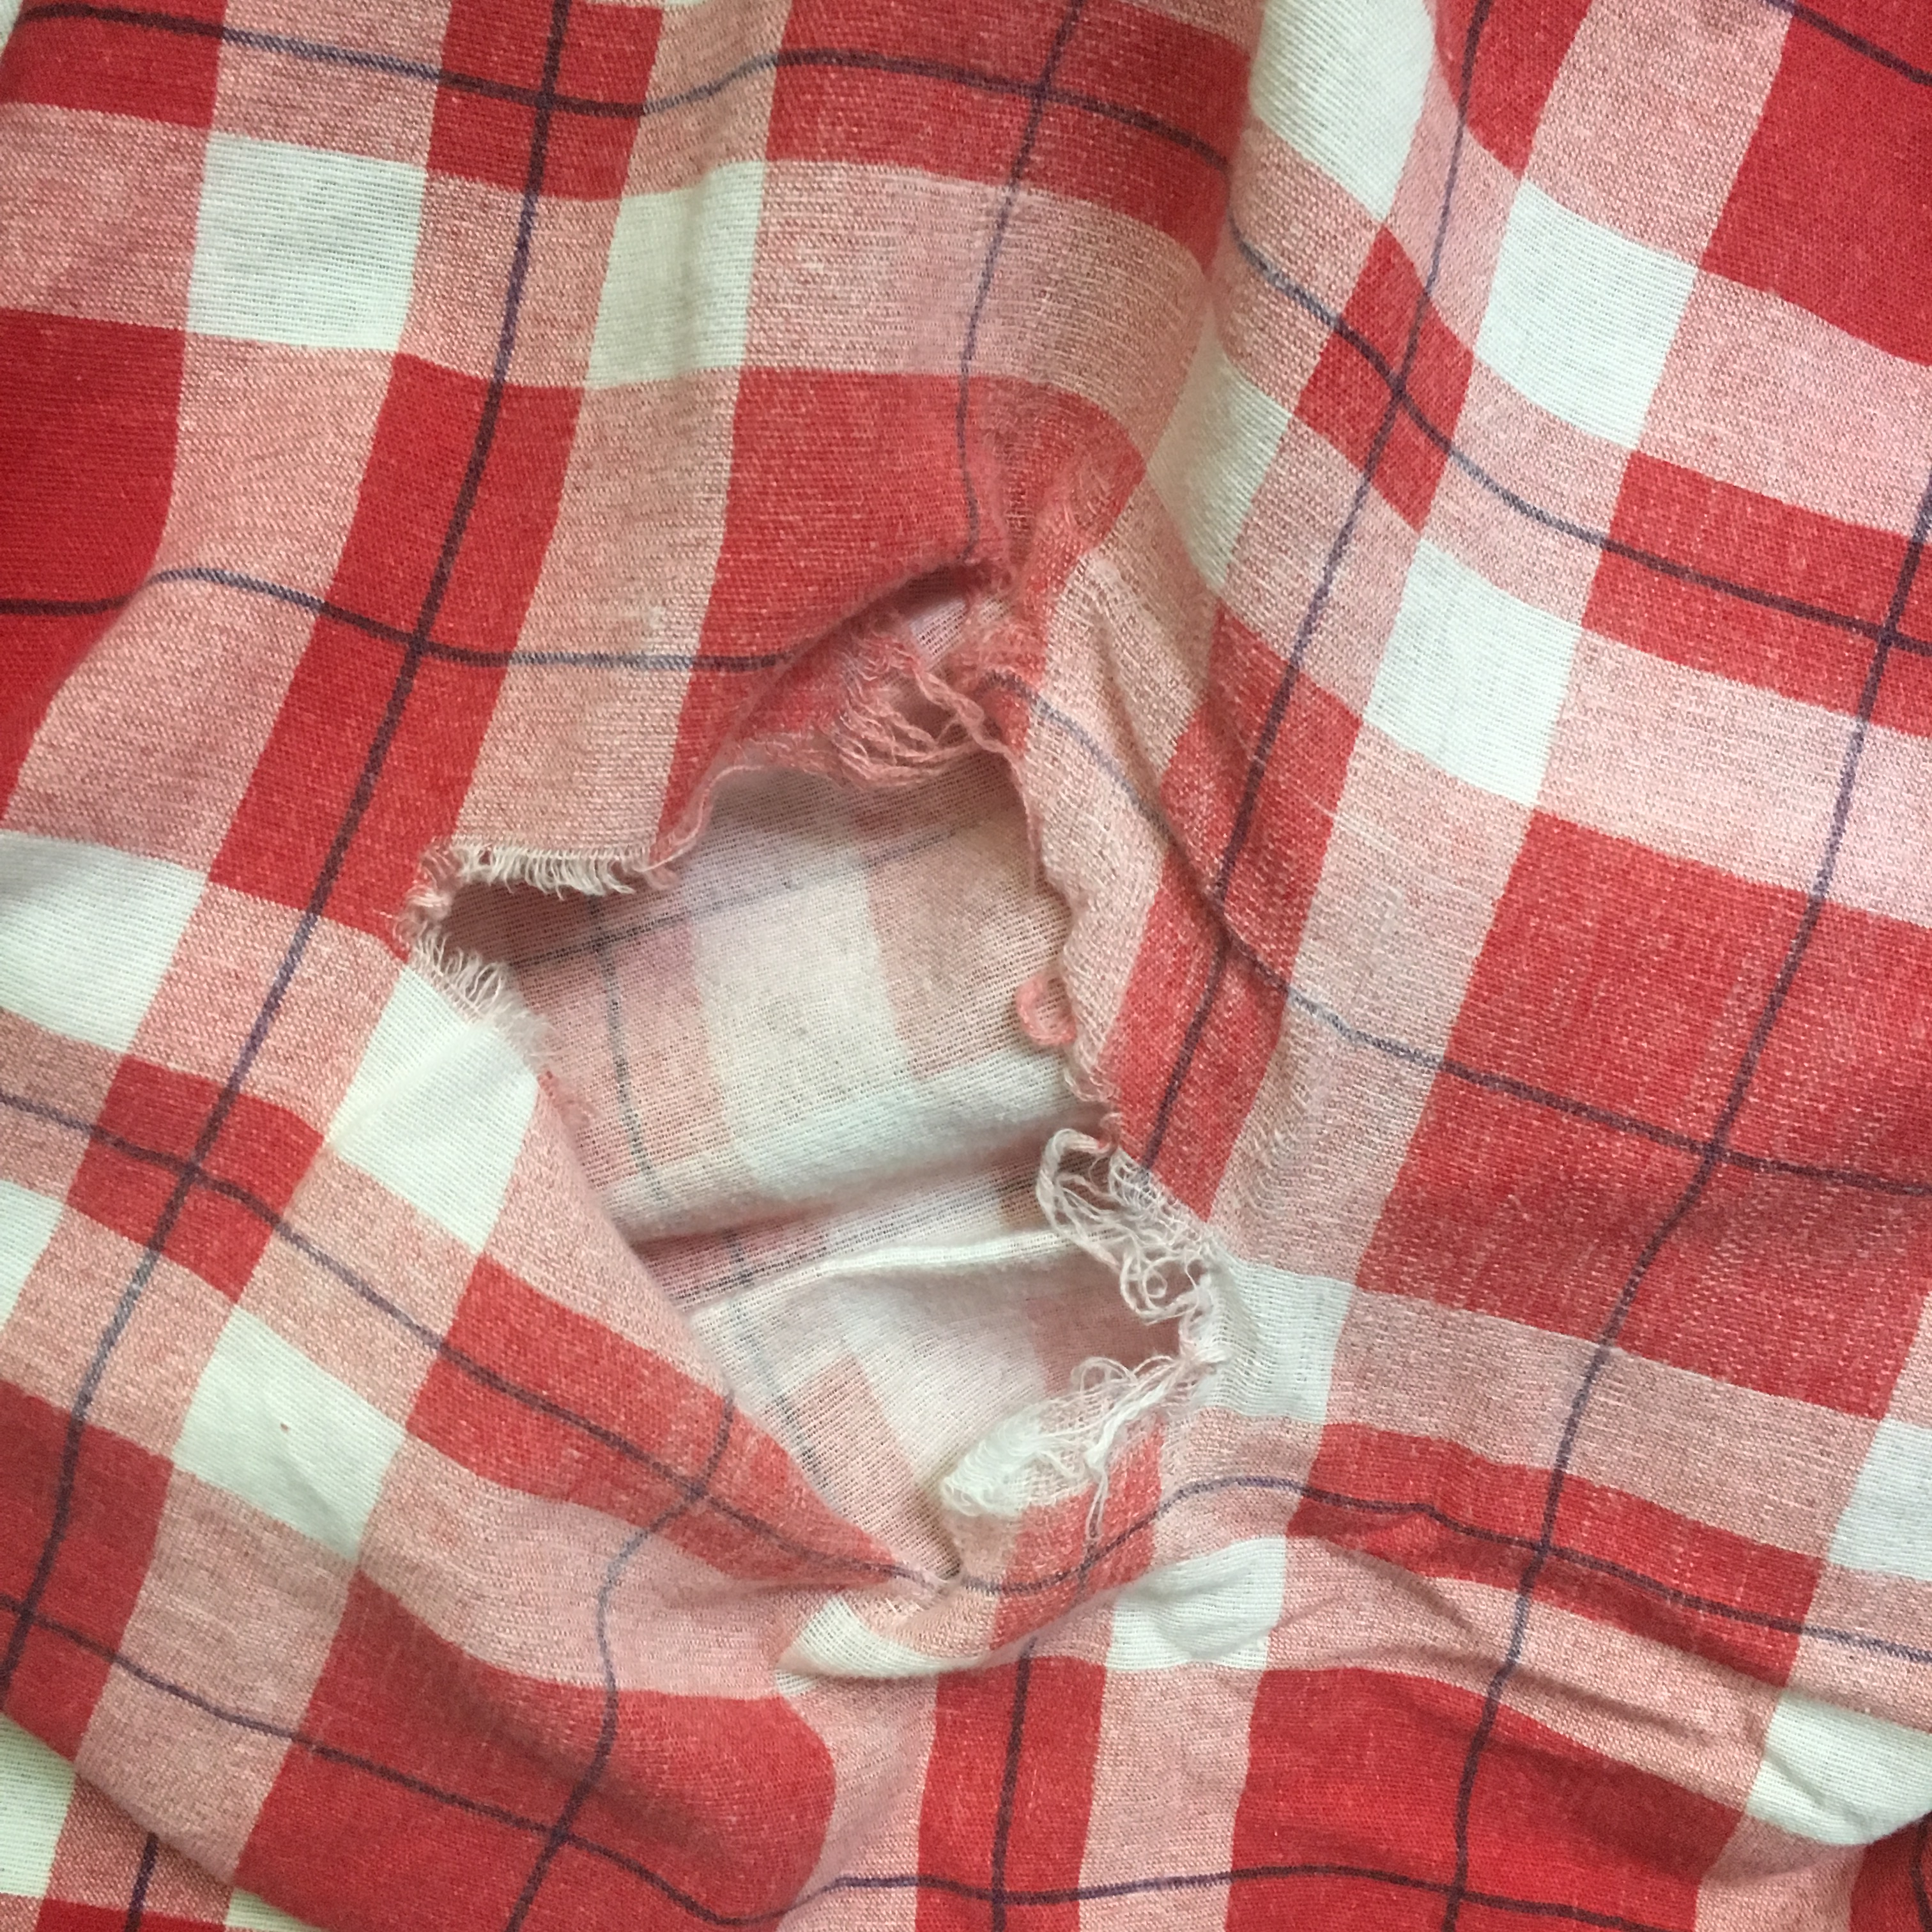
Apparently, I like to run marathons in my sleep, because I wore a hole in a flannel fitted sheet. Now, to my defense, these are fast home décor (think fast fashion, but with home décor). We’ve only had the sheets for a couple of years (and use them seasonally because they’re flannel), but still, a hole showed up.
To my credit, I made the hole larger so that I WOULD NOT MISS IT and try to put it back on the bed.
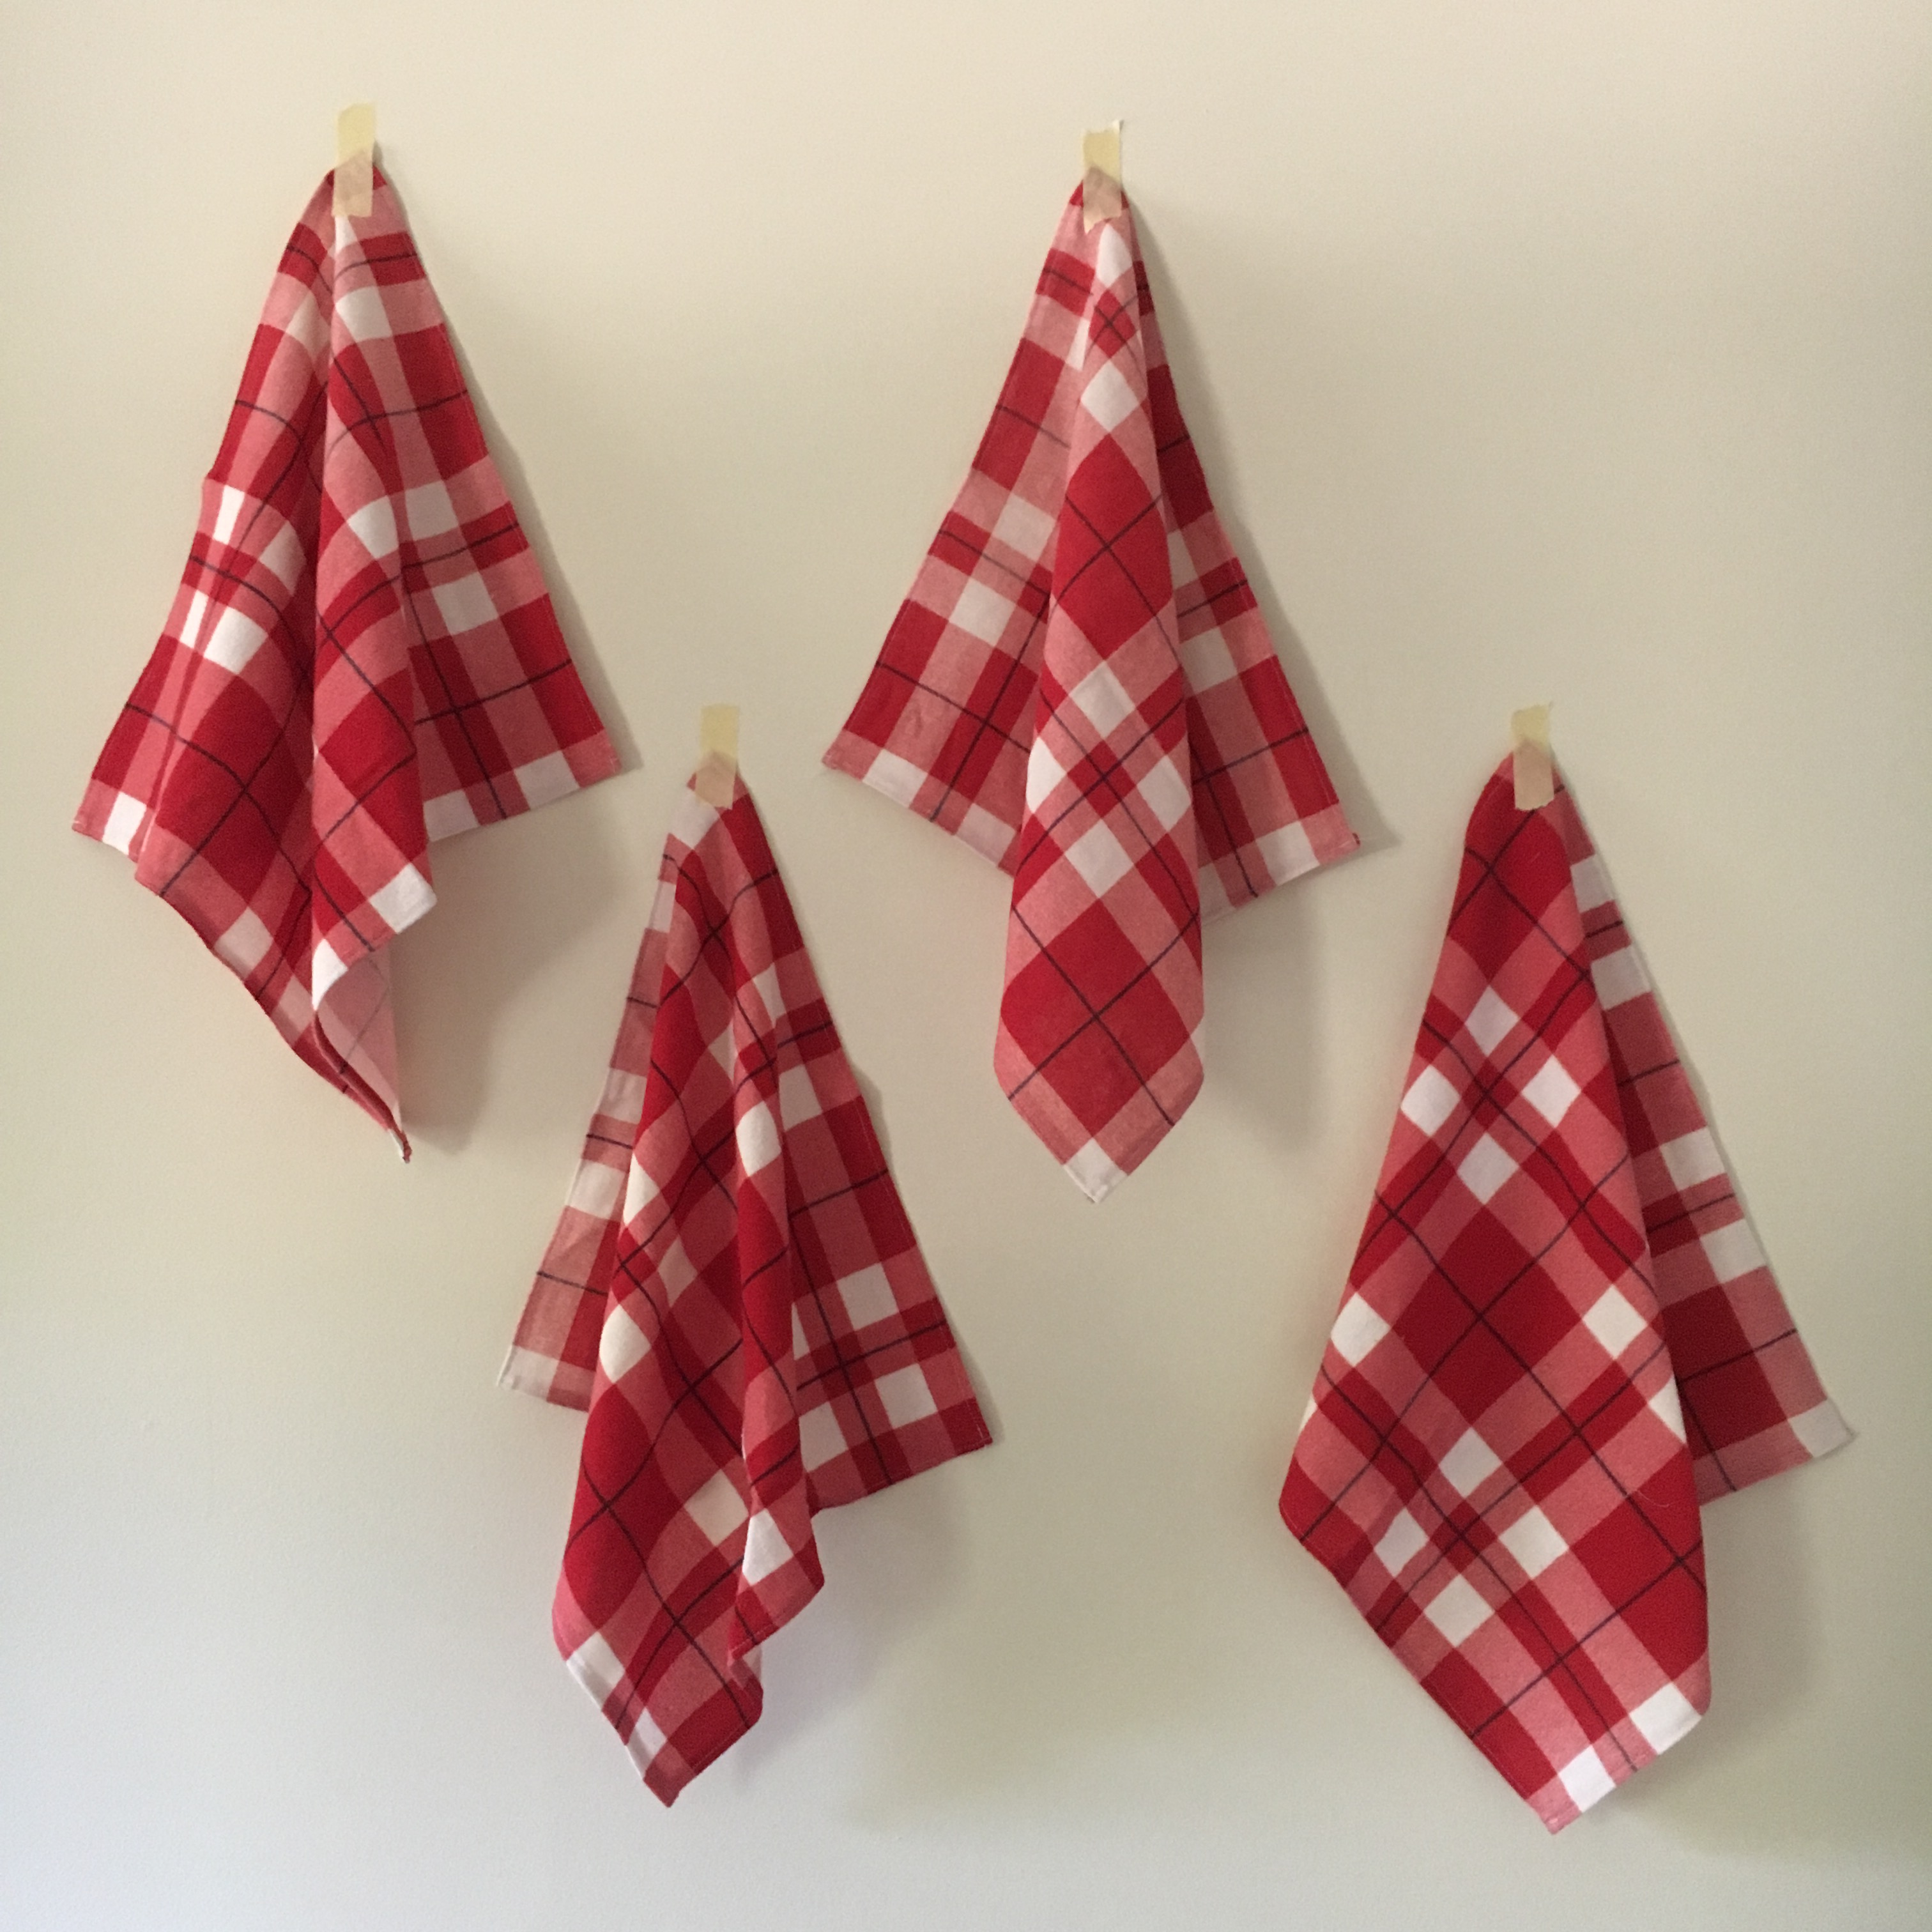
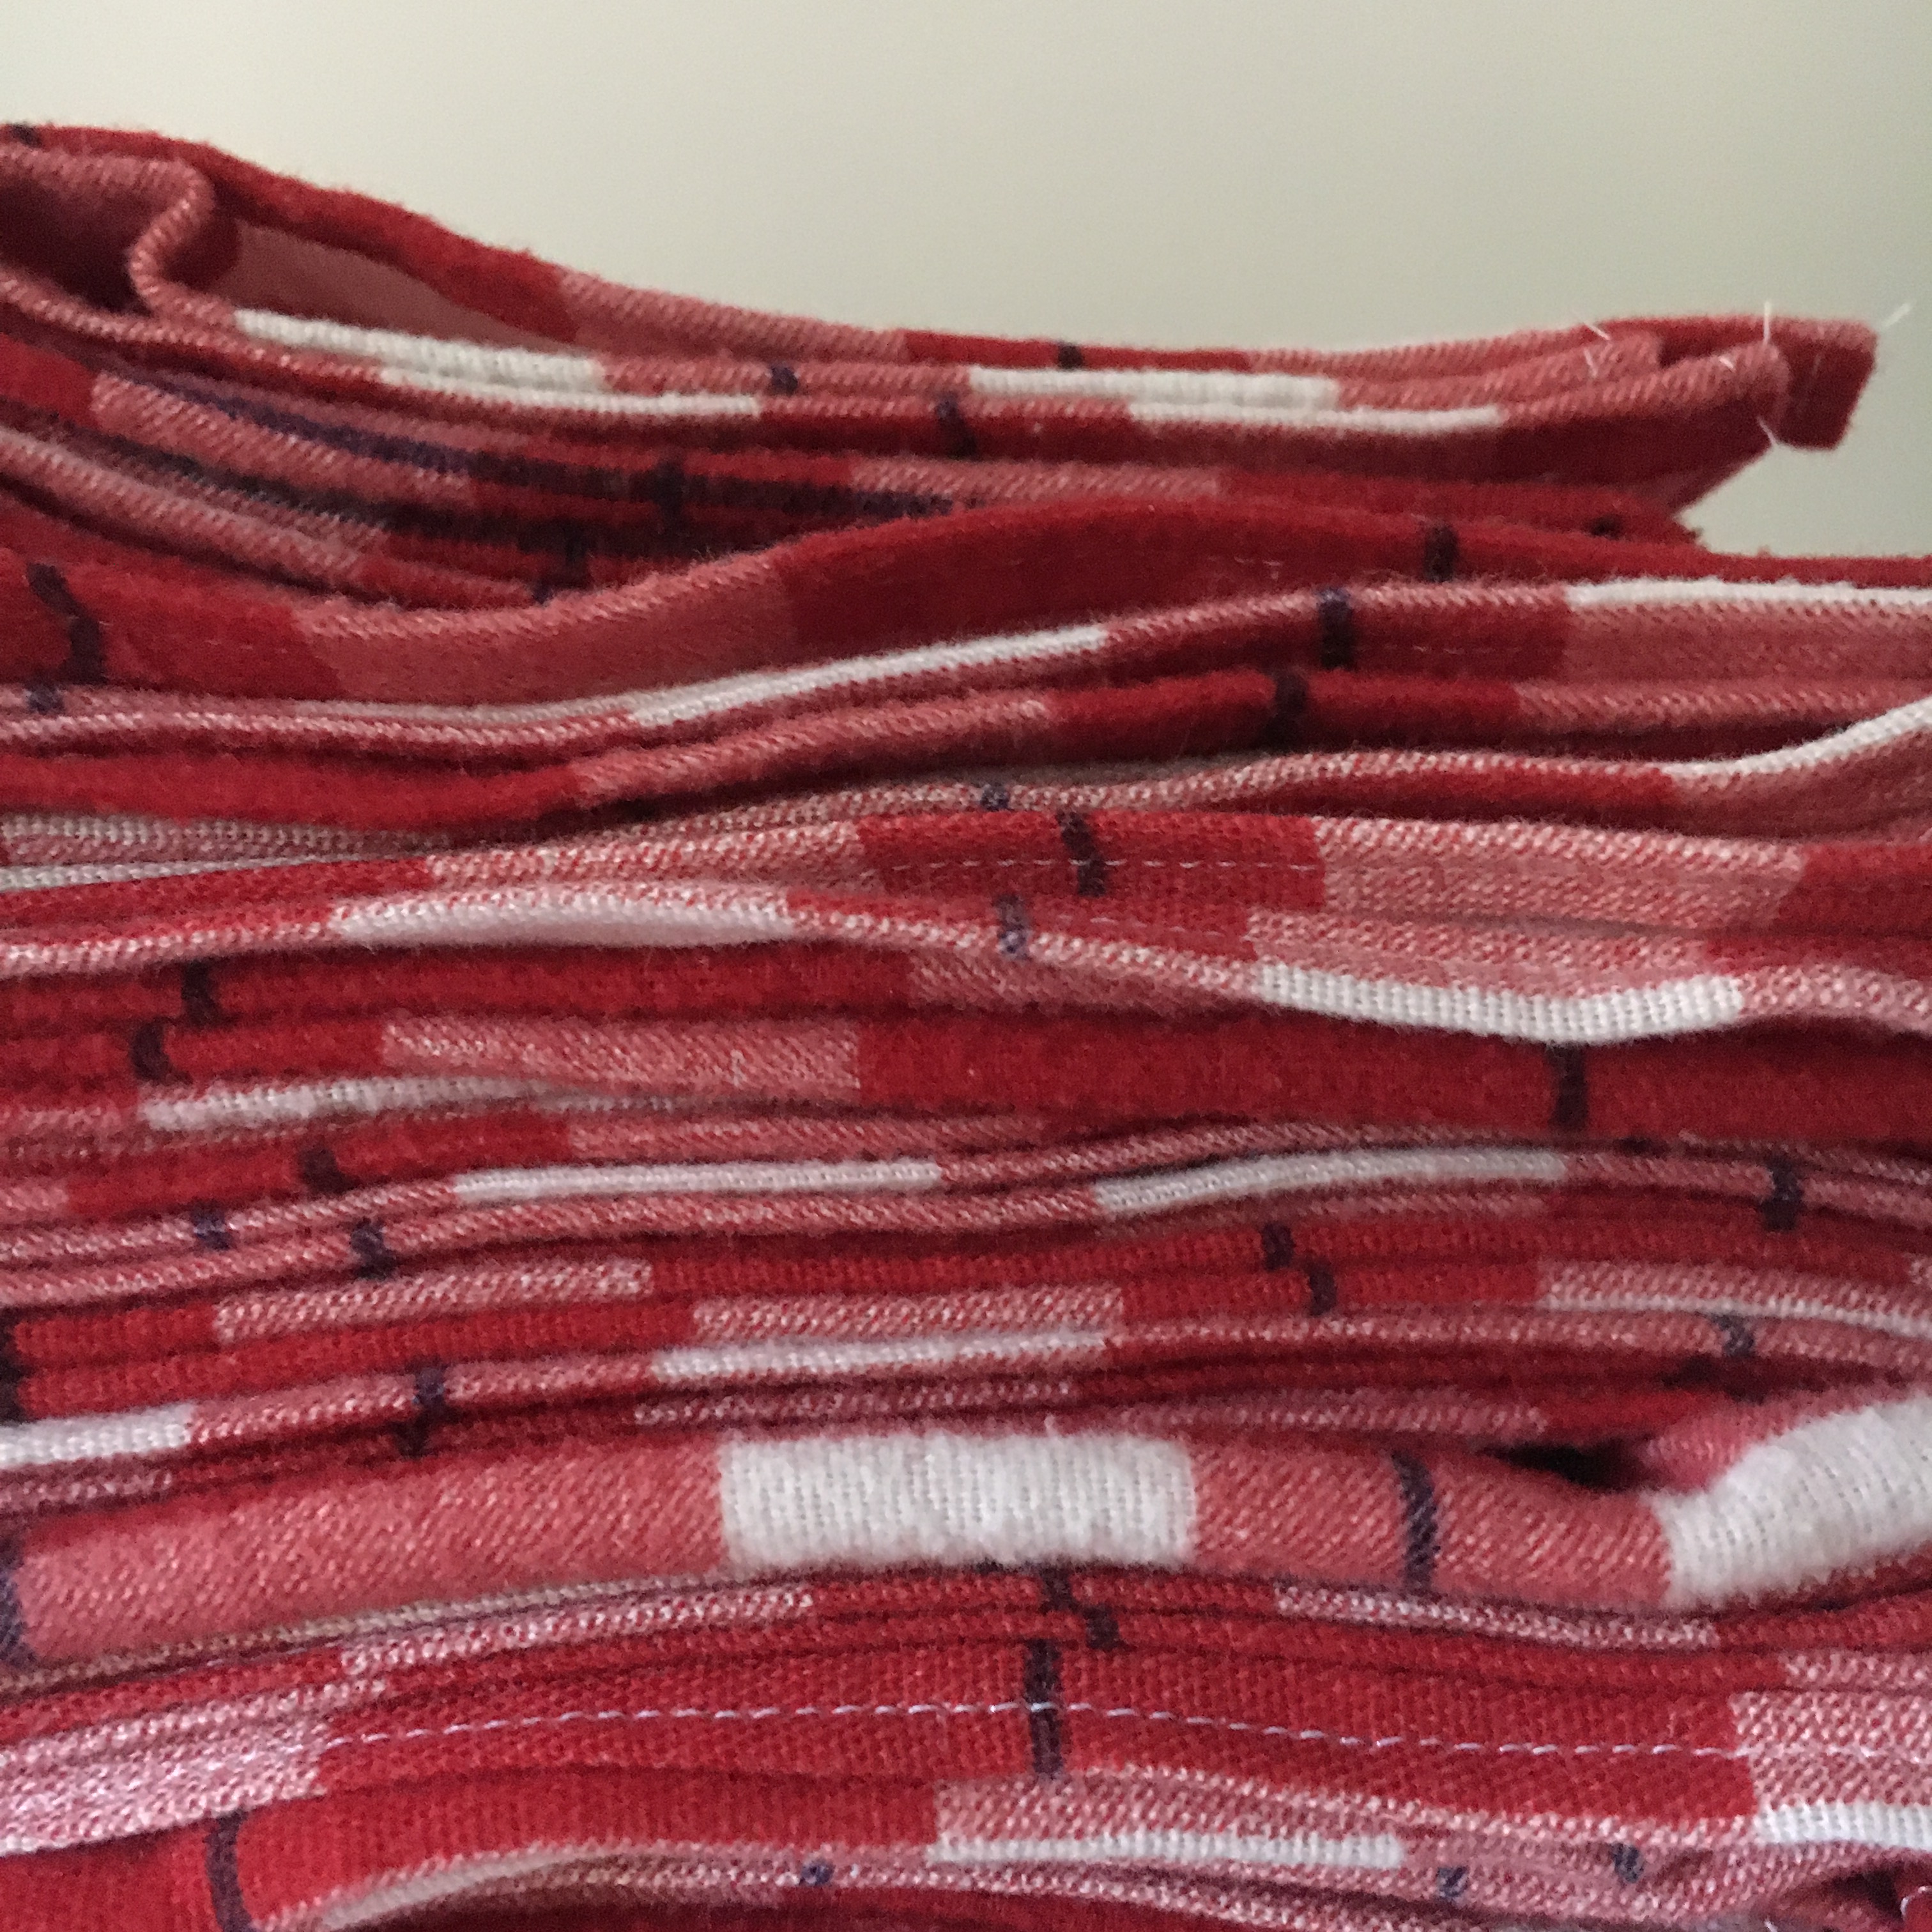
The sheet is queen-size. That’s a lot of fabric without a hole. I washed the sheet and kept it because I knew I’d think of something to use it for. Finally, I decided on handkerchiefs. I grew up using handkerchiefs, or hankies, when I had a cold. Granted, they’re gross. You blow your nose on them. And, you don’t throw them away like you would with a tissue. But, because you DON’T throw them away, you always have one handy. Also, you don’t have to remember to buy tissues or use toilet paper.
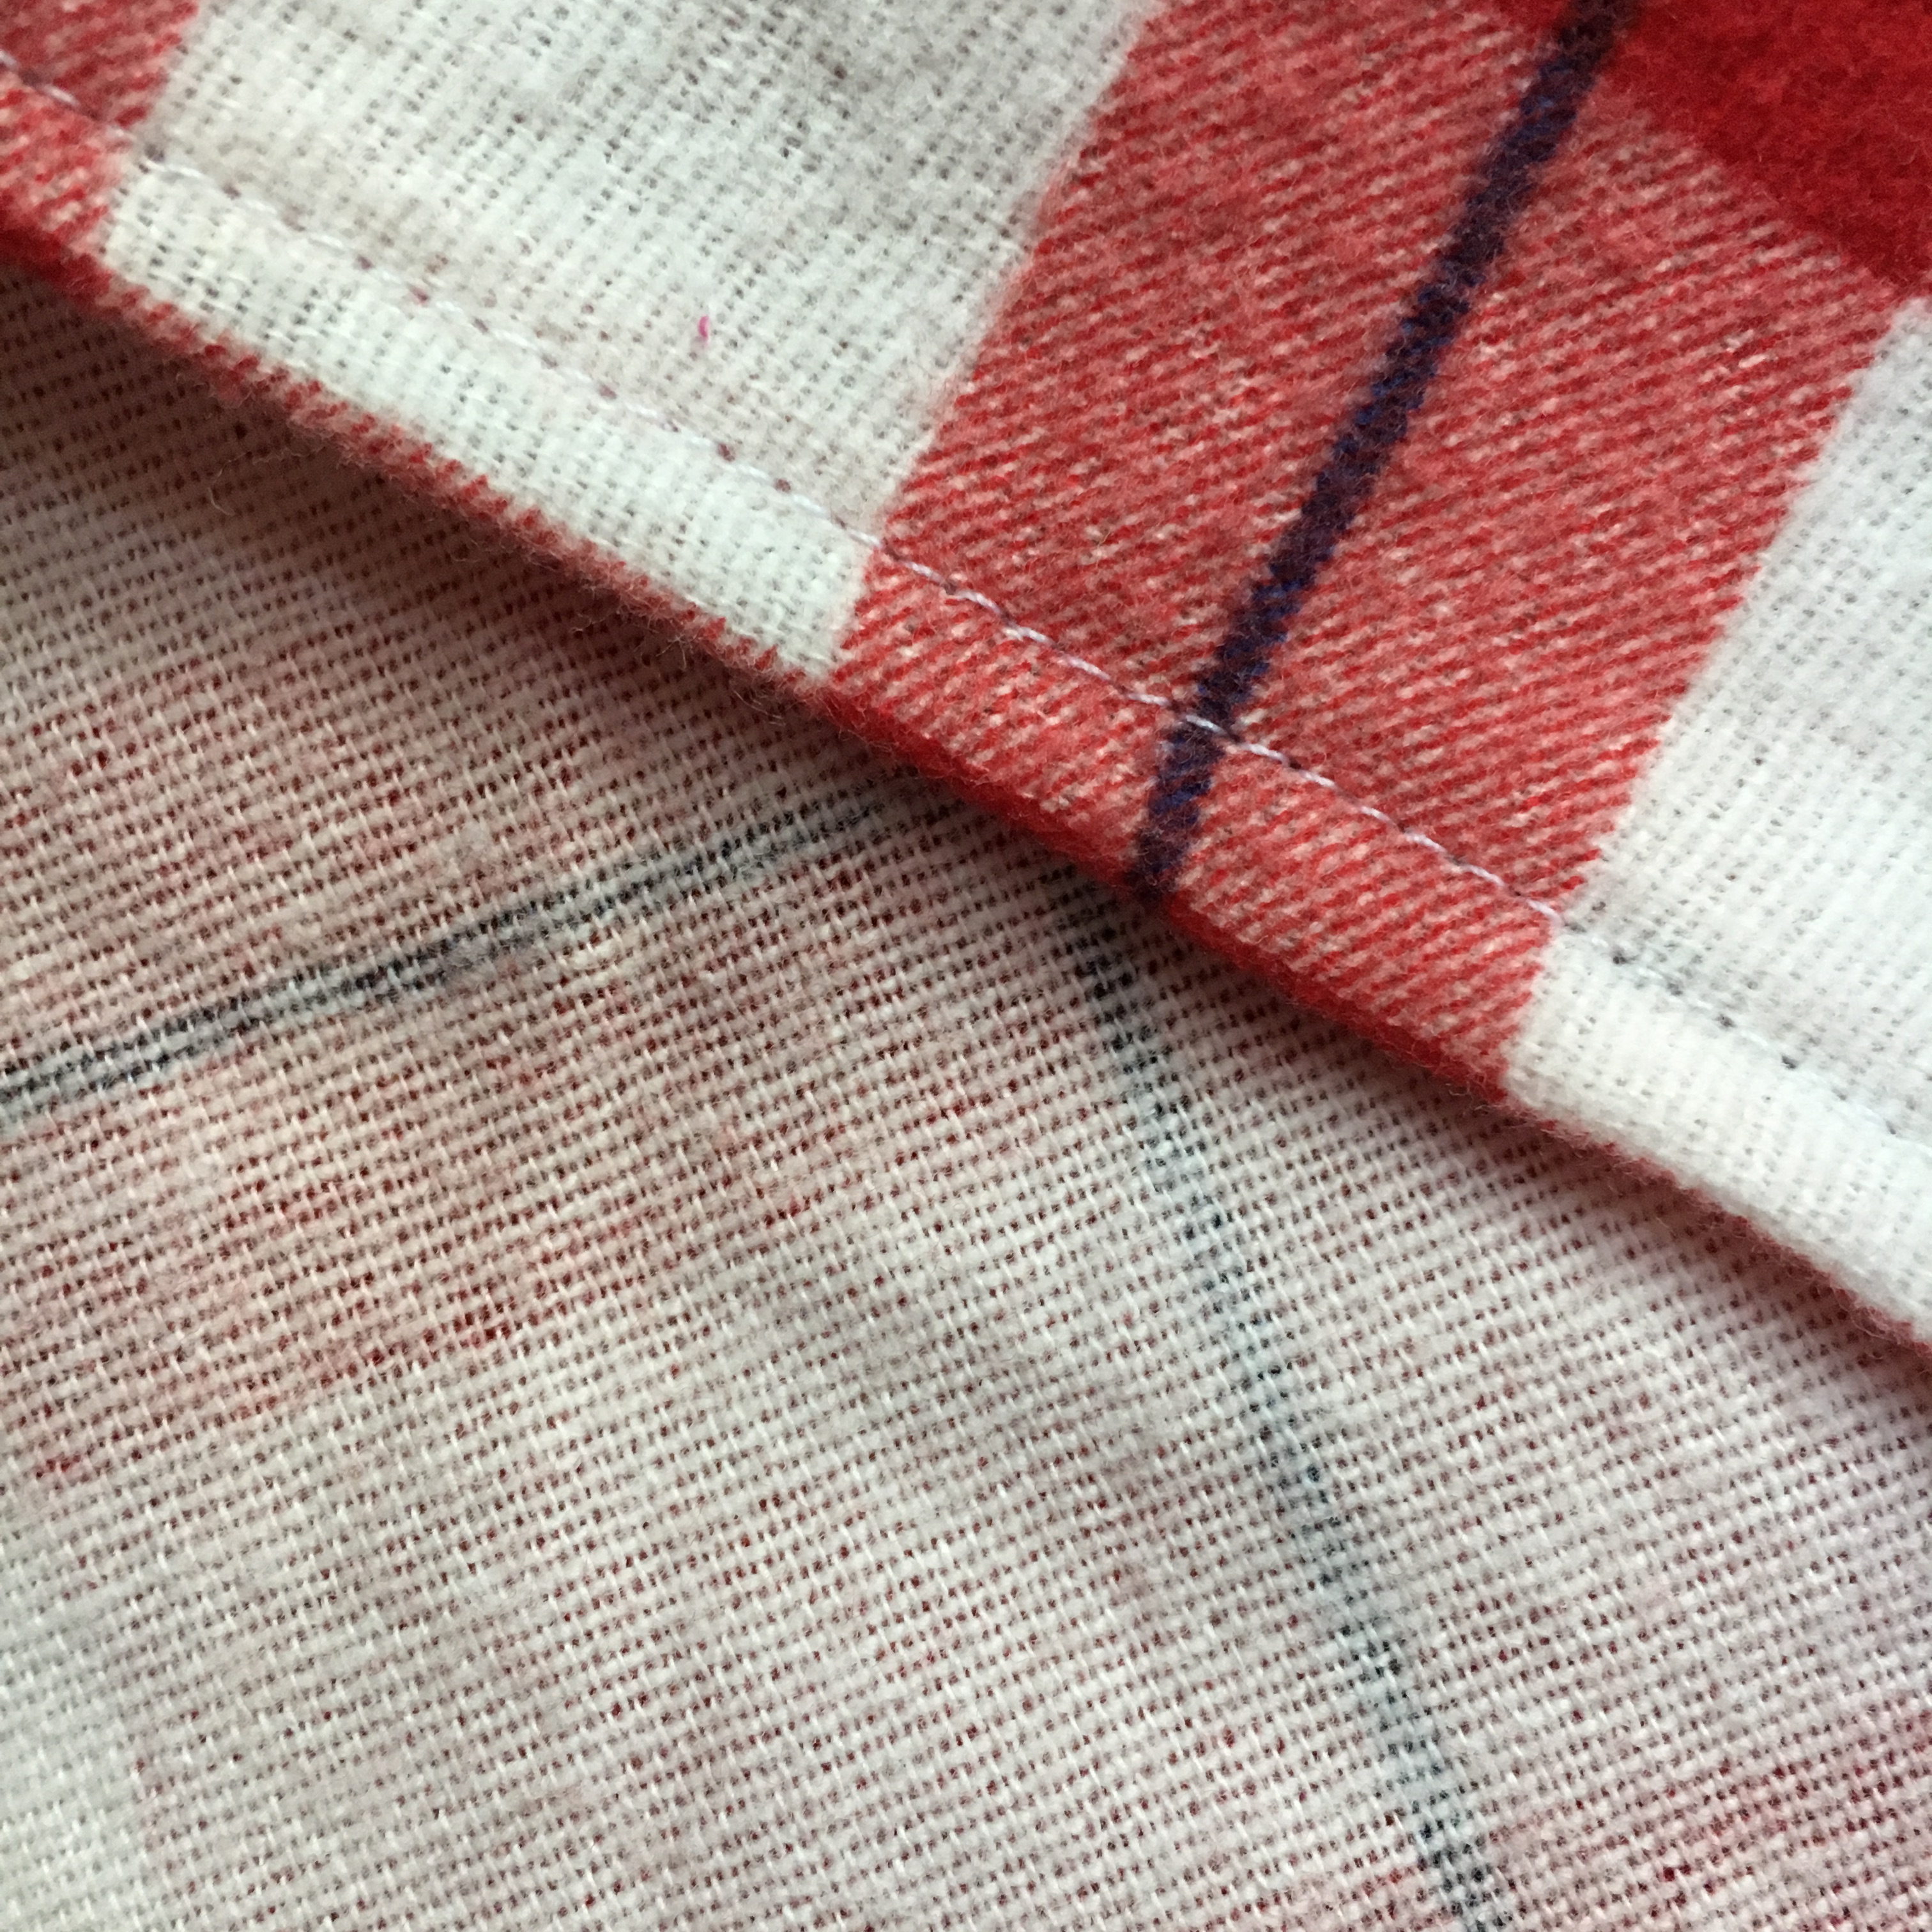
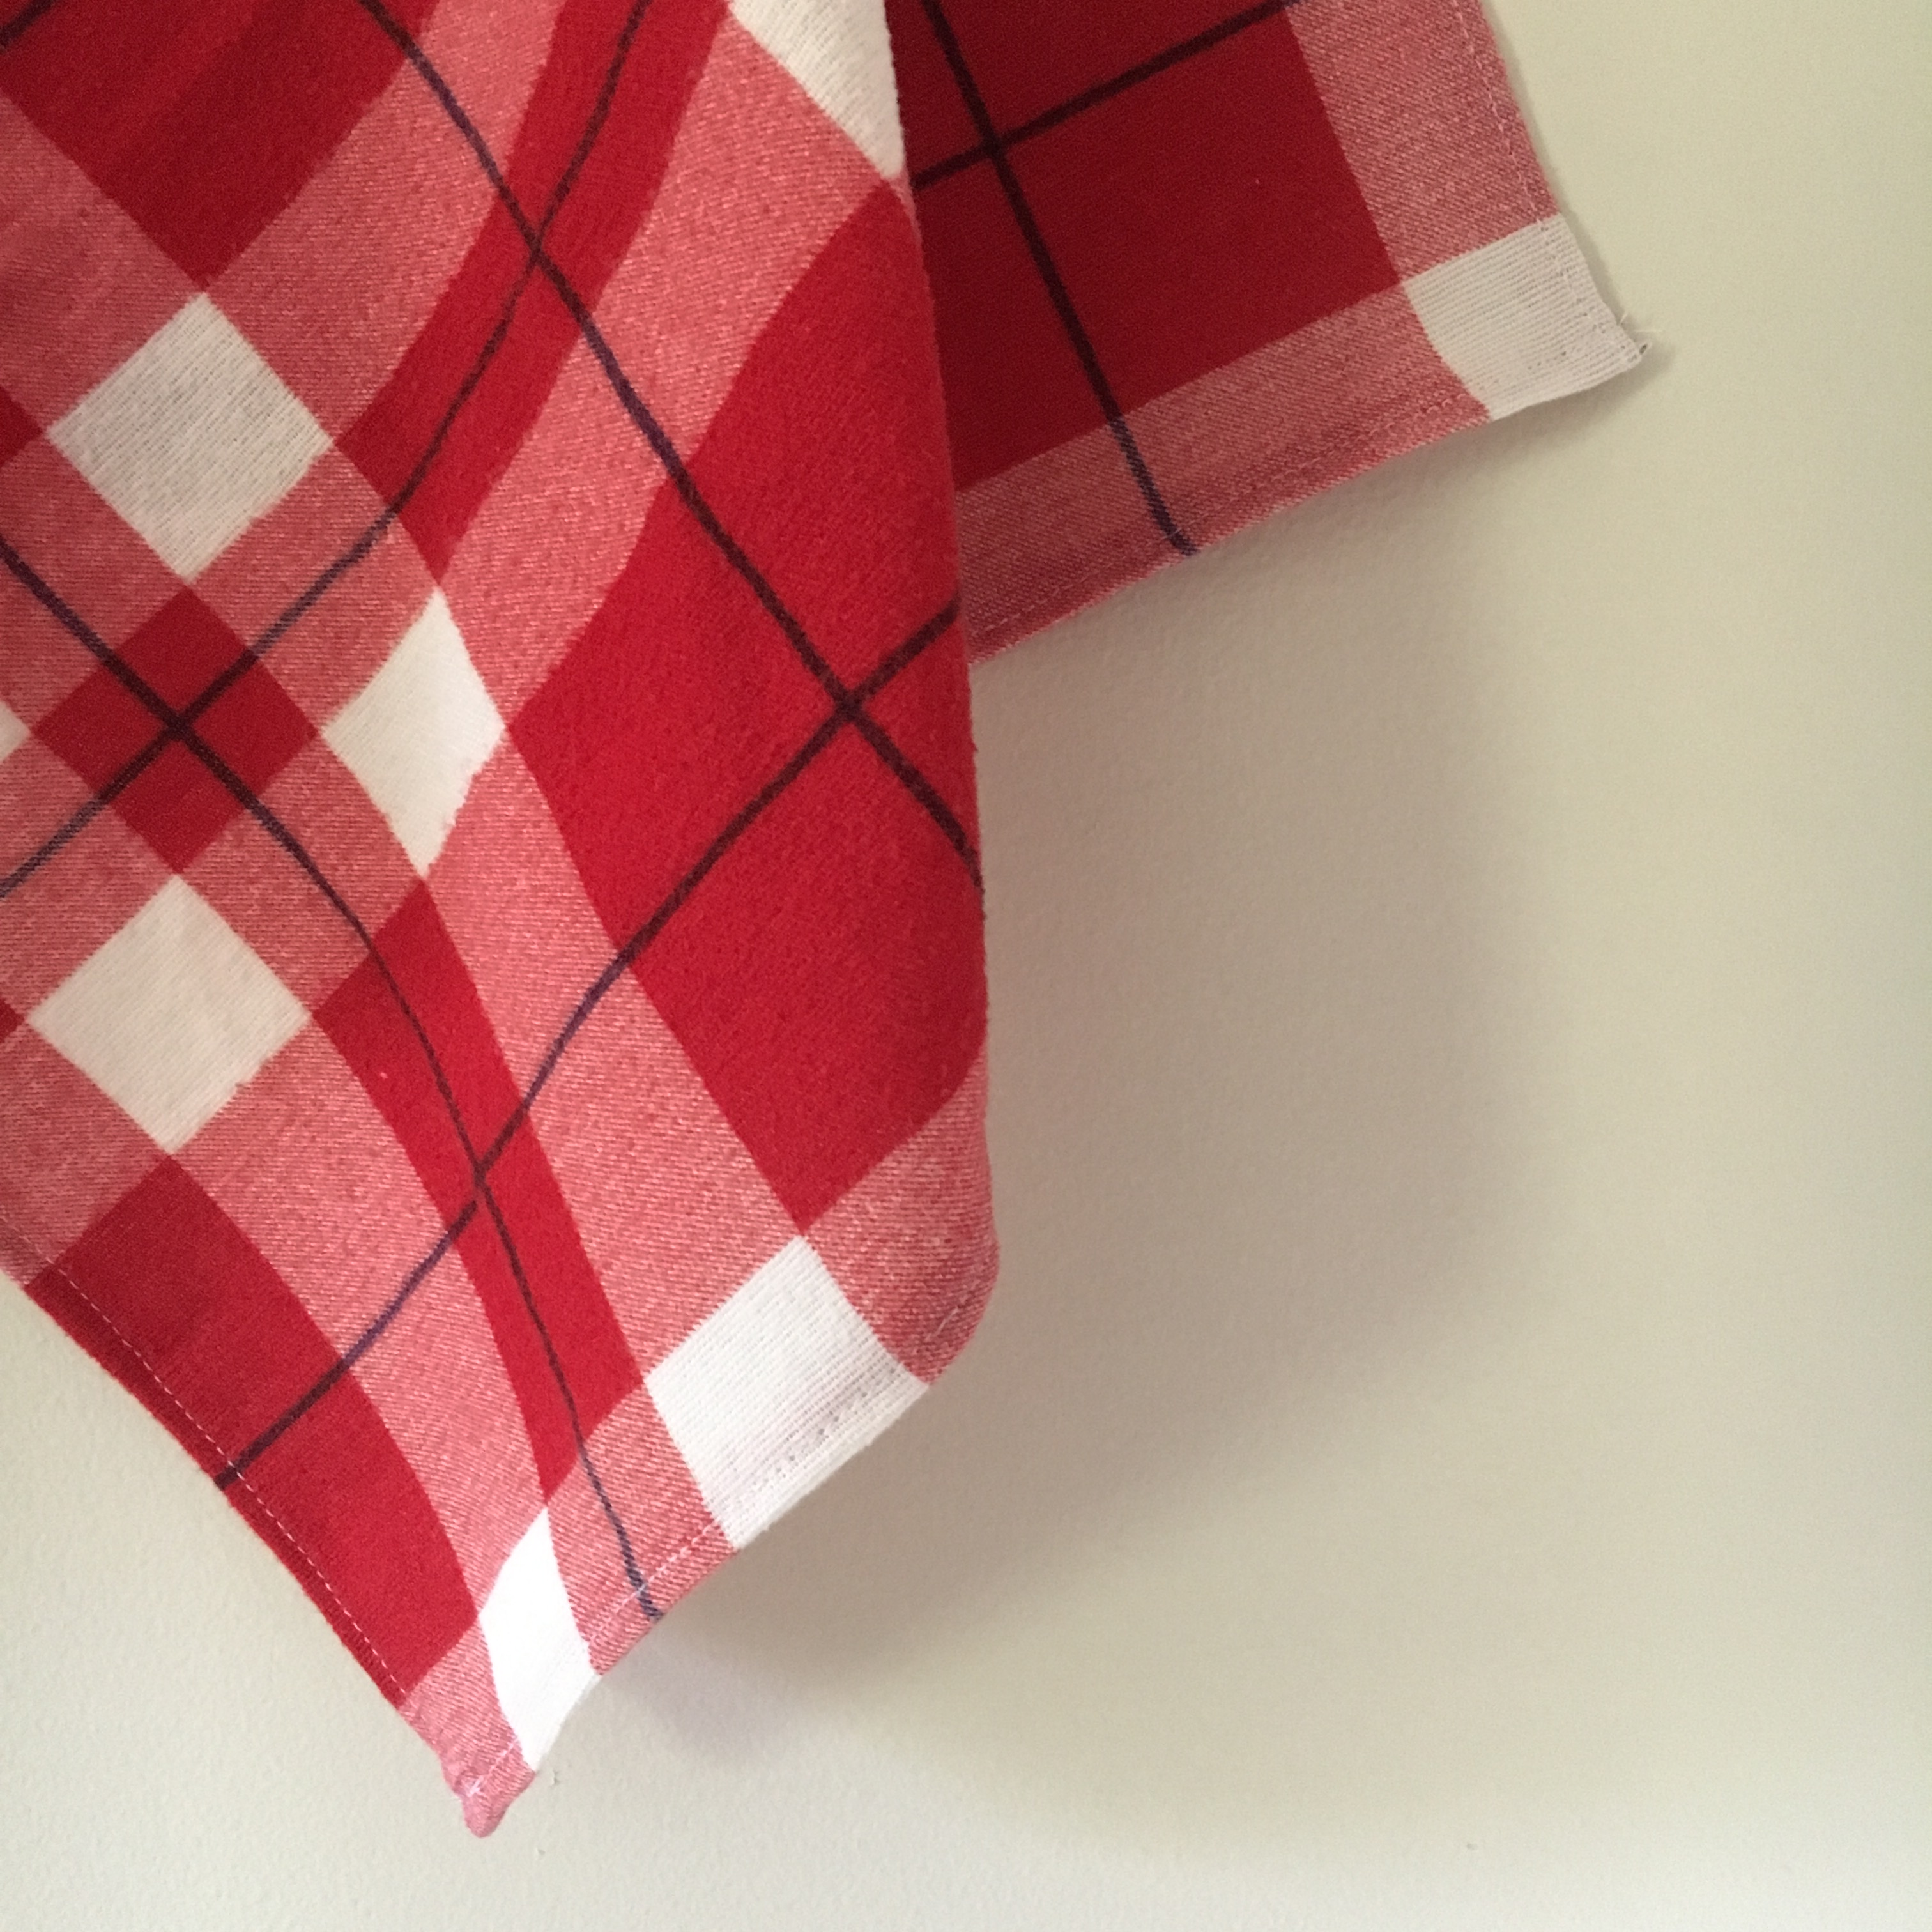
Because this sheet was to become hankies, I wasn’t too worried about how they looked in the end. I mean, they’re going to wipe up snot. I simply cut out as many squares as I could by cutting along the plaid pattern. Further evidence of this sheet being fast home décor? The plaid isn’t yarn-dyed, it’s piece-dyed (piece-printed?). Most plaids are yarn-dyed. Go to your closet and check out your favorite plaid shirt and flip it over to the reverse side. The reverse should look like the front and not plain. The reverse of this sheet is white, not plaid: piece-dyed. Because of this, cutting along the plaid pattern didn’t necessarily result in true square pieces. But, whatever—snot.
Plaid on one side; plain on the reverse.
I took the time to press a ¼” hem on two opposite sides of each hankie. Then, I stitched it down. I was going to press the remaining two sides, but it took a long time the first round. I decided to wing it and just fold the hem over as I stitched, because boogers. It worked! They didn’t turn out too shabby—for hankies.
Artsy shot of a snot rag.
The result is 20 or so hankies for my family to use. And, bonus! I came down with a cold only a week or so after I finished making these. I used them and I’m satisfied with how they turned out. One sheet saved from the landfill and a house of happy noses!