
Prepping the cloth and floss for a new cross-stitch pattern makes it easy to jump in and start stitching. Here’s how I do it.

This past summer, I was bitten by the cross-stitch bug. When I was around 10-years-old, my mom introduced me to Christmas cross-stitch ornament kits—those little plastic round frames into which I’d pop the image of Santa Claus, or a snowman, or a train that I had painstakingly crisscrossed out with the provided threads. They were fun when I was a kid. But as an adult, I lost interest…until now.
Needing a hand sewing/stitching project, I browsed Pinterest and found a pattern that caught my eye. I was able to order the pattern and all the required embroidery floss and cloth from a single website. (Etsy is also a great place to get fun patterns, but you need to have the ability to print the pattern and must purchase the floss and cloth somewhere.)

Starting a cross-stitch pattern larger than those tiny ornaments can be overwhelming. Fabric! Thread! Find the center! Here’s how I set up my supplies after I have a pattern I want to start making.
First, I get my cloth. There are a lot of different sizes and colors. For now, I like working with 14-count Aida. White and beige are my favorite colors and easy to find. Consulting the pattern, I see how big the finished image is on the particular size of Aida I’m using. Then, I’ve learned to cut 3” extra on all sides. But, I wish pattern makers/writers would say “add 6 inches to the height and width” because a few times I’ve been tempted to just add 3”—and then I’d only have an extra 1.5” on each side. This extra fabric is so that you have finishing options.
I use my quilting ruler and tailor’s chalk to mark the size just on the edges of my larger piece of fabric. I cut the fabric using the weave as a guide.
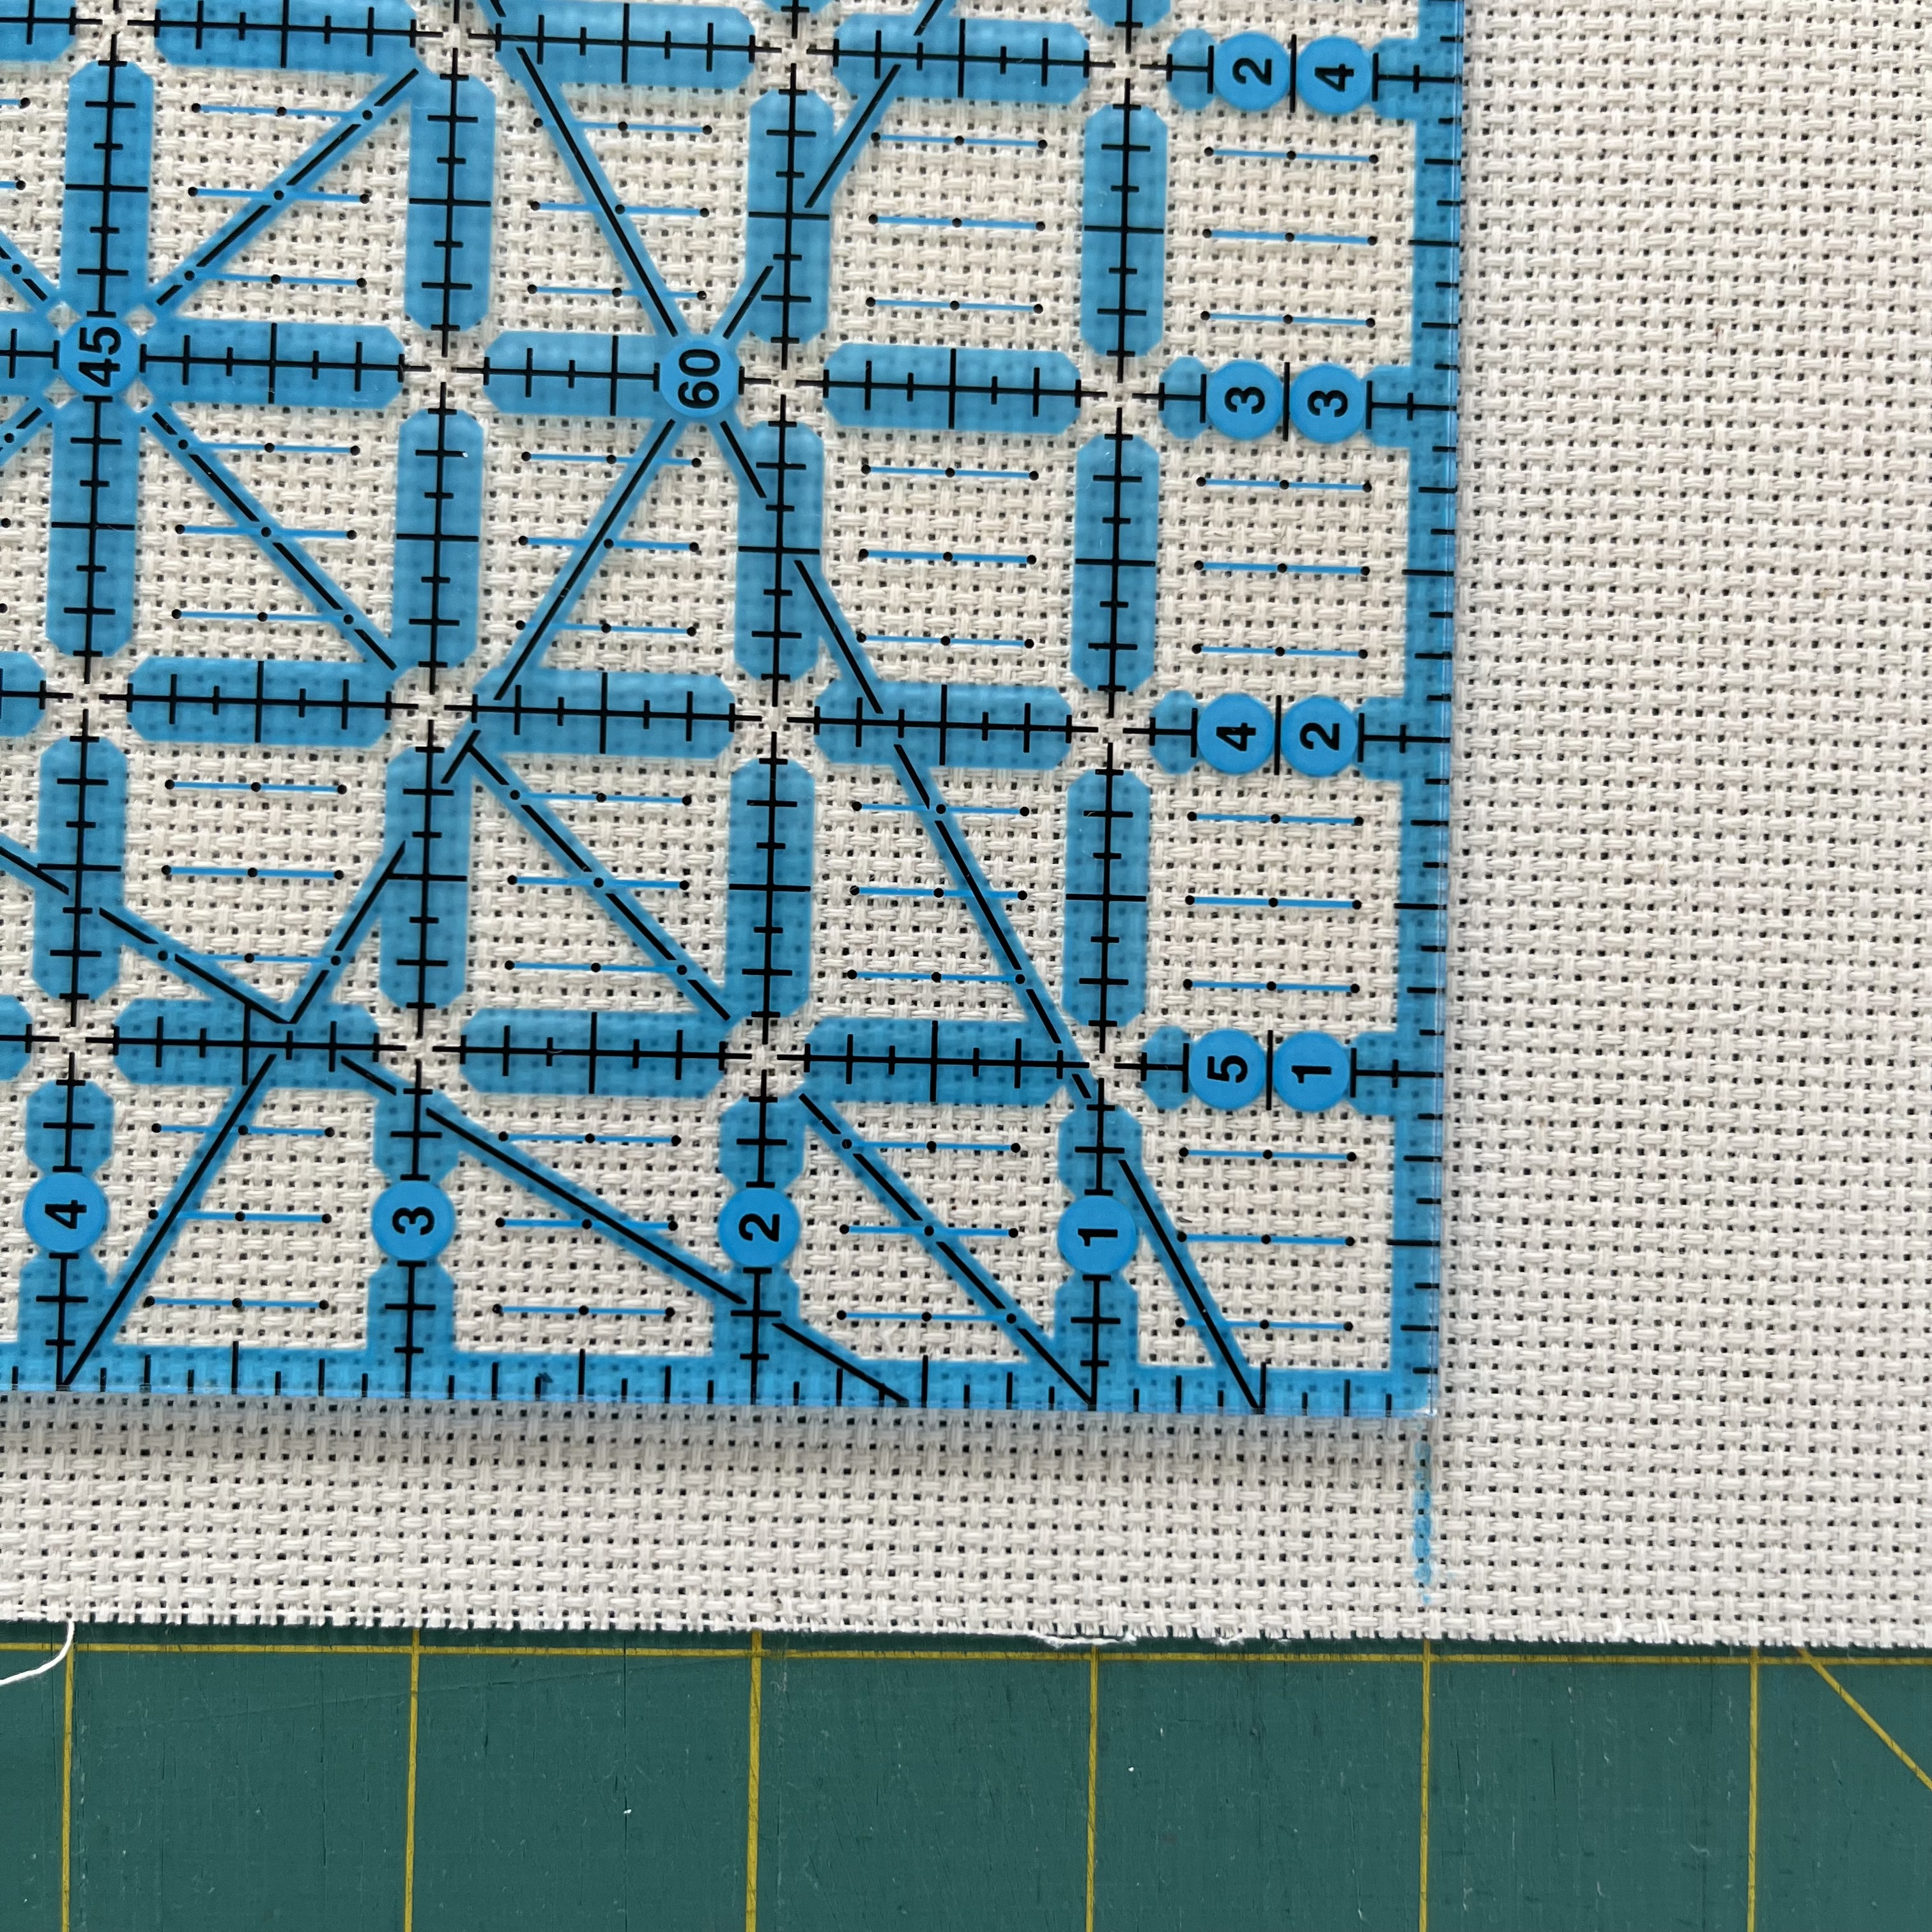
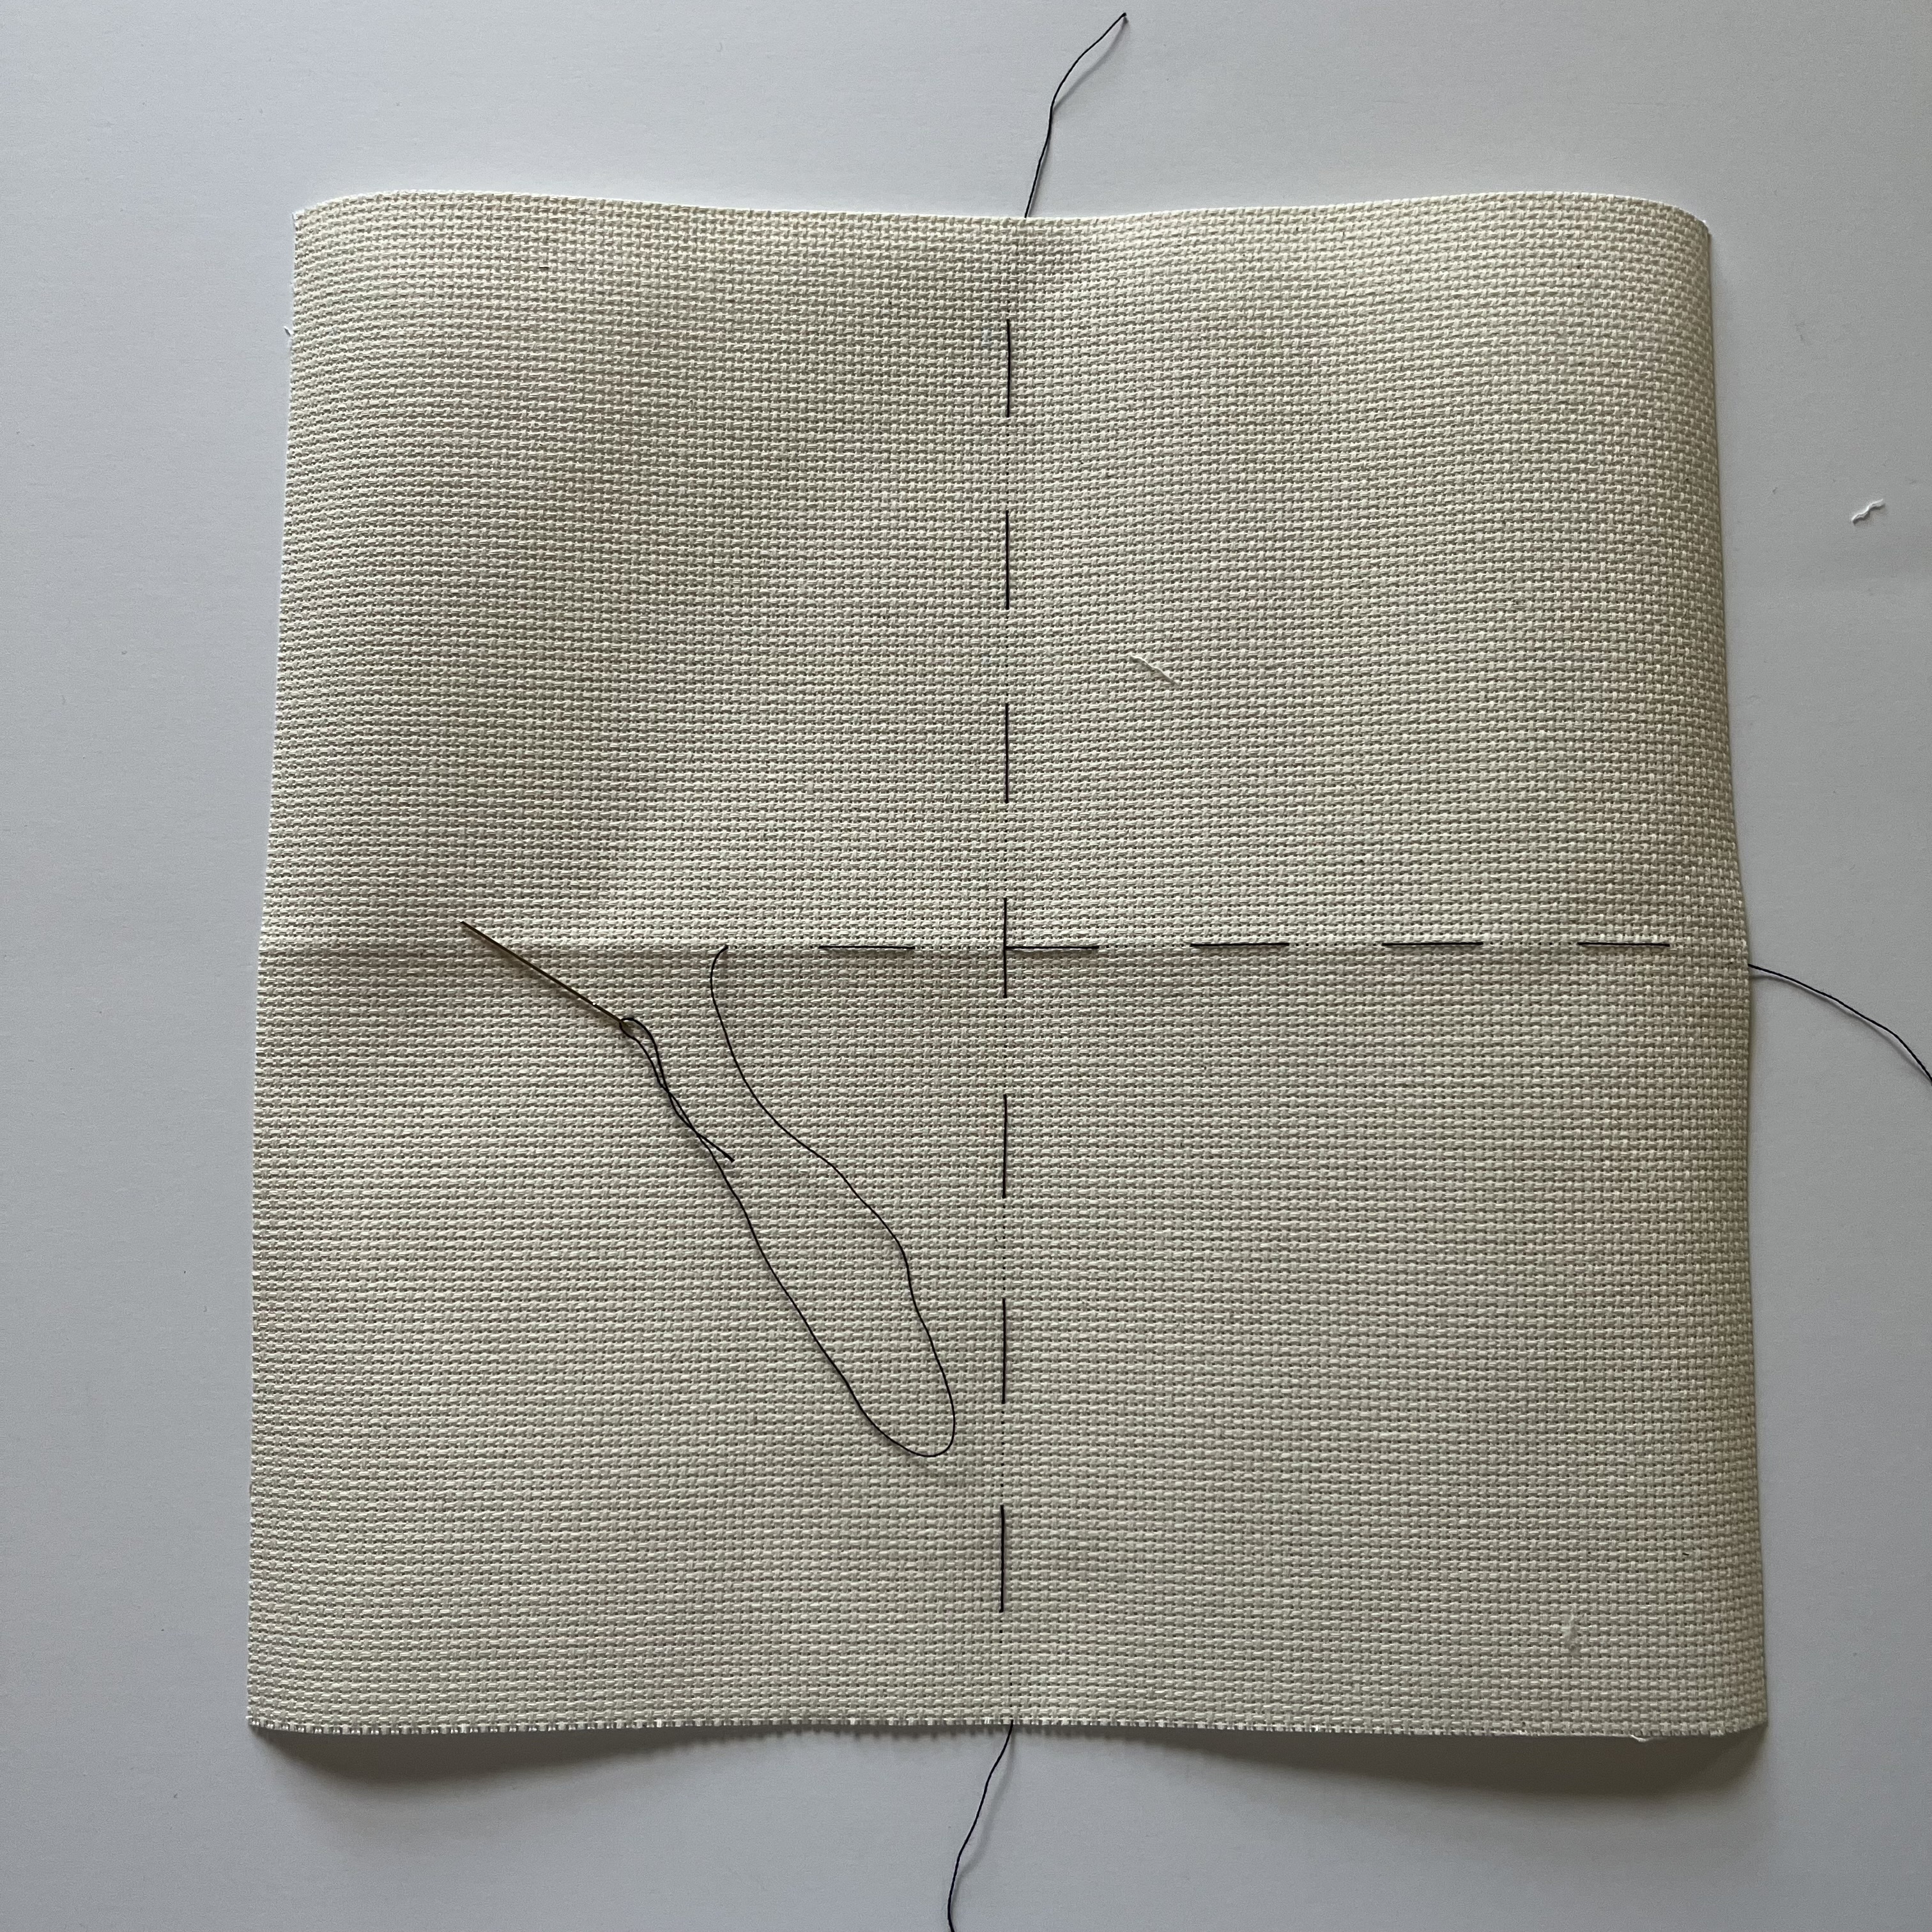
Next, most patterns recommend working from the center out. Cross-stitch patterns generally have markers so you can easily find the center on the chart. I have been folding my fabric in half one way and then in half the other way. Then, I thread a needle with a single strand of black embroidery floss and run it up and down every 10 holes along the two folds. Once I get started and create the center stitches, I go ahead and clip and remove these marking threads so I don’t permanently stitch them into the design. (Ask me how I learned this.)
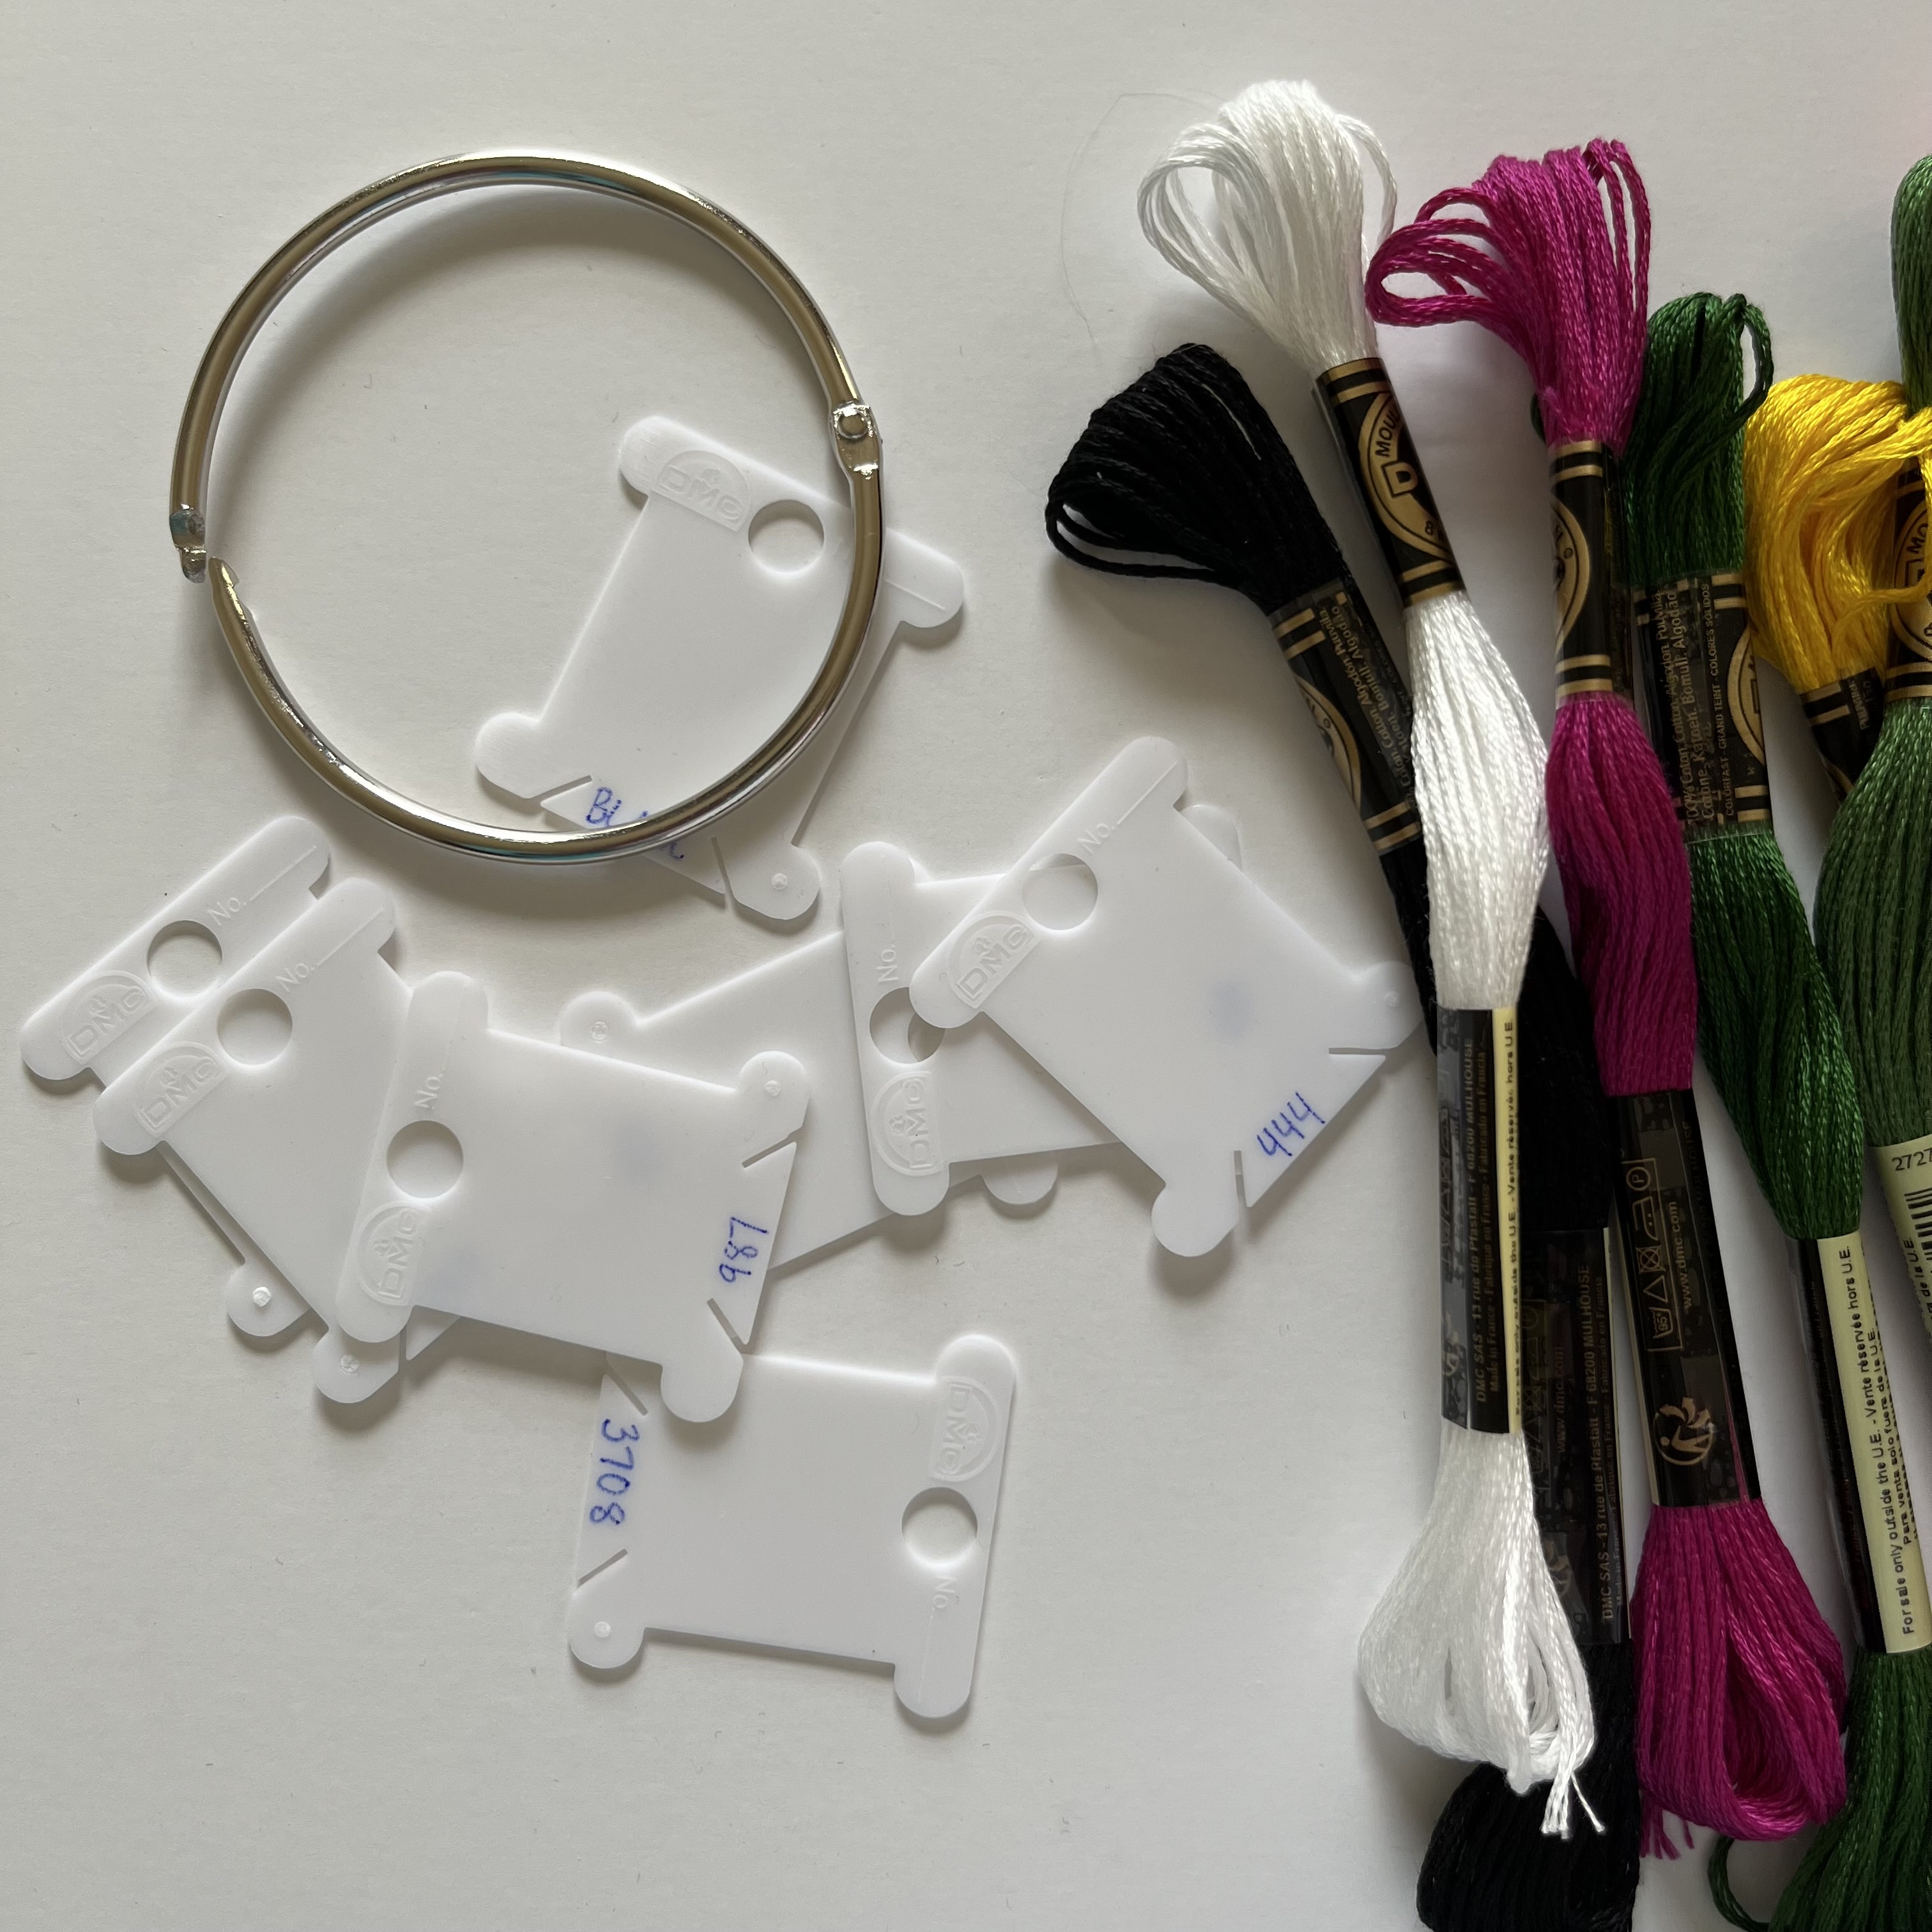
For the floss, I like to wind it onto bobbins, marking each bobbin with the corresponding color number. Then, I load them onto the ring. The plastic bobbins and ring were a set! I only put the colors for my current pattern on there.
Next, I get a piece of cardstock paper, fold it in half (so it’s extra sturdy), and punch enough holes in it to hold a couple lengths of each floss. I write the color number above each hole and then I cut two lengths of each floss and simply tie them on. The floss is the length I like to work with. If you take nothing else from this post, do this. I find this is one of the most helpful things I’ve done. It makes starting on the pattern so easy. Sure, at some point I need to cut a new length of floss from the bobbin, but having this card makes accessing it so easy.

I keep everything in the same project bag: cut fabric, floss card, ring of floss bobbins, pattern, needles, and something to cut with. Bonus items are thread conditioner and needle threader. One unusual thing you see in my photo is nail clippers. Nail clippers are scissors alternatives. If you are unwilling to travel with your “good scissors,” take nail clippers! They trim floss just as easily and are small enough for project bags and traveling!

And, here’s a glamour shot of my completed crocodile:

Save this post for later and pin this image:


Man I wish I knew this info years ago!
Get Outlook for iOShttps://aka.ms/o0ukef